crwdns2915892:0crwdne2915892:0
This guide will require an extensive amount of tools, from screwdrivers to scalpels. The camera will be taken apart piece by piece extensively so make sure there is enough room to lay out all the parts without them becoming lost.
crwdns2942213:0crwdne2942213:0
-
-
Remove the 4mm Y0 screws found on the sides and bottom of the camera.
-
-
-
Use a plastic opening tool to pry the back cover (with LCD screen) away from the front of the camera.
-
Use a plastic opening tool to disconnect the LCD ribbon cable holding the two pieces of the camera together.
-
-
-
-
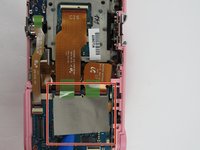
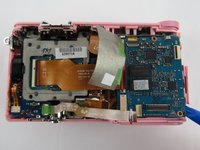
Move towards the main frame of the camera and locate the three 1mm Y0 screws holding down the motherboard.
-
-
crwdns2935267:0crwdne2935267:0Tweezers$4.99
-
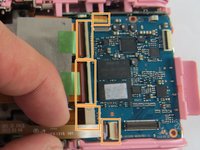
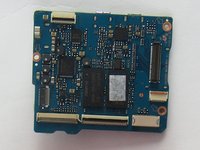
Lift the duct tape covering the ribbon cable connectors.
-
Use a plastic opening tool to lift the black tab on top of the ZIF connectors.
-
Pull all five ribbon cables out with tweezers.
-
-
-
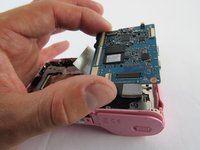
Take the time to make sure everything is detached and lift the motherboard slowly using your fingers.
-


To reassemble your device, follow these instructions in reverse order.
To reassemble your device, follow these instructions in reverse order.
crwdns2935221:0crwdne2935221:0
crwdns2935229:02crwdne2935229:0
crwdns2915084:0crwdne2915084:0

USF Tampa, Team 7-4, Cheng Spring 2016 crwdns2935289:0USF Tampa, Team 7-4, Cheng Spring 2016crwdne2935289:0
USFT-CHENG-S16S7G4
crwdns2931471:04crwdne2931471:0
crwdns2935297:010crwdne2935297:0
crwdns2947412:04crwdne2947412:0
The step for removing the metal hot shoe lit and removing 2 small screws is missing.
This is also required in order to be able to remove the back cover.
The step removing the metal hot shoe lit and removing 2 small screws underneath is missing.
This is required in order to be able to remove the back cover.
The camera is simply dead from one day to the next it stopped working, what could it be?
Aqui a mesma coisa, do nada, quando liga a câmera o LED Verde fica parado e em seguida pisca alternadamente, ESTÁ NOVISSIMA, nunca sofreu quedas ou qualquer outro tipo de avaria