crwdns2915892:0crwdne2915892:0
This guide will show you how to replace the motherboard in the camera. Be sure to turn off the camera and remove the battery before you being your replacement.
crwdns2942213:0crwdne2942213:0
-
-
Locate the bottom panel of the camera.
-
Unscrew the four 4.5mm Philips #000 (perpendicular cross) screws with the Philips #000 screwdriver.
-
-
-
Unscrew the three 4.5mm #000 Philips screws on the sides of the camera using the Philips #000 screwdriver.
-
-
-
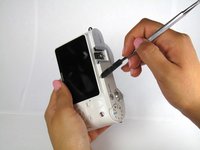
Pry open the back panel using the metal spudger.
-
-
-
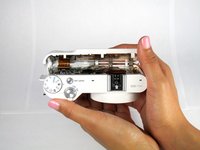
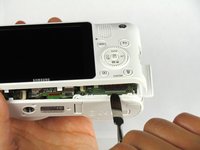
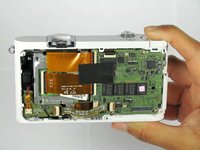
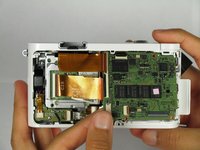
Open the two halves of the camera, taking care not to disturb the ribbon cable.
-
-
-
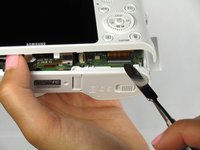
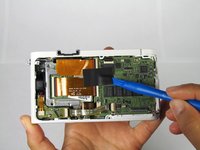
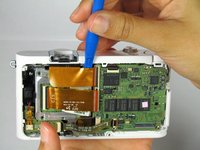
Remove the ribbon by lifting the grey tab on the ZIF connector with the metal spudger.
-
Push the ribbon out of its socket with the plastic opening tool.
-
-
-
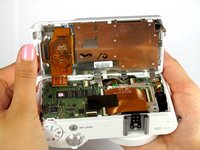
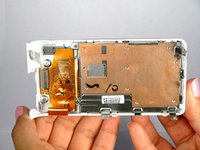
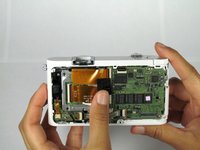
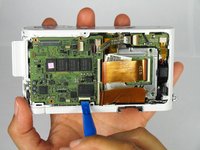
Completely separate the back panel from the camera.
-
-
-
-
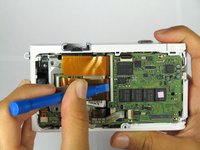
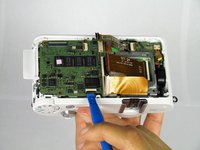
Remove the black rubber tape with the plastic opening tool and slowly peel it off.
-
-
-
Disconnect the bottom ribbon by grasping the ribbon and wiggling it out gently from the connection.
-
-
-
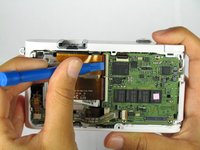
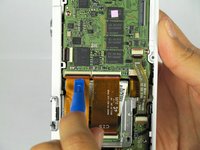
Open the ZIF connector on both of the larger ribbons by lifting the black latch with the plastic opening tool.
-
-
-
Disconnect the bottom of the larger ribbons by gently wiggling it away from the ZIF connector.
-
-
-
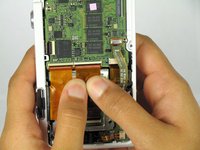
Disconnect the top of the larger ribbons by wiggling it out of the ZIF connector / prying the ribbon out with the plastic opening tool.
-
-
-
Hold back the ribbons to access the second smaller one at the bottom of the camera.
-
Slowly wiggle the ribbon out of the ZIF connection.
-
-
-
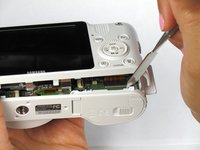
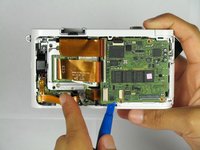
Unscrew the three 4.5mm Philips #000 screws with the Philips #000 screwdriver.
-
-
-
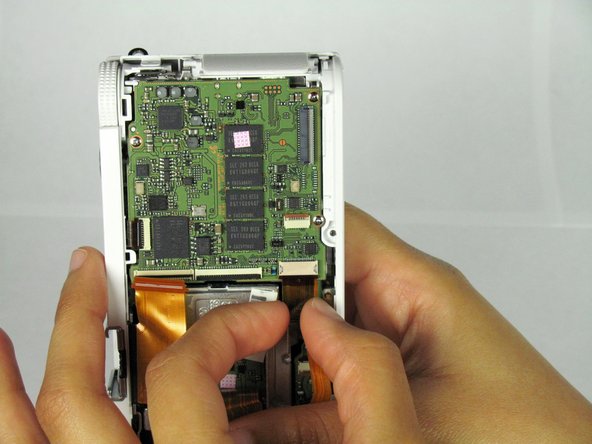
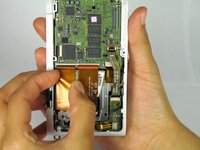
Using the plastic opening tool lift the motherboard up starting from the bottom left side.
-
-
-
Pull out the board to the left, freeing the external ports from the plastic case.
-
-
-
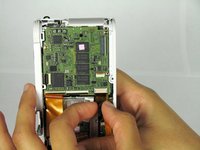
Carefully place the motherboard back down to remove the last ribbon. Lift the black latch up from the ZIF connector of the last ribbon with the plastic opening tool.
-
-
-
Slowly and carefully wiggle the ribbon out of the ZIF connection (Do this by holding the back of the ribbon).
-


To reassemble your device, follow these instructions in reverse order.
To reassemble your device, follow these instructions in reverse order.
crwdns2935221:0crwdne2935221:0
crwdns2935227:0crwdne2935227:0
crwdns2915084:0crwdne2915084:0

Cal Poly, Team 20-13, Maness Winter 2015 crwdns2935289:0Cal Poly, Team 20-13, Maness Winter 2015crwdne2935289:0
CPSU-MANESS-W15S20G13
crwdns2931471:04crwdne2931471:0
crwdns2935297:014crwdne2935297:0
crwdns2947412:02crwdne2947412:0
Is NX210 works the same way?
Have you checked? Please give me an answer. I also need to disassemble nx210, but I'm afraid I won't guess the position of the screen cable...