crwdns2915892:0crwdne2915892:0
If the optical drive isn’t working correctly, this guide will help you replace the drive.
crwdns2942213:0crwdne2942213:0
-
-
Lay the laptop down so that the bottom is facing up.
-
-
-
Slide the two plastic tabs to the opposing sides.
-
-
-
While both are in the unlocked position, slide the battery out.
-
-
-
-
Remove the M2.5x5 mm screw with a Phillips #0 screwdriver.
-
-
-
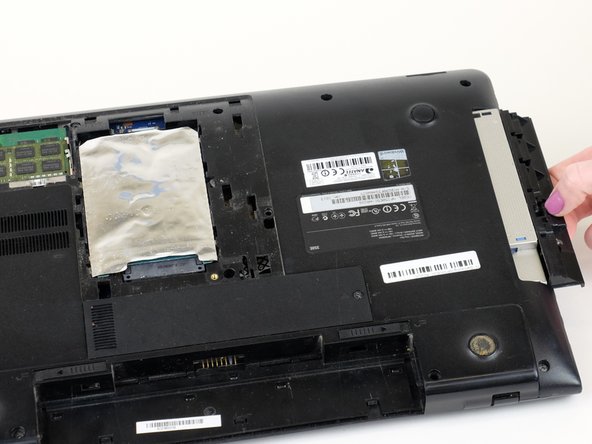
Slide the cover 1/4" towards the front of the laptop.
-
-
-
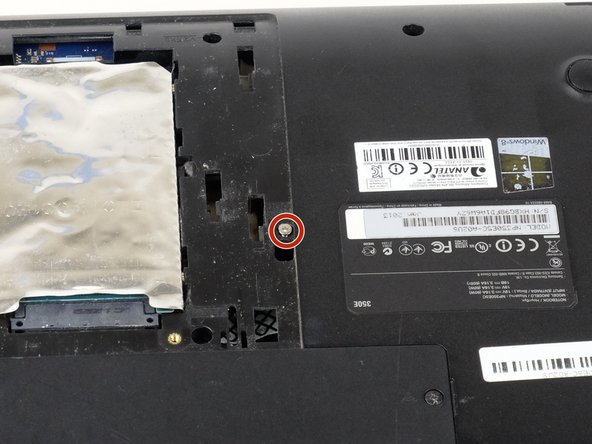
Find the screw between the hard drive and the model label. Then remove the M2.5X5 screw with a Phillips #0 screwdriver.
-


To reassemble your device, follow these instructions in reverse order.
To reassemble your device, follow these instructions in reverse order.
crwdns2915084:0crwdne2915084:0

Linn Benton Community College, Team S2-G4, Karnes Fall 2018 crwdns2935289:0Linn Benton Community College, Team S2-G4, Karnes Fall 2018crwdne2935289:0
LBCC-KARNES-F18S2G4
crwdns2931471:04crwdne2931471:0
crwdns2935297:06crwdne2935297:0