crwdns2933423:0crwdne2933423:0

Samsung NP300E5C Screen Replacement

crwdns2942213:0crwdne2942213:0

  1. Samsung NP300E5C Screen Replacement, Battery: crwdns2935265:01crwdnd2935265:01crwdnd2935265:01crwdne2935265:0
    • Lay laptop down so that the bottom is facing the sky.

  2. Samsung NP300E5C Screen Replacement: crwdns2935265:02crwdnd2935265:01crwdnd2935265:03crwdne2935265:0 Samsung NP300E5C Screen Replacement: crwdns2935265:02crwdnd2935265:02crwdnd2935265:03crwdne2935265:0 Samsung NP300E5C Screen Replacement: crwdns2935265:02crwdnd2935265:03crwdnd2935265:03crwdne2935265:0
    • Push both tabs away from the center of the device.

    • While both are in the fully unlocked position, slide the battery out.

  3. Samsung NP300E5C Screen Replacement, Screen: crwdns2935265:03crwdnd2935265:01crwdnd2935265:01crwdne2935265:0
    • Turn the laptop over and open it so that you can see the keyboard and screen.

    • Using a Phillips #000 screwdriver, remove the two 4 mm Phillips #8 screws that are under the black covers on the front of your screen.

    • You can remove the black covers by simply pushing your screwdriver into them.

  4. Samsung NP300E5C Screen Replacement: crwdns2935265:04crwdnd2935265:01crwdnd2935265:03crwdne2935265:0 Samsung NP300E5C Screen Replacement: crwdns2935265:04crwdnd2935265:02crwdnd2935265:03crwdne2935265:0 Samsung NP300E5C Screen Replacement: crwdns2935265:04crwdnd2935265:03crwdnd2935265:03crwdne2935265:0
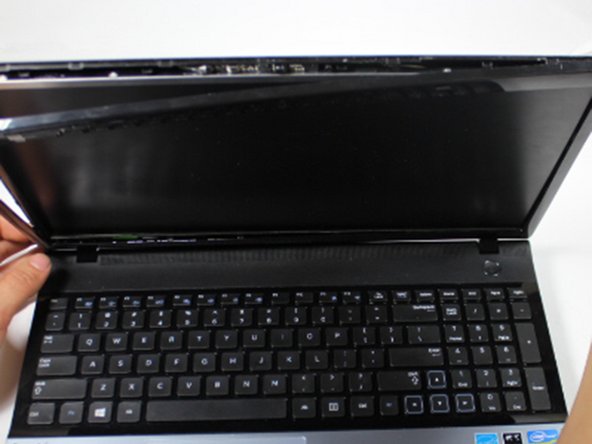
    • Insert the plastic opening tool into the seam on the top of the screen.

    • The seam is where the back screen cover and the plastic bezel around the edges of the screen meet.

    • Use the plastic opening tool to pop open the clasps that keep the casing on the screen.

    • It helps to use the plastic opening tool like a crowbar.

    • Follow this seam around the laptop's screen with the plastic opening tool until the plastic cover comes off.

    • Don't be afraid to use your fingers to help pop open the clips.

  5. Samsung NP300E5C Screen Replacement: crwdns2935265:05crwdnd2935265:01crwdnd2935265:01crwdne2935265:0
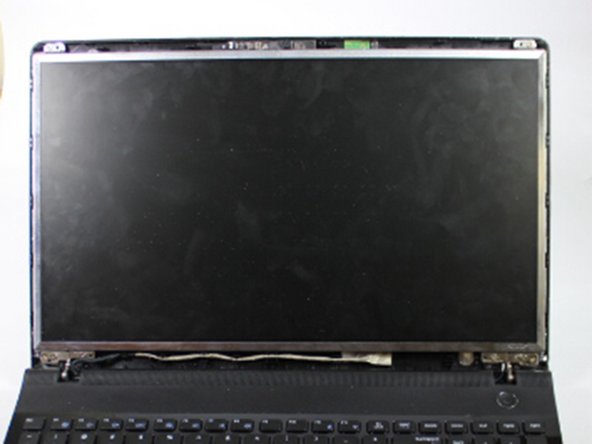
    • Using a Phillips #000 screwdriver, remove the top two 4 mm Phillips #8 screws that join the LCD screen to the plastic casing.

    • Using the same screwdriver, remove the bottom four 4 mm Phillips #8 screws that mount the screen onto the base of the laptop.

    • As you remove these bottom 4 screws, support the screen! As the screws come off, the screen will begin to fall backwards.

  6. Samsung NP300E5C Screen Replacement: crwdns2935265:06crwdnd2935265:01crwdnd2935265:03crwdne2935265:0 Samsung NP300E5C Screen Replacement: crwdns2935265:06crwdnd2935265:02crwdnd2935265:03crwdne2935265:0 Samsung NP300E5C Screen Replacement: crwdns2935265:06crwdnd2935265:03crwdnd2935265:03crwdne2935265:0
    • Gently lay the LCD on the keyboard, and lay down the back panel of the screen as well. They are not attached and will separate easily.

    • The LCD and the back panel must remain close to one another due to the video connector at the bottom that links the two.

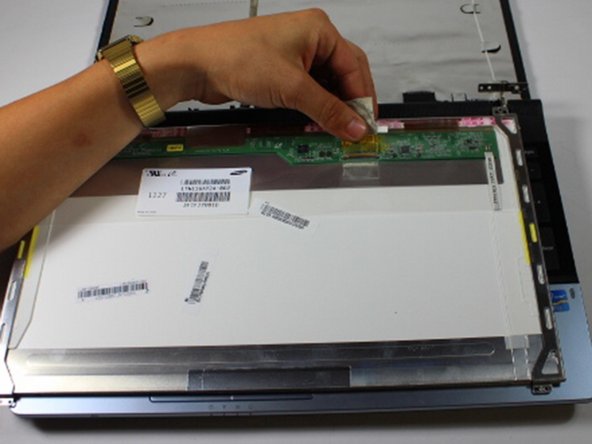
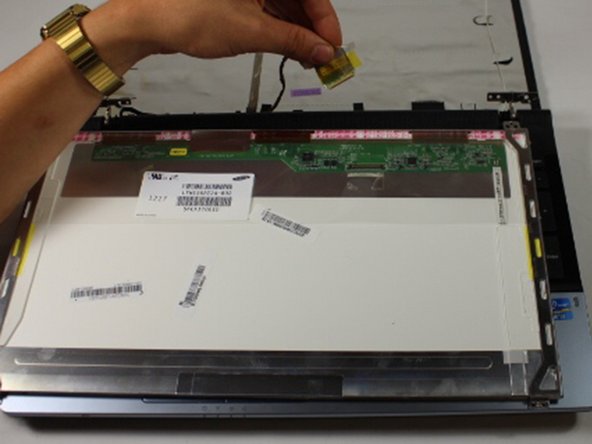
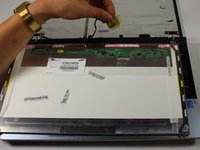
    • Remove the tape that secures the video connector to the LCD.

    • While maintaining a firm grip on the LCD, grasp the video connector at its base, and pull it away from you.

    • Don't be afraid to pull, the video connector is not soldered onto the LCD.

crwdns2915888:0crwdne2915888:0

To reassemble your device, follow these instructions in reverse order.

crwdns2935229:010crwdne2935229:0

aliahsan95

crwdns2935283:009/23/15crwdne2935283:0

937 crwdns2915208:0crwdne2915208:0

crwdns2935297:04crwdne2935297:0

crwdns2915084:0crwdne2915084:0

Baylor, Team 10-13, Williams Fall 2015 crwdns2935289:0Baylor, Team 10-13, Williams Fall 2015crwdne2935289:0

BU-WILLIAMS-F15S10G13

crwdns2931471:03crwdne2931471:0

crwdns2935297:04crwdne2935297:0

crwdns2944067:00crwdne2944067:0

crwdns2917038:0crwdne2917038:0

crwdns2936625:0crwdne2936625:0:

crwdns2936751:024crwdne2936751:0 2

crwdns2936753:07crwdne2936753:0 11

crwdns2936753:030crwdne2936753:0 37

crwdns2942667:0crwdne2942667:0 5,758