crwdns2942213:0crwdne2942213:0
-
-
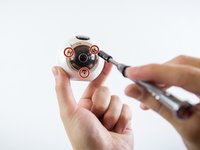
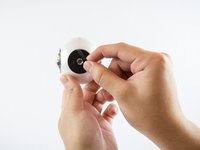
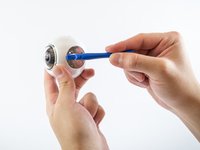
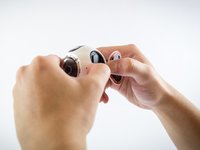
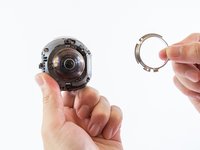
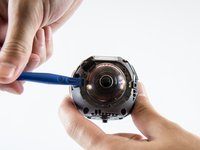
Twist silver ring on the lens counter-clockwise with force to remove it.
-
-
-
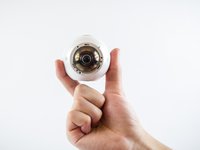
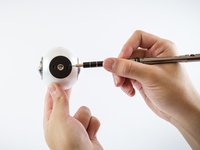
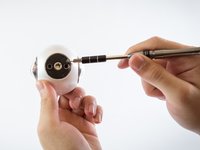
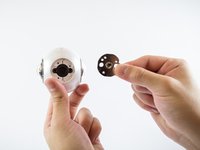
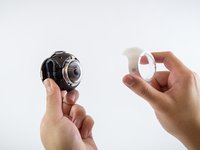
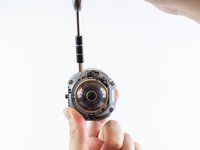
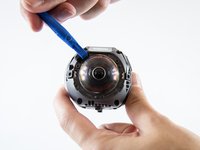
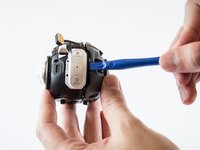
Insert a small flathead screwdriver into marked slot on camera lens and pry off camera lens cover.
-
-
-
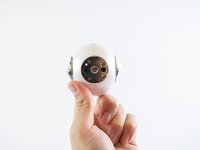
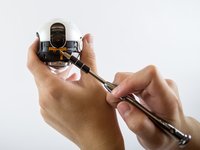
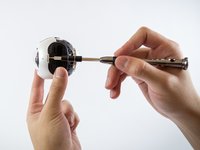
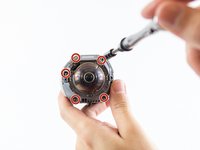
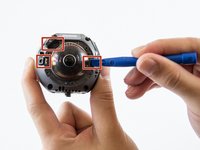
Using a PH00 screwdriver head, remove all Phillips #00 0.75 mm screws on the front of the camera.
-
Repeat for the back side of the camera.
-
-
-
Peel off the black rubber located on the bottom of the device using your hand or a small flathead screwdriver.
-
-
-
Once the black rubber has been removed, unscrew all Phillips #00 0.75 mm screws on the bottom of the device using a PH00 screwdriver head.
-
-
-
-
Using a plastic opening tool, pry the tripod mount off the device.
-
-
-
Using both hands, carefully remove the right cover off the camera body.
-
-
-
To remove the left cover of the camera body, lift the left cover using a small flathead screwdriver and pull it off.
-
-
-
Once the camera body has been removed, lift and pull off the metal support ring using a small flathead screwdriver.
-
Repeat for both sides of the camera.
-
-
-
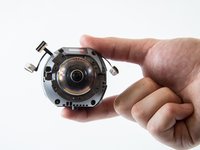
Remove all Phillips #00 0.75 mm screws from the body of the camera using a PH00 screwdriver head.
-
-
-
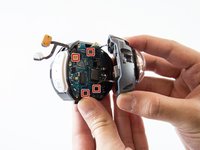
Carefully lift the three sensors off using a plastic opening tool and pull them aside.
-
-
-
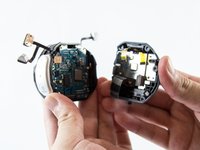
Carefully use a plastic opening tool to separate the gray case from the black case on the device.
-
-
-
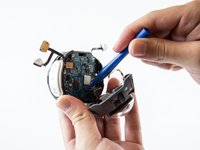
Insert a plastic removal tool underneath the four sensors on the motherboard to fully separate the camera case.
-


To reassemble your device, follow these instructions in reverse order.
To reassemble your device, follow these instructions in reverse order.
crwdns2915084:0crwdne2915084:0

USF Tampa, Team S3-G5, Sullivan Spring 2017 crwdns2935289:0USF Tampa, Team S3-G5, Sullivan Spring 2017crwdne2935289:0
USFT-SULLIVAN-S17S3G5
crwdns2931471:04crwdne2931471:0
crwdns2935297:014crwdne2935297:0