crwdns2915892:0crwdne2915892:0
The motherboard controls a majority of the functions on your phone. Go ahead and dive into this guide for detailed steps on how to remove the motherboard on your device.
crwdns2942213:0crwdne2942213:0
-
-
Place phone face down. Ensure the side with the display screen is not facing you.
-
Locate battery door and slide open.
-
Remove battery.
-
-
-
Remove the 7 Phillips 3.93 mm labeled screws by using the Phillips #00 Precision Screwdriver.
-
-
-
-
Use the plastic opening tool to pry open the back cover.
-
Insert the tool into the SD card slot and pry around the entire phone.
-
-
-
Remove one Phillips 3.93 mm screw from bottom center of the phone.
-
-
-
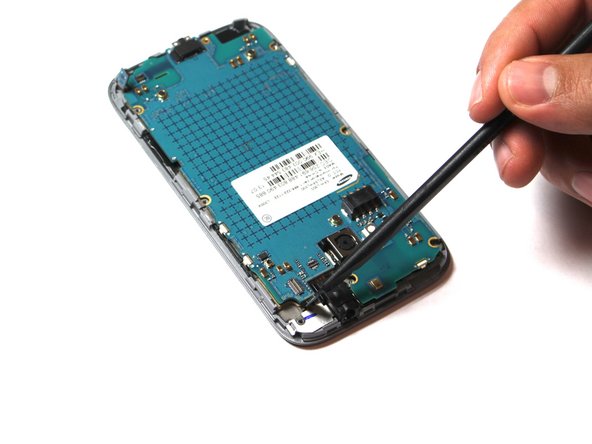
Carefully disconnect 3 ribbons at the shown location. To remove, place tool under the ribbon and pull slowly to avoid tearing.
-
-
-
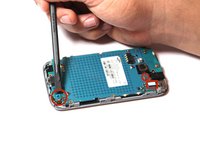
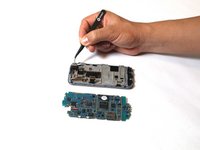
Pull the motherboard back and out to the left. Make sure the motherboard is faced straight up, as shown in the photo.
-
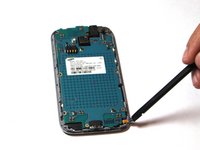
Place your tool under the labeled area and pull gently to detach the ribbon cable from the motherboard.
-
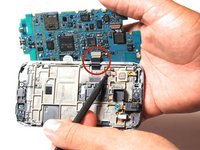
At this point the motherboard should be completely detached from the rest of the phone.
-


To reassemble your device, follow these instructions in reverse order.
To reassemble your device, follow these instructions in reverse order.
crwdns2935221:0crwdne2935221:0
crwdns2935229:07crwdne2935229:0
crwdns2915084:0crwdne2915084:0

USF Tampa, Team 15-3, Remmell Fall 2014 crwdns2935289:0USF Tampa, Team 15-3, Remmell Fall 2014crwdne2935289:0
USFT-REMMELL-F14S15G3
crwdns2931471:04crwdne2931471:0
crwdns2935297:03crwdne2935297:0