crwdns2915892:0crwdne2915892:0
Mishaps happen, and that was me one early morning when I dropped my Tab S9 at the corner, causing the OLED panel to crack and eventually fail. This guide will show how to replace the display panel. If you prefer watching a video demonstrating the de-gluing process, here's one on YouTube.
Take note that the water resistance of the device will be compromised, and there is no guaranteeing that it will be water-resistant again.
As for obtaining the display module itself, I highly recommend doing some searching to find the source that you can trust. You may refer to Step 6 for how the original packaging should look like.
crwdns2942213:0crwdne2942213:0
-
-
Apply heat to the screen to loosen the adhesive. A heating pad or 3D printer heated bed is recomended, but a heat gun or hair dryer can also do the trick, just be careful not to apply excessive heat to avoid damage to the battery.
-
-
-
Take note of the location where the adhesive and display flex conector is:
-
Adhesive location
-
Dsiplay flex connector
-
Camera location (for orientation)
-
-
-
-
Using a suction cup, lift the middle right side and insert a pick and/or plastic card into the gap, slowly slice left and right
-
Do the same from the middle top side
-
Again from the middle left side
-
Lastly, from the middle bottom side
-
Once again, watch out for the display flex connector
-
-
-
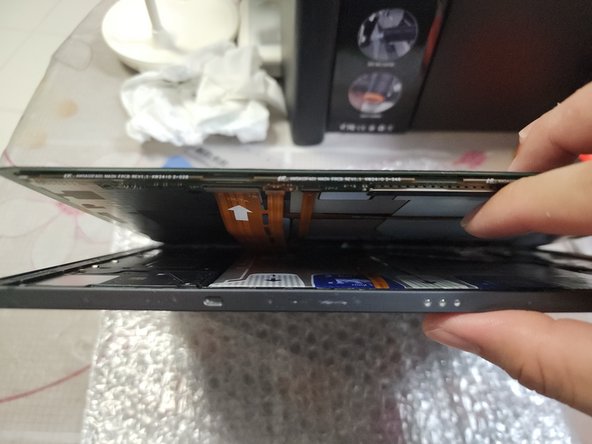
Once the display can lift free from the tablet, prop the tablet as shown, such that you can hold the display and shell separately, with the bottom side facing you to facilitate the connector removal.
-
Using a spudger or fingernail, disconnect the display and stylus digitizer connectors from the display.
-
-
-
Once the display is separated, use a spudger to scrape off any adhesive residue from the sides of the frame.
-
Optional: use kapton tape or any method you prefer to cover the camera and fingerprint sensor from dust.
-
Use wipes and isopropyl alcohol (70% or more) to clean off any remaining adhesive.
-
There are 15 silver screws and 2 black screws holding the frame down, take note where the black screws are located for reassembly.
-
-
-
Grab the replacement display from its packaging, without removing the protective plastic and adhesive liner.
-
Connect the display flex connector to the replacement display, then turn on the tablet to test its functionality
-


To reassemble your device, remove the front camera cutout liner (black-colored pull tab at the top), fingerprint sensor liner (black-colored pull tab at the left, ensure the attached red liner comes along), then the green adhesive liner. Carefully attach the display back to its frame, and you're done!
To reassemble your device, remove the front camera cutout liner (black-colored pull tab at the top), fingerprint sensor liner (black-colored pull tab at the left, ensure the attached red liner comes along), then the green adhesive liner. Carefully attach the display back to its frame, and you're done!
crwdns2935221:0crwdne2935221:0
crwdns2935227:0crwdne2935227:0
crwdns2947410:01crwdne2947410:0
this guide seems like it ends too soon