crwdns2933423:0crwdne2933423:0

Samsung Galaxy Tab E 9.6 Verizon Front Panel Replacement

crwdns2942213:0crwdne2942213:0

  1. Samsung Galaxy Tab E 9.6 Verizon Front Panel Replacement, Back Casing: crwdns2935265:01crwdnd2935265:01crwdnd2935265:01crwdne2935265:0
    • Remove any micro-SD or SIM cards before continuing.

    • Verify your device is turned OFF.

    • Disconnect all external devices from your tablet.

  2. Samsung Galaxy Tab E 9.6 Verizon Front Panel Replacement: crwdns2935265:02crwdnd2935265:01crwdnd2935265:03crwdne2935265:0 Samsung Galaxy Tab E 9.6 Verizon Front Panel Replacement: crwdns2935265:02crwdnd2935265:02crwdnd2935265:03crwdne2935265:0 Samsung Galaxy Tab E 9.6 Verizon Front Panel Replacement: crwdns2935265:02crwdnd2935265:03crwdnd2935265:03crwdne2935265:0
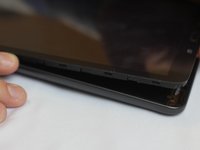
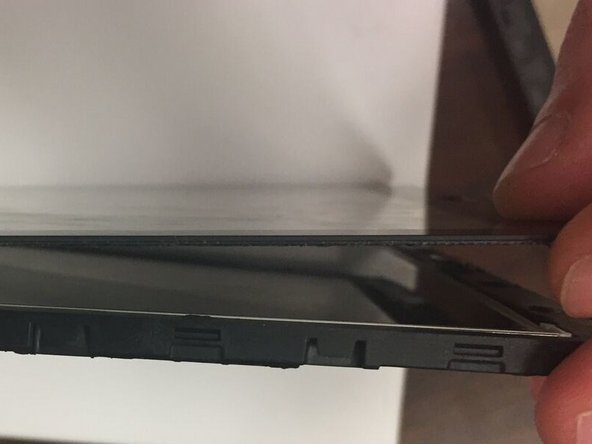
    • Insert the plastic opening tool by wedging it between the device's screen and back cover.

    • Move the plastic tool around the edges of the device to undo the plastic lips holding the casing together.

    • This step may require more force than expected. If difficult, try using a suction cup on the screen.

  3. Samsung Galaxy Tab E 9.6 Verizon Front Panel Replacement: crwdns2935265:03crwdnd2935265:01crwdnd2935265:03crwdne2935265:0 Samsung Galaxy Tab E 9.6 Verizon Front Panel Replacement: crwdns2935265:03crwdnd2935265:02crwdnd2935265:03crwdne2935265:0 Samsung Galaxy Tab E 9.6 Verizon Front Panel Replacement: crwdns2935265:03crwdnd2935265:03crwdnd2935265:03crwdne2935265:0
    • This process will become easier as more clips are separated.

    • Use your hands to gently pull the back cover off the device after about half of the clips are separated.

    • A suction cup can be used in this step as well to assist in pulling the device apart.

  4. Samsung Galaxy Tab E 9.6 Verizon Front Panel Replacement, Front Panel: crwdns2935265:04crwdnd2935265:01crwdnd2935265:02crwdne2935265:0 Samsung Galaxy Tab E 9.6 Verizon Front Panel Replacement, Front Panel: crwdns2935265:04crwdnd2935265:02crwdnd2935265:02crwdne2935265:0
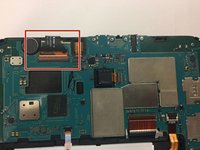
    • Turn the device over so the screen is facing down. Locate the front panel assembly connector at the top left corner of the motherboard.

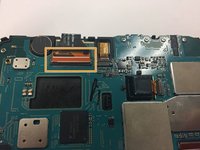
    • To remove the connector, first use a pair of tweezers and flip the connector lock upwards towards the battery.

  5. Samsung Galaxy Tab E 9.6 Verizon Front Panel Replacement: crwdns2935265:05crwdnd2935265:01crwdnd2935265:01crwdne2935265:0
    • Once you've undone the connector lock, use a pair of tweezers to pull the cable front its housing.

  6. Samsung Galaxy Tab E 9.6 Verizon Front Panel Replacement: crwdns2935265:06crwdnd2935265:01crwdnd2935265:01crwdne2935265:0
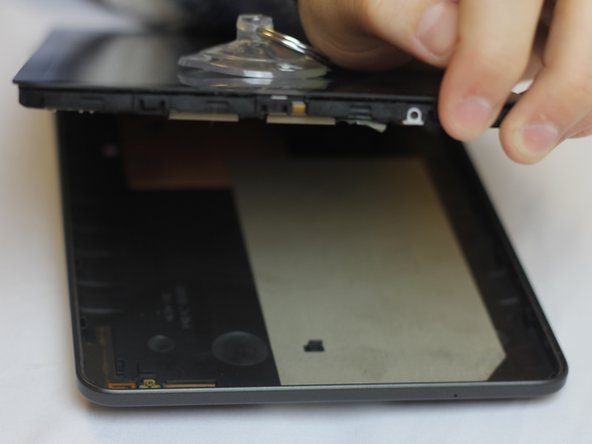
    • Turn the device back over and use a plastic opening tool to detach the adhesive glue securing the front casing.

    • You will need to wedge a plastic opening tool in between the front casing and the screen. Then move the tool around the perimeter of the device to break the adhesive.

    • Once you've loosed the front panel enough with the prying tool, you can use your hands to pull the front panel off of the device.

crwdns2915888:0crwdne2915888:0

To reassemble your device, follow these instructions in reverse order.

crwdns2935229:06crwdne2935229:0

Dave Dorzback

crwdns2935283:009/28/16crwdne2935283:0

626 crwdns2915208:0crwdne2915208:0

crwdns2935297:04crwdne2935297:0

crwdns2915084:0crwdne2915084:0

USF Tampa, Team 1-4, Cagle Fall 2016 crwdns2935289:0USF Tampa, Team 1-4, Cagle Fall 2016crwdne2935289:0

USFT-CAGLE-F16S1G4

crwdns2931471:03crwdne2931471:0

crwdns2935297:014crwdne2935297:0

crwdns2917034:0crwdne2917034:0

To install the new screen, install the connector at the top first and dry fit before installing and make sure you align the Button and Camera.

Oscar C - crwdns2934203:0crwdne2934203:0

crwdns2917038:0crwdne2917038:0

crwdns2936625:0crwdne2936625:0:

crwdns2936751:024crwdne2936751:0 0

crwdns2936753:07crwdne2936753:0 1

crwdns2936753:030crwdne2936753:0 9

crwdns2942667:0crwdne2942667:0 4,329