crwdns2915892:0crwdne2915892:0
A damaged/broken or even corrupted motherboard can render an entire device useless. This guide highlights how to remove the back cover of the tablet in order to get to the motherboard as a means to replace it.
crwdns2942213:0crwdne2942213:0
-
-
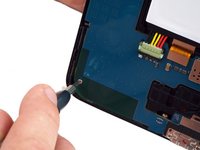
At the top portion of the memory card slot, use the small metal spudger to create separation between the back cover and the rest of the device.
-
-
-
Use the intermediate metal spudger in place of the small metal spudger to remove the back cover. This is done by sliding the intermediate metal spudger around the perimeter of the device, beginning at the top portion of the memory card slot.
-
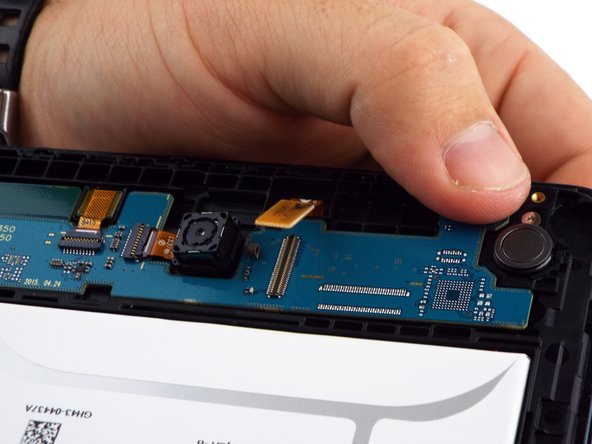
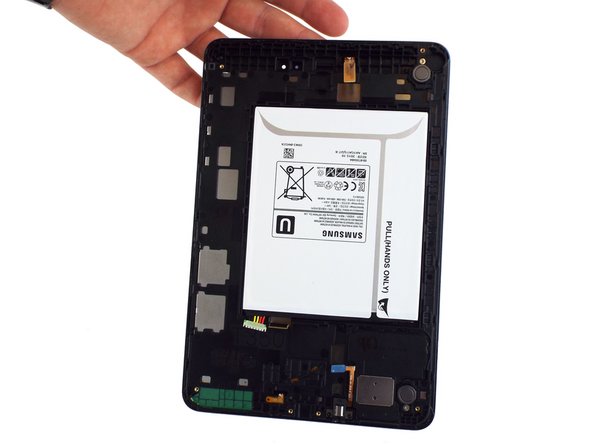
The second picture shows the internal portion of the device once the back cover is removed.
-
-
crwdns2935267:0crwdne2935267:0Tweezers$4.99
-
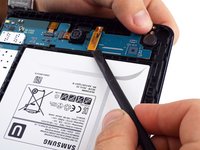
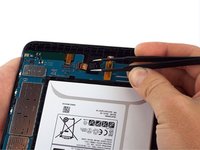
Use the bent precision tweezers to disconnect the battery connector from the motherboard.
-
-
-
Use the spudger to disconnect the flexible display cable connector from the motherboard.
-
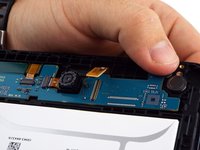
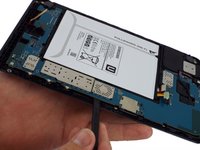
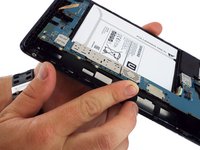
The first and second pictures show what the display looks like when it is still connected to the motherboard and once it is disconnected, respectively.
-
-
-
-
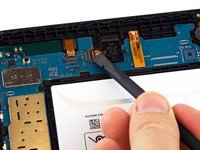
Use the spudger to flip up the ZIF connector to unlock the rear facing camera's flexible cable.
-
Then use tweezers to gently remove the rear facing camera from the device.
-
-
-
Use the spudger to flip up the ZIF connector to unlock the front facing camera's flexible cable.
-
Then use tweezers to gently remove the front facing camera from the device.
-
-
-
Use the spudger to disconnect the LCD panel's flexible cable connector.
-
-
-
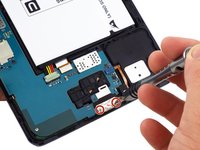
Use the spudger to disconnect the 3.5mm headset jack's flexible cable connector.
-
-
-
Use the PH0 screwdriver bit to remove the two 3 mm screws connecting the USB port shield to the midframe.
-
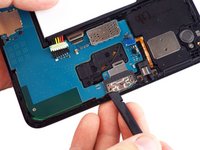
Then use the spudger tool to remove the USB port shield.
-
-
-
Use the PH0 screwdriver bit to remove the two 3 mm screws on the left side of the motherboard.
-
-
-
Using the flat end of a spudger, carefully wedge the motherboard from the case.
-
Using your fingers, gently remove the motherboard out of the device.
-
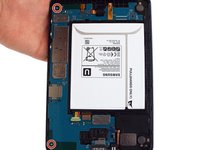
Once the motherboard is removed, the device should look like as illustrated in the third picture.
-


To reassemble your device, follow these instructions in reverse order.
To reassemble your device, follow these instructions in reverse order.
crwdns2935221:0crwdne2935221:0
crwdns2935229:015crwdne2935229:0
crwdns2915084:0crwdne2915084:0

USF Tampa, Team 17-4, Blackwell Winter 2016 crwdns2935289:0USF Tampa, Team 17-4, Blackwell Winter 2016crwdne2935289:0
USFT-BLACKWELL-W16S17G4
crwdns2931471:04crwdne2931471:0
crwdns2935297:012crwdne2935297:0
crwdns2947412:08crwdne2947412:0
I have a tablet that has previously had its battery replaced and well pretty much the red text in step 3 happened would that small scratch cause it to not turn on at all and require a replacement motherboard?
you would be correct that it COULD as it says, but take a magnifying glass (or a phone app that magnifies and examine the scratch, if you can see the copper on the pcb is in fact showing and cut the yeah if not perhaps that is not the problem (in trouble shooting one needs to check to see that they are correct and not just assume that is the end of the road, it could be something else (this post is very old i answer only for those getting here and wondering the same thing. answers to questions are good things, questions only are just internet clutter. someone here could have answered this by now.
Can you still revive photos and video if you change mother board
if the pictures are on the old motherboard then now. if you are replacing with a motherboard (because the display and touch are messed up) from an old machine that worked then anything on the motherboards memory that you are putting in and powering up are potentially within your reach. (if you are correct that the board you are putting in is working) (there is more than one reason to replace a motherboard; i am taking a perfectly fine board out, putting in a board that is my old machine with valued data, then once i got my data i will be replacing the brand new board right back in, (most likely) and i will have saved my data (my backup was a few months out of date and i wish to recover that)
this must be said, people do NOT use metal spudger. use plastic guitar pick or similar for this stuff, try not to use needle nose plyers, use a plastic stick on battery connection detaching at right angle to connector (not anglarly as this may undo some of the wire connections.
always examin connectors for latches or locks some connectors will have a folding door, not activating these may wreck your connector. be observant, remember you have lots of time no need for rush in this kind of stuff.
another thing not mentioned is you should destatic (or ground yourself) as your body may have enough charge in you to mess up some chips on any computer parts.