crwdns2915892:0crwdne2915892:0
This guide assumes you have a basic understanding of miscellaneous hand tools such as a screwdriver and plastic opening tool. You will also need a heat gun in order to remove the screen. We will go in depth on how to use said tool.
crwdns2942213:0crwdne2942213:0
-
-
First, ensure that your tablet is turned off by pressing the power button and selecting the "turn off" button on the screen. If the screen is too badly damaged and you are unsure if the device is off, wait 48 hours to ensure the battery drains and the device turns off.
-
-
-
Look at the edge of your tablet, you will see small depression in the screen where you can insert your plastic opening tools. Insert the tip of your opening tool pry open a small crack. Using the other plastic opening tool, insert the tip of that one in, pry as well.
-
These particular pry tools are incredibly substandard and don't need to be used. I recommend 1 or 2 small metal pry tools (slim jim like)
-
-
-
As you pry, the opening will become larger. Move the tips of the tools away from each other and continue to pry. Do this all the way around the device until the back pops off.
-
-
-
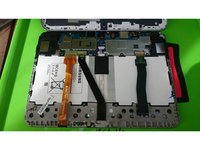
You will see a large white rectangle in the center of the device with a small ribbon cable coming off of it. This is the battery. Along the edge of the battery there are 10 small screws. Use the tip of your screwdriver to remove the screws, remembering to turn the screw driver counter clockwise.
-
-
-
-
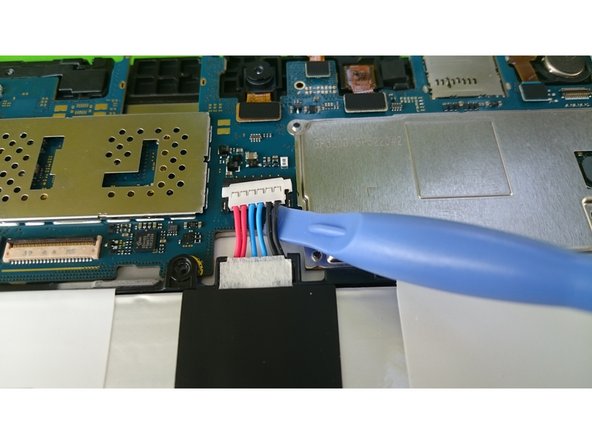
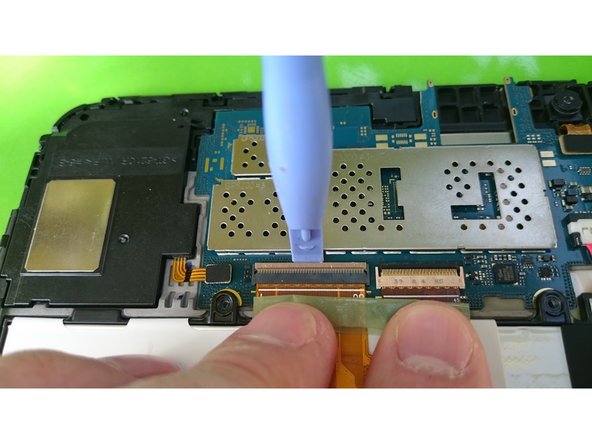
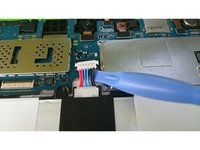
Once all 10 screws have been loosened and removed, you can now use your plastic tool to lift up one edge of the battery. Disconnect the wire from the motherboard by pressing on the small white latch where the wire connects. Remove the other wires on the device in the same manner. Once the wires are removed it is safe to remove the battery.
-
-
-
There is a silver plastic frame around the perimeter of the screen, remove this by holding the screen with one hand and prying it off using your index finger and thumb on your other hand
-
-
-
Use your heat gun (or hair dryer) to heat the four corners as well as the middle of the screen. This will remove the glue holding the screen on. The process is very slow so it is important to be patient.
-
-
-
once the screen is warmed up the glue will become less tactile. Insert one of your IFixit picks in between the screen and backing, letting it get pinched in between. As more of the glue lets go, add more picks along the perimeter of the screen.
-
-
-
Once the screen has loosened up, press your suction cup to one of the corners of the screen. Use one of your plastic removal tools and pry against the screen and the backing. Again, pry around the screen, following your tool with the suction cup as you go. Remove the glass screen.
-
-
-
Remove the plastic film from the inner side of your new screen. If your screen comes with pre-existing stickers, remove the coverings from said stickers so the sticky backs are facing the outwards. WARNING: ENSURE THAT THE HOLES FOR THE CAMERA AND LED ARE ALIGNED PROPERLY! Once aligned, press the screens edges firmly into the frame of the tablet.
-
-
-
Work backwards from here, first putting the screen frame back on. Then insert the battery and screw the screws back in (rotating them clockwise). Then place the ribbon cables back in and finally press the back of the device back into place.
-
Before closing the back cover, you can test the device with switching it on via the power button.
-


To reassemble your device, follow these instructions in reverse order.
To reassemble your device, follow these instructions in reverse order.
crwdns2935221:0crwdne2935221:0
crwdns2935229:05crwdne2935229:0
crwdns2915084:0crwdne2915084:0

UMass Dartmouth, Team 2-2, Duarte Fall 2014 crwdns2935289:0UMass Dartmouth, Team 2-2, Duarte Fall 2014crwdne2935289:0
UMASSD-DUARTE-F14S2G2
crwdns2931471:04crwdne2931471:0
crwdns2935297:06crwdne2935297:0
crwdns2947412:04crwdne2947412:0
hi, my device looks just like on your photo. There is also hard broken LCD , please help with info, how to change LCD + digitizer, and is possible to find assembly /LCD + screen
thank you :)
i tried fixing it and ended up cracking my LCD screen as well. The priving of the smashed screen from the lcd is the hardest as the glue is on the whole screen and a little force ended up cracking the lcd as well.
took me 3 hrs and when i turned it on was a cracked lcd screen.
Definitely not recommended to do if your screen is just a little cracked up to 20% cracked but still usable. only for those who want to attempt if their glass is fully smashed.
How cost- effectively is it to do yourself?
How much to have someone else to fix the screen on a Samsung model number GT-N80139
MY EMAIL IS tornfew78@gmail.com WITH ANY INFO YOU MAY HAVE ON THIS PLEASE
I realize this post is old but how or do you remove the Samsung logo as well and how to get the rest of the small pieces off, Heat it up again