crwdns2915892:0crwdne2915892:0
For any number of reasons, your camera may be taking bad pictures, or no pictures at all! If it's not a software issue, then you might need to replace your actual camera. This straightforward guide will lead you through the process of replacing your camera step-by-step. The trickiest part here is removing the back panel, so just be careful there. In no time you'll be back to snapping selfies!
crwdns2942213:0crwdne2942213:0
-
-
Screen side facing you, rotate device 180 degrees so the "SAMSUNG" logo is upside down.
-
-
-
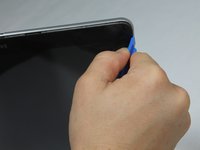
Using the plastic opening tool, start in the center near the charge port and wedge the angled tip between the plastic back and the glass screen.
-
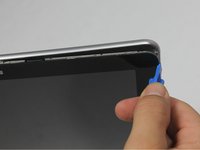
Create a wedge and apply pressure. Use the tool to separate the screen from the back until you hear an audible “pop."
-
Continue to wedge the tool about every inch along the current edge.
-
-
-
Once the bottom edge has been loosened, work towards a bottom corner from the other edge and continue to wedge gently until you can “pop” the corner out.
-
Continue this process on the other bottom corner until it can be popped out as well.
-
-
-
-
Place your hand between the device and the back panel. Then continue the wedging motion along the top edge of the device until the back panel comes loose.
-
-
-
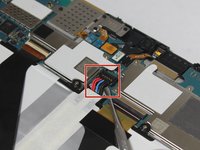
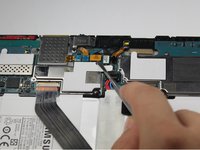
The connection between the battery and motherboard is a group of four wires in black housing that can be found near the top middle of the device. Using a plastic spudger or a flat, slim tool, lift the black connector housing upwards to disconnect it.
-
-
-
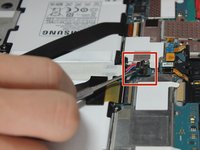
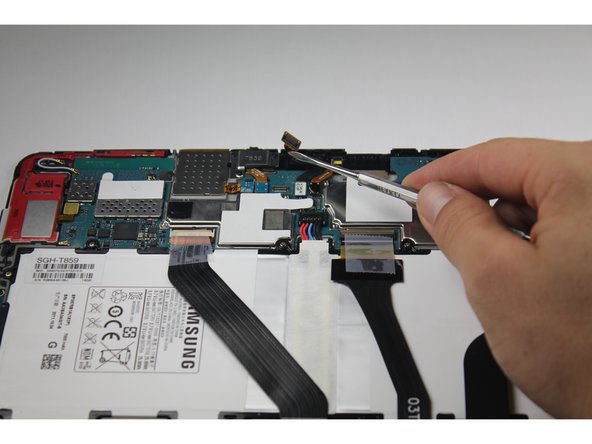
The connection you need to unfasten is the orange rectangle with the black cable coming out of it. Slide either your nail or the metal spudger under that orange connection.
-
Gently pop the connection off the motherboard.
-


To reassemble your device, follow these instructions in reverse order.
To reassemble your device, follow these instructions in reverse order.
crwdns2935221:0crwdne2935221:0
crwdns2935229:02crwdne2935229:0
crwdns2915084:0crwdne2915084:0

Baylor, Team 10-11, Williams Fall 2015 crwdns2935289:0Baylor, Team 10-11, Williams Fall 2015crwdne2935289:0
BU-WILLIAMS-F15S10G11
crwdns2931471:03crwdne2931471:0
crwdns2935297:016crwdne2935297:0