crwdns2915892:0crwdne2915892:0
The Samsung Galaxy S9 only has one rear facing camera. You would need to change the camera if the lens became cracked or scratched. Be sure to be level and straight when putting on the replacement camera.
Be forewarned- replacing the rear facing camera will impair your phone's waterproof capabilities unless you also replace the adhesive seal on the back cover.
crwdns2942213:0crwdne2942213:0
-
-
Before you begin, switch off your phone.
-
Apply a heated iOpener to a long edge of the phone to loosen the adhesive beneath the rear glass. Apply the iOpener for at least two minutes.
-
-
-
In the following steps, you'll be cutting through the adhesive securing the back cover.
-
You'll be slicing through the adhesive in the areas shown:
-
Thick portions of adhesive
-
Thin areas of adhesive
-
Avoid prying or slicing in this area, to protect the fingerprint sensor flex cable.
-
-
-
Press a suction cup onto the back cover.
-
Lift the back cover's bottom edge with your suction cup, opening a slight gap between the back cover and the frame.
-
Insert an opening pick in the gap you created and slide it to the bottom right corner.
-
Insert a second opening pick and slide it to the bottom left corner.
-
Insert a third opening pick to prevent the adhesive from resealing during the rest of the removal procedure.
-
-
-
While inserting only the tip of the opening pick, slide it from the bottom left corner along the side to the top.
-
Slide the pick around the top corner and leave it there to prevent the adhesive from resealing.
-
-
-
Slide the opening pick from the bottom right corner along the side to the top.
-
Slide the opening pick around the corner and cut the remaining adhesive at the top of the phone.
-
-
-
Carefully lift the side of the rear glass where the volume button is located.
-
Use the edge of a spudger to pry up and disconnect the fingerprint sensor flex cable.
-
-
-
-
Remove fifteen 4mm screws with a #000 Phillips screwdriver.
-
-
-
Remove the speaker cover/antenna assembly.
-
-
-
Disconnect the battery by using a spudger to pry open the connection.
-
-
-
Remove one 3mm screw with a #000 Phillips screwdriver.
-
-
-
Disconnect 6 cables by prying apart the connections with a spudger.
-
-
-
Take out the SIM card by using a SIM card remover or unbent paper clip to depress the release lever.
-
-
-
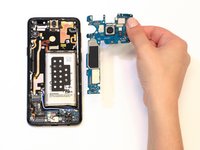
Remove the motherboard by prying it out with the spudger.
-
-
-
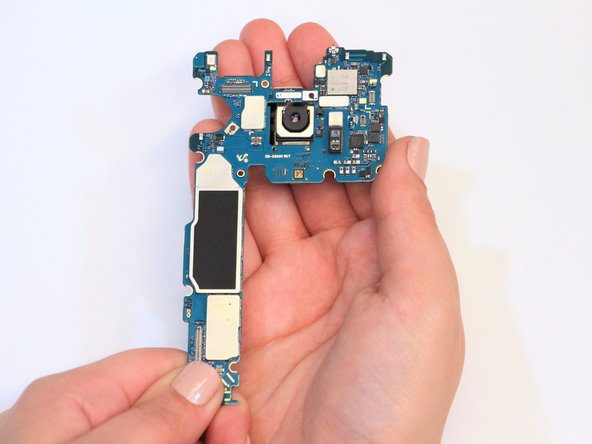
Disconnect one connector by prying it apart with the spudger.
-
-
-
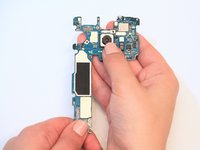
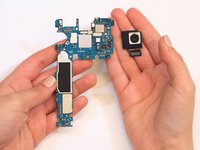
Pop the camera out gently with your fingers.
-


To reassemble your device, follow these instructions in reverse order.
crwdns2935221:0crwdne2935221:0
crwdns2935229:06crwdne2935229:0
crwdns2935287:0crwdne2935287:0

Cal Poly, Team S1-G6, White Winter 2019 crwdns2935289:0Cal Poly, Team S1-G6, White Winter 2019crwdne2935289:0
CPSU-WHITE-W19S1G6
crwdns2931471:04crwdne2931471:0
crwdns2935297:029crwdne2935297:0
crwdns2947410:01crwdne2947410:0
Followed to a T, now get Camera Failed as a reward.