crwdns2915892:0crwdne2915892:0
The charging port in the connection point where the charging cable goes in to feed power to the device. You may want to check our troubleshooting page first to verify that there isn't a problem with the software of the device.
If the problem turns out to be a hard ware problem, then you will have to replace the charging port board on your device.
Be forewarned- replacing this part involves breaking your phone's waterproof seal. If you want your phone to keep its waterproof capabilities, you will have to replace the seal.
crwdns2942213:0crwdne2942213:0
-
-
Before you begin, switch off your phone.
-
Apply a heated iOpener to a long edge of the phone to loosen the adhesive beneath the rear glass. Apply the iOpener for at least two minutes.
-
-
-
In the following steps, you'll be cutting through the adhesive securing the back cover.
-
You'll be slicing through the adhesive in the areas shown:
-
Thick portions of adhesive
-
Thin areas of adhesive
-
Avoid prying or slicing in this area, to protect the fingerprint sensor flex cable.
-
-
-
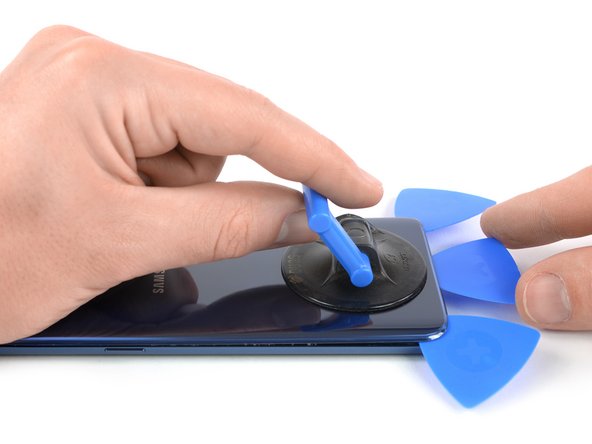
Press a suction cup onto the back cover.
-
Lift the back cover's bottom edge with your suction cup, opening a slight gap between the back cover and the frame.
-
Insert an opening pick in the gap you created and slide it to the bottom right corner.
-
Insert a second opening pick and slide it to the bottom left corner.
-
Insert a third opening pick to prevent the adhesive from resealing during the rest of the removal procedure.
-
-
-
While inserting only the tip of the opening pick, slide it from the bottom left corner along the side to the top.
-
Slide the pick around the top corner and leave it there to prevent the adhesive from resealing.
-
-
-
Slide the opening pick from the bottom right corner along the side to the top.
-
Slide the opening pick around the corner and cut the remaining adhesive at the top of the phone.
-
-
-
-
Carefully lift the side of the rear glass where the volume button is located.
-
Use the edge of a spudger to pry up and disconnect the fingerprint sensor flex cable.
-
-
-
Remove fifteen 4mm screws with a #000 Phillips screwdriver.
-
-
-
Remove the speaker cover/antenna assembly.
-
-
-
Remove five 3mm screws #000 Phillips screwdriver.
-
-
-
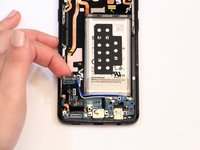
Disconnect three cables.
Forgot step to remove logic board held by several connectors and one screw. Connect new charging port cable to mother board before putting it back together.
Could you point out to me where the logic board is? It’s possible we called it something else.
The board to the left of the battery the two cables connect to.
Kind of a big step to miss.
Oh, I think I get what y’all are pointing out.
1) We called the logic board the charging port board.
2) We did disconnect the two cables (the blue and white ones, right?) in the step above, as seen by the upper red rectangle. (Look at step #13)
3) I’m having trouble finding which screw we missed. Could you identify it a little better so I can fix the picture? (Look at step #12)
We might also have called the logic board the mother board, which you do not need to remove as long as you detach all of the cables.
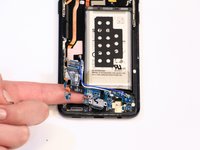
Yes, logic board must be removed. It is what you called the motherboard. We had to remove the motherboard enough to be able to mate the charging port board to the motherboard multipin connection seen under the index finger in the photo for step 15.
I’m not sure if I can change the prerequisite guides now that this one has been published, but we do have a motherboard replacement guide here. It has detailed instructions on removing the motherboard/logic board.
We also had to remove the opposite ends of the blue and white cables from the charging port board since our replacement charging port board did not come with new cables.
Thanks! I’ll see if I can add that in.
Agree with the comment above - the daughter charging board does not include the blue and white wires. I just disconnected the wires from ends and left them in place, working the wires over the new charging board.
There is another connection that needs to be disconnected. In your photo above, if you look at the red box you marked to the left of the battery, you’ll see a ‘+’ on a small circle and a short strip of visible connector on the left side of the frame. This needs to be disconnected to remove and should be reconnected on the replacement board.
-
-
-
Remove the headphone jack by using a spudger to pry it free.
-
-
-
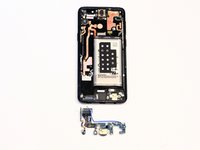
Remove charging port board.
Seem to have omitted step 13.b ... remove the motherboard :-(
-
To reassemble your device, follow these instructions in reverse order.
To reassemble your device, follow these instructions in reverse order.
crwdns2935221:0crwdne2935221:0
crwdns2935229:035crwdne2935229:0
crwdns2947412:09crwdne2947412:0
Hi, does the screen need to be replaced once the charging port has been replaced?
Hi Elliot! If you replace your charging port, you will need to replace the back cover, but the screen should remain intact. It is very difficult to remove the back cover without breaking it (unless you have access to a heat gun), so if you’re thinking about replacing your charging port, you may want to get a new back cover ready beforehand. Good luck and Happy Fixing!
A lot of parts missing to this guide.
Hi there, is there anything you would recommending replacing/updating/upgrading while you have the phone disassembled? Thanks!
This guide is decent, but it was not my primary reference for this task. IMO a better guide can be found here: https://www.youtube.com/watch?v=o1NYvdkZ...
**VERY IMPORTANT!**
You have to buy the same revision charging board as the one that’s in your phone, the one that i unknowingly ordered was a E4 but my phone needed a C7. Now i’m hunting down the correct parts and my phones not working.
I'm considering doing this, how do you identify the revision?
I think there’s a step missing between Step 13 and 14? Since there is a board either taken out or lifted on the left side? I lifted mine slightly to take out the white and blue wires as the gap was too small to pull them out. Still, thank you so much for making this graphical step-by-step instruction available for all, it’s the best the web has to offer! (: #respect
Very nice. I never use videos because I like to control my own rate, and its always nice to find a tech guide that explains things without over-explaining. Well done.


