crwdns2915892:0crwdne2915892:0
Use this guide to replace or remove the battery in your Samsung Galaxy S8 Active.
This guide involves removing the back cover of the device, so you will need replacement adhesive to reattach the back cover to the phone.
Before disassembling your device, be sure the battery is charged below 25%. If accidentally punctured or damaged, the battery can catch fire and/or explode; if discharged below 25%, the chances of fire/explosion is decreased.
Follow the iOpener Heating guide for instructions on using the iOpener.
crwdns2942213:0crwdne2942213:0
-
-
Insert and gently push the SIM card ejector tool (or an unfolded paperclip) into the small hole on the left side of the top edge of the phone.
-
Press gently to eject the SIM tray.
-
Remove the SIM card tray from the device.
-
-
-
Remove four black 3mm screws from the outside edges of the device that hold the rubber bumpers in place using the TR6 Torx Security Screwdriver.
-
Take off the rubber bumpers from the top and bottom edges of the device.
not needed as near as I can tell
You dont need to remove these.
-
-
-
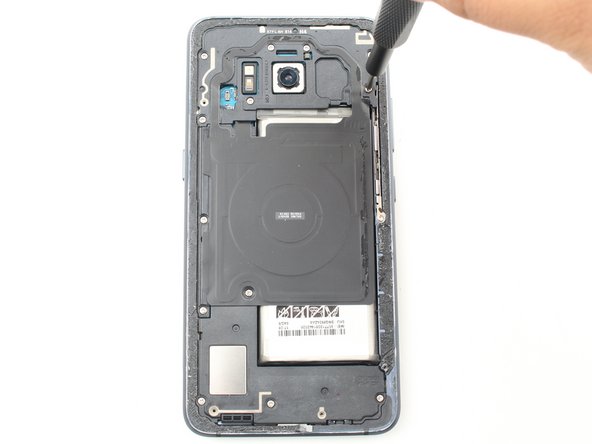
Use a heat gun to lightly heat the edges of the back to soften the adhesive that connects the back cover to the rest of the frame.
-
-
-
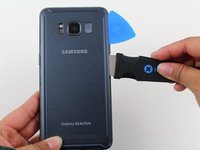
Insert the Jimmy tool under the edge of the back cover.
-
Once the Jimmy tool is under the edge of the cover, insert an opening pick into the seam to prevent the seam from closing if the Jimmy tool slips or is accidentally removed.
-
Cut slowly around the top section of the device and be careful to avoid damaging the cables for the fingerprint sensor and camera. Avoid prying too far into the top of the device to protect the fingerprint sensor.
-
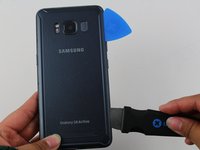
Slide the Jimmy tool down the sides of the device, separating the adhesive.
-
-
-
-
Use the opening pick to slice through any remaining adhesive.
-
Open the back cover slightly to the point that you can see the fingerprint sensor flex cable connector.
-
-
-
Slowly flip the cover over and set it down on top of the rest of the device.
-
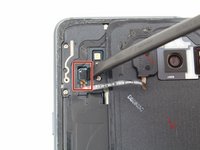
Disconnect the fingerprint flex cable using the flat end of a spudger.
-
Remove the back cover.
-
-
-
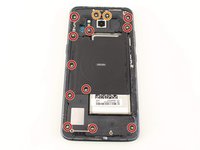
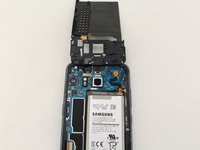
Remove eleven 3.5 mm screws using a Phillips #00 Screwdriver.
-
Remove two 2mm screws using a Phillips #00 Screwdriver.
You only need to remove the top seven, the rest aren't necessary to remove the battery.
-
-
-
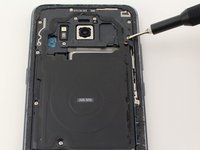
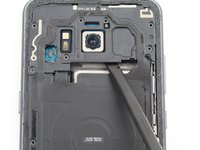
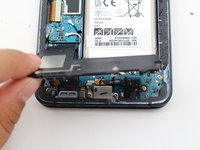
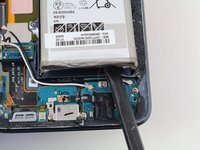
Remove the NFC antenna and charging coil assembly using the flat end of a spudger.
-
-
-
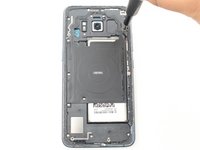
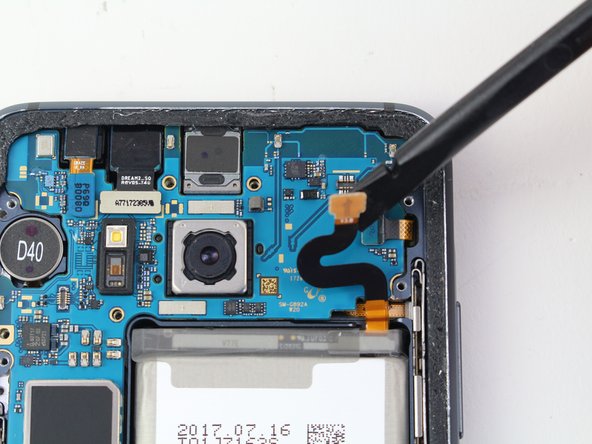
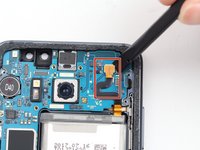
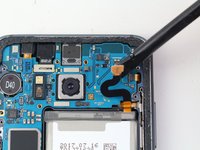
Remove the loudspeaker assembly using the flat end of a spudger.
Step nine (removing the loudspeaker assembly) did not seem necessary to replace the battery pack. Skipping this would save some time and risk. Otherwise GREAT instructions! And completed sucessfully! Sam Caldwell rev.sam.caldwell@gmail.com
broke 2 spudgers on this make be careful
-
-
-
Use the flat end of a spudger to disconnect the battery flex cable.
-
-
-
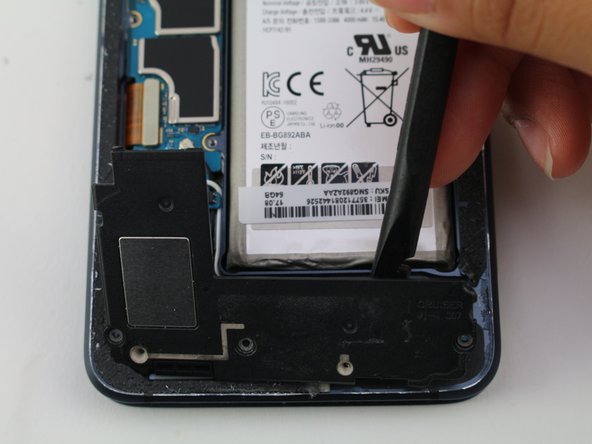
Place the heated iOpener across the top of the battery for approximately three minutes to soften the adhesive holding the battery to the device.
-
Alternatively, apply 1-2 drops of high-concentration (>90%) isopropyl alcohol under each corner of the battery and allow it to penetrate for several minutes to help weaken the adhesive.
-
-
-
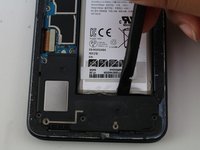
Use the flat end of a spudger to carefully pry up on the bottom of the battery with firm, steady pressure until the adhesive separates.
-
If you used isopropyl alcohol, wait ten minutes before installing the new battery to allow the alcohol to completely evaporate.
-


To reassemble your device, follow these instructions in reverse order.
To reassemble your device, follow these instructions in reverse order.
crwdns2935221:0crwdne2935221:0
crwdns2935229:030crwdne2935229:0
crwdns2915084:0crwdne2915084:0

Cal Poly, Team S2-G1, White Winter 2019 crwdns2935289:0Cal Poly, Team S2-G1, White Winter 2019crwdne2935289:0
CPSU-WHITE-W19S2G1
crwdns2931471:03crwdne2931471:0
crwdns2935297:011crwdne2935297:0
crwdns2947412:08crwdne2947412:0
Can I buy all of the parts on ifixit?
Where can I order the batter
I need to do this repair. Can’t seem to find the battery on here.
Nice guide!
I still managed to rip the fingerprint cable tho ¯\_(ツ)_/¯
I completed this, the hardest parts were: 1. When prying up the battery, the back of the screen is directly under it! Any nicks or scratches will completely damage the screen! yikes. 2. when going back through and replacing the step 8 part, make sure the pieces are completely in line and the screws are not even a tiny bit crooked.
Thanks for the guide!
My wife has an S8 Active whose back cover is coming off, seems like the adhesive has failed. I’m assuming to do the repair described above you’d need to replace the adhesive on the back cover. Do you sell the adhesive strips?
What type of adhesive should I use during reassembly?
The battery is not charging
I have chang it but still not
You dont need to remove the SIM tray.
Gregg Stanley - crwdns2934203:0crwdne2934203:0