crwdns2915892:0crwdne2915892:0
Complex solution for faulty microphone in Galaxy S7. No need to disassembly the LCD.
crwdns2942213:0crwdne2942213:0
-
-
Apply a heated iOpener to a long edge of the phone for about two minutes.
-
-
-
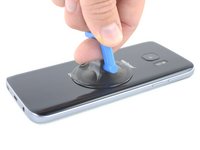
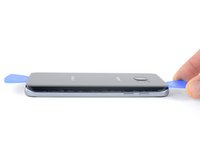
When the back panel is warm to the touch, apply a suction cup as close to the heated edge of the phone as you can while avoiding the curved edge.
-
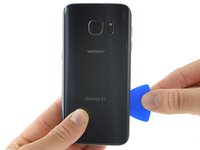
Lift on the suction cup and insert an opening pick under the rear glass.
-
-
-
Once you have the pick firmly inserted into the glass, reheat and reapply the iOpener to soften the adhesive.
-
-
-
-
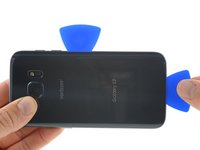
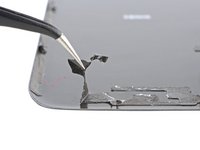
Slide the opening pick down along the side of the phone, separating the adhesive.
-
Leave the pick in place and grab a second pick as you proceed to the next step. Leaving the pick inserted can help prevent the glue you just separated from re-adhering.
-
-
-
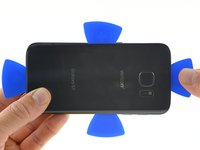
Repeat the previous heating and cutting procedure for the remaining three sides of the phone.
-
Leave an opening pick in each edge of the phone as you continue to the next to prevent the adhesive from resealing.
-
-
-
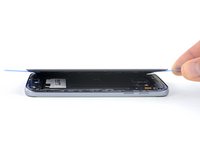
Lift the glass and remove it from the phone.
-
-
-
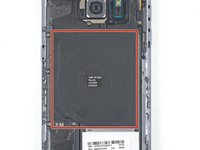
If you're cleaning the midframe surface with isopropyl alcohol, be careful not to get any alcohol on the wireless charging coil. The coil coating will break down if it contacts alcohol.
-
-
-
Complex solution for faulty microphone in Galaxy S7. No need to disassembly the LCD.
-


To reassemble your device, follow these instructions in reverse order.
crwdns2935221:0crwdne2935221:0
crwdns2935229:02crwdne2935229:0

crwdns2947412:03crwdne2947412:0
this repair guide is trash.
disappointing.
Worse than useless. Please just remove it. Bad camera angles. Can’t actually see the repair in action. No dialogue when the repair is taking place and 3 minutes of explanatory dialogue in a 4 minute video without actually showing anything.