crwdns2915892:0crwdne2915892:0
Use this guide to replace the rear-facing camera.
crwdns2942213:0crwdne2942213:0
-
-
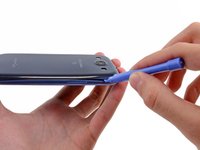
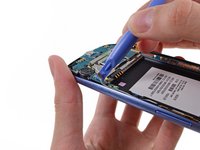
Insert a plastic opening tool or fingernail into the notch in the gap between the rear case and the rest of the phone, located at the top of the device.
-
Gently twist the opening tool to disconnect the clips securing the top of the rear case.
-
-
-
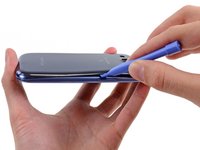
Slide the plastic opening tool left along the top edge and repeat the twisting motion to widen the gap between the rear case and the phone.
-
-
-
Continue to move the plastic opening tool around the perimeter of the top left corner, gently prying up along the rear case.
-
-
-
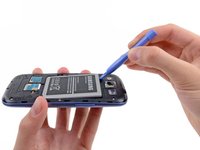
Pry along the top right side, and continue prying down the right side of the rear case.
-
-
-
Lift up and remove the rear case from the phone.
-
-
-
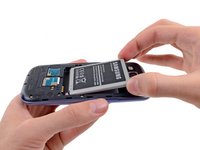
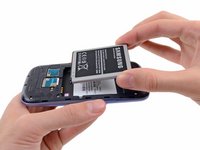
Wedge a plastic opening tool into the small notch above the battery.
-
Pry the battery up out of its recess.
-
-
-
-
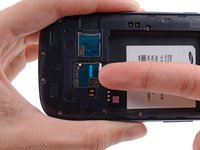
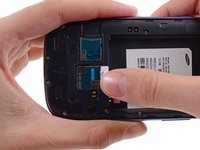
Using your fingernail, push the SIM card slightly deeper into its slot, until you hear a click.
-
After the click, release the card and it will pop out of its slot.
-
-
-
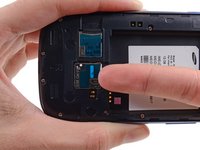
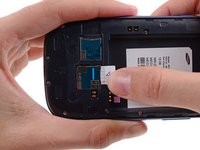
Use your thumb to slide enough of the SIM card out of its slot to grab ahold of it.
-
Grasp and remove the SIM card away from the phone.
-
-
-
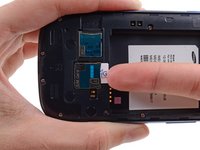
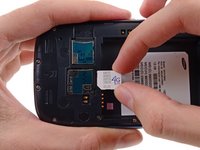
Using your fingernail, push the microSD card slightly deeper into its slot, until you hear a click.
-
After the click, release the card and it will pop out of its slot.
-
-
-
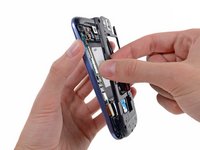
Use your thumb to slide the microSD card out of the slot.
-
Remove the microSD card from the phone.
Forgot about the step to remove the back casing...pretty simple though, just several screws then pop it off.
-
-
-
Remove the ten 4.0 mm Phillips screws securing the midframe to the front panel assembly.
What would you use to remove the screws
I used both P#000 and J#00 precision bits to good effect. I tend to prefer the Japanese Standard bits in place of Philips, as the JIS bits seem not to cam out and strip screws as easily.
E West -
-
-
-
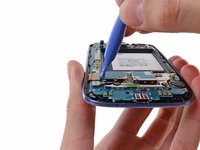
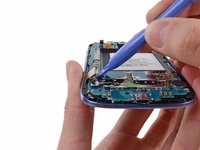
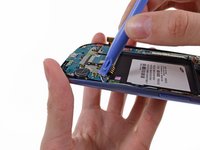
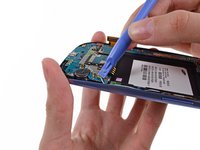
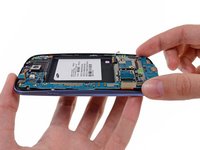
Grasp the left side of the plastic midframe with your thumb and forefinger and lift it away from the phone.
There's another piece of the frame that needs to be taken out, but it doens't come out as nicely... unless I did something wrong. It's the part that covers the speaker. I couldn't find a nice way of taking it out.
I had to use a guitar-pick to pry that section off of the frame. Start at the front-facing camera edge and run the pick underneath the plastic cover. The catches should release.
I used a pointed prying too to get it started, then the flat one. It took some fiddling but finally came off nicely.
READ ME!
For a guide that takes you step by step on how to remove the SIM and microSD, I'm surprised they didn't mention the top part of this midframe (still attached, in the pictures). This top part of the midframe also needs to be removed before you can take out the motherboard.
You need to disconnect a ribbon not listed in these directions first, then pry that midframe up with the help of a guitar pick. This ribbon is located by the back-camera, next to the digitizer ribbon. This ribbon is connected to the midframe so it is essential you disconnect this before lifting the frame up.
The frame is really snapped in there so don't be afraid to use a little force - for reference, you will use more force to pull this frame off than you did to pull off the back-cover of the phone. Once this piece is off, your phone should look like the picture in step 14.
-
-
-
Use a plastic opening tool to pry the front-facing camera connector from its socket on the motherboard.
-
-
-
Disconnect the digitizer cable by gently prying its connector up from its socket on the motherboard.
Step 18 says the front digitizer connector, but later calls it the earpiece/buttons/ambient light sensor ribbon cable.
Is the Digitizer connector part of the display connector, or is it elsewhere?
It's the volume and speaker
-
-
-
Disconnect the display data cable from the motherboard.
-
-
-
Pry the Wi-Fi antenna cable connector up from its socket on the motherboard.
-
Gently move the cable out of the way of the motherboard.
Be very careful,as it is very easy to break the connector off the motherboard.
Has anyone tried just folding the motherboard back to the left after removing all the screws WITHOUT disconnecting the wi-fi antenna? I'm just a little worried about this one step.
Folding the motherboard back without disconnecting the WiFi antenna worked for me! :)
I broke the WiFi antenna connector bit off motherboard. How do I fix it?
-
-
-
Remove the single 3.0 mm Phillips screw securing the motherboard to the front panel assembly.
-
-
-
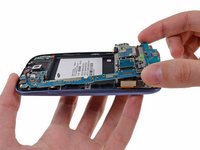
Carefully lift the bottom of the motherboard assembly away from the front panel assembly.
-
Remove the motherboard assembly from the front panel assembly, minding any cables that may snag on it.
When reassembling your device, there can be a problem with connecting display data cable to the motherboard. I fixed display data cable on the motherboard before mounting motherboard: it gave me some freedom and simplified positioning of data cable on the motherboard
If I am not mistaking, there is a screw also on the motherboard needs to be removed before removing motherboard from the assembly
It's covered in Step 21
Amy Losh -
-
-
-
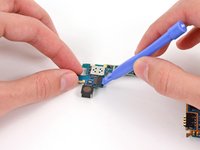
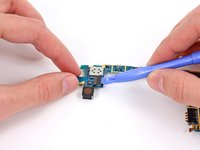
Use a plastic opening tool to pry the rear-facing camera connector from its socket.
-
-
-
Remove the rear-facing camera off the motherboard.
-


To reassemble your device, follow these instructions in reverse order.
To reassemble your device, follow these instructions in reverse order.
crwdns2935221:0crwdne2935221:0
crwdns2935229:032crwdne2935229:0

crwdns2947412:03crwdne2947412:0
Hola es muy bueno el tutoril pero yo tengo un problema y es que la camera de mi samsung galaxy s3 no funciona cuando quiero hacer selfie se bloquea me toca ir a aplicaciones borrar todo sus ajustes para poder usar la de nuevo he probado también con app de otros pero a la hora de hacer selfie se bloquea y toca borrar sus ajustes,por lo demás funciona bien
Is it possible to extend the camera strip for the rear facing camera so it could be taken out of the case and make it forward mounted (as an example)? How would you go about this I have an old s3 and want to adapt it into a hidden spy camera for when I am away to watch the house
I simply followed these instructions and the repair worked perfectly. Many thanks indeed for your help.