crwdns2933423:0crwdne2933423:0
crwdns2947577:0crwdnd2947577:0crwdne2947577:0

Samsung Galaxy S III Front Panel Assembly Replacement

crwdns2942213:0crwdne2942213:0

crwdns2936621:0crwdne2936621:0

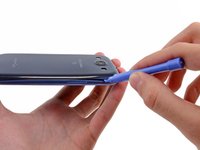
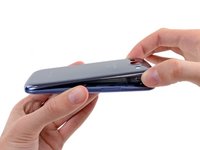
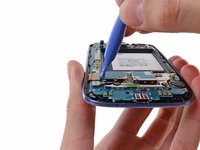
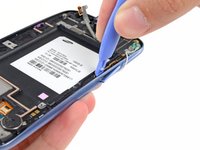
    1. Samsung Galaxy S III Front Panel Assembly Replacement, Rear Case: crwdns2935265:01crwdnd2935265:01crwdnd2935265:02crwdne2935265:0 Samsung Galaxy S III Front Panel Assembly Replacement, Rear Case: crwdns2935265:01crwdnd2935265:02crwdnd2935265:02crwdne2935265:0
      • The following four steps can be accomplished without a plastic opening tool. However, it's recommended to use a tool to best avoid breaking any clips along the perimeter of the rear case.

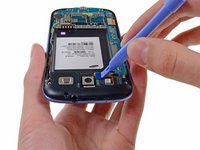
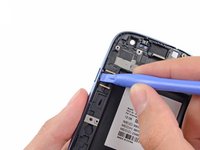
      • Insert a plastic opening tool or fingernail into the notch in the gap between the rear case and the rest of the phone, located at the top of the device.

      • Gently twist the opening tool to disconnect the clips securing the top of the rear case.

      crwdns2952109:0crwdne2952109:0

      crwdns2917038:0crwdne2917038:0

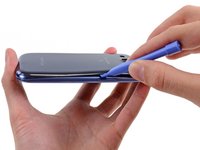
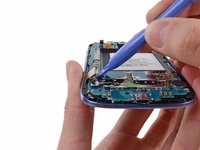
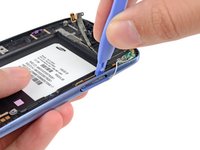
    2. Samsung Galaxy S III Front Panel Assembly Replacement: crwdns2935265:02crwdnd2935265:01crwdnd2935265:02crwdne2935265:0 Samsung Galaxy S III Front Panel Assembly Replacement: crwdns2935265:02crwdnd2935265:02crwdnd2935265:02crwdne2935265:0
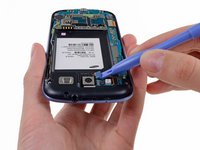
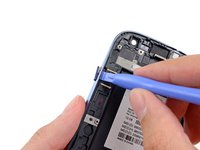
      • Slide the plastic opening tool left along the top edge and repeat the twisting motion to widen the gap between the rear case and the phone.

      crwdns2952109:0crwdne2952109:0

      crwdns2917038:0crwdne2917038:0

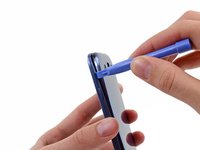
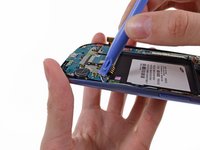
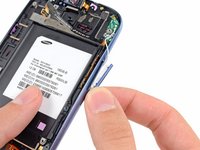
    3. Samsung Galaxy S III Front Panel Assembly Replacement: crwdns2935265:03crwdnd2935265:01crwdnd2935265:02crwdne2935265:0 Samsung Galaxy S III Front Panel Assembly Replacement: crwdns2935265:03crwdnd2935265:02crwdnd2935265:02crwdne2935265:0
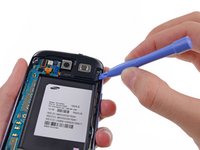
      • Continue to move the plastic opening tool around the perimeter of the top left corner, gently prying up along the rear case.

      crwdns2952109:0crwdne2952109:0

      crwdns2917038:0crwdne2917038:0

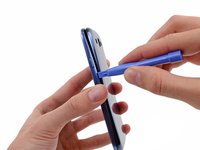
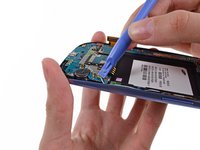
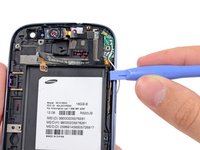
    4. Samsung Galaxy S III Front Panel Assembly Replacement: crwdns2935265:04crwdnd2935265:01crwdnd2935265:02crwdne2935265:0 Samsung Galaxy S III Front Panel Assembly Replacement: crwdns2935265:04crwdnd2935265:02crwdnd2935265:02crwdne2935265:0
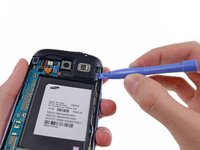
      • Pry along the top right side, and continue prying down the right side of the rear case.

      crwdns2952109:0crwdne2952109:0

      crwdns2917038:0crwdne2917038:0

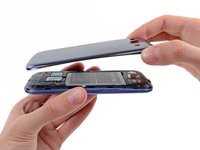
    5. Samsung Galaxy S III Front Panel Assembly Replacement: crwdns2935265:05crwdnd2935265:01crwdnd2935265:02crwdne2935265:0 Samsung Galaxy S III Front Panel Assembly Replacement: crwdns2935265:05crwdnd2935265:02crwdnd2935265:02crwdne2935265:0
      • Lift up and remove the rear case from the phone.

      • You may need to peel the case up to separate it from any clips still holding it to the bottom of the phone.

      crwdns2952109:0crwdne2952109:0

      crwdns2917038:0crwdne2917038:0

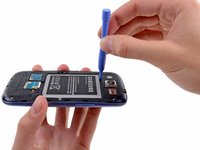
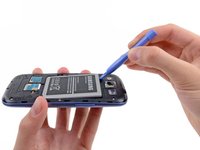
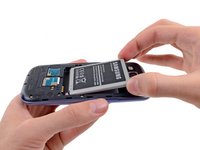
    1. Samsung Galaxy S III Front Panel Assembly Replacement, Battery: crwdns2935265:06crwdnd2935265:01crwdnd2935265:02crwdne2935265:0 Samsung Galaxy S III Front Panel Assembly Replacement, Battery: crwdns2935265:06crwdnd2935265:02crwdnd2935265:02crwdne2935265:0
      • This step can be accomplished without the need of a plastic opening tool. Just use your finger if you want to.

      • Wedge a plastic opening tool into the small notch above the battery.

      • Pry the battery up out of its recess.

      crwdns2952109:0crwdne2952109:0

      crwdns2917038:0crwdne2917038:0

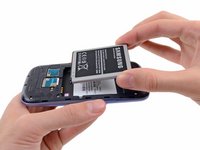
    2. Samsung Galaxy S III Front Panel Assembly Replacement: crwdns2935265:07crwdnd2935265:01crwdnd2935265:02crwdne2935265:0 Samsung Galaxy S III Front Panel Assembly Replacement: crwdns2935265:07crwdnd2935265:02crwdnd2935265:02crwdne2935265:0
      • Remove the battery.

      crwdns2952109:0crwdne2952109:0

      crwdns2917038:0crwdne2917038:0

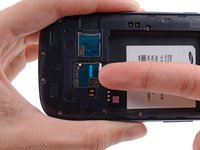
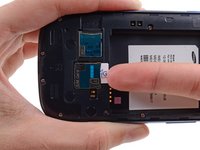
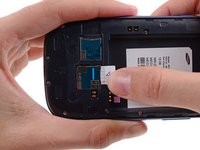
    1. Samsung Galaxy S III Front Panel Assembly Replacement, SIM Card: crwdns2935265:08crwdnd2935265:01crwdnd2935265:03crwdne2935265:0 Samsung Galaxy S III Front Panel Assembly Replacement, SIM Card: crwdns2935265:08crwdnd2935265:02crwdnd2935265:03crwdne2935265:0 Samsung Galaxy S III Front Panel Assembly Replacement, SIM Card: crwdns2935265:08crwdnd2935265:03crwdnd2935265:03crwdne2935265:0
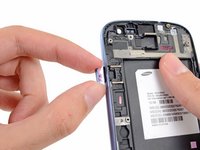
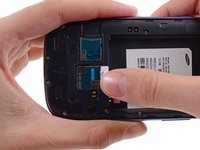
      • Using your fingernail, push the SIM card slightly deeper into its slot, until you hear a click.

      • After the click, release the card and it will pop out of its slot.

      • For reassembly, push the SIM card into the slot until it clicks in place.

      crwdns2952109:0crwdne2952109:0

      crwdns2917038:0crwdne2917038:0

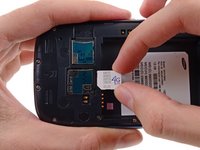
    2. Samsung Galaxy S III Front Panel Assembly Replacement: crwdns2935265:09crwdnd2935265:01crwdnd2935265:03crwdne2935265:0 Samsung Galaxy S III Front Panel Assembly Replacement: crwdns2935265:09crwdnd2935265:02crwdnd2935265:03crwdne2935265:0 Samsung Galaxy S III Front Panel Assembly Replacement: crwdns2935265:09crwdnd2935265:03crwdnd2935265:03crwdne2935265:0
      • Use your thumb to slide enough of the SIM card out of its slot to grab ahold of it.

      • Grasp and remove the SIM card away from the phone.

      crwdns2952109:0crwdne2952109:0

      crwdns2917038:0crwdne2917038:0

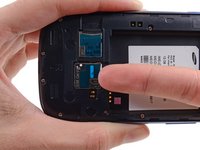
    1. Samsung Galaxy S III Front Panel Assembly Replacement, microSD Card: crwdns2935265:010crwdnd2935265:01crwdnd2935265:03crwdne2935265:0 Samsung Galaxy S III Front Panel Assembly Replacement, microSD Card: crwdns2935265:010crwdnd2935265:02crwdnd2935265:03crwdne2935265:0 Samsung Galaxy S III Front Panel Assembly Replacement, microSD Card: crwdns2935265:010crwdnd2935265:03crwdnd2935265:03crwdne2935265:0
      • Using your fingernail, push the microSD card slightly deeper into its slot, until you hear a click.

      • After the click, release the card and it will pop out of its slot.

      • For reassembly, push the microSD card into the slot until it clicks in place.

      crwdns2952109:0crwdne2952109:0

      crwdns2917038:0crwdne2917038:0

    2. Samsung Galaxy S III Front Panel Assembly Replacement: crwdns2935265:011crwdnd2935265:01crwdnd2935265:02crwdne2935265:0 Samsung Galaxy S III Front Panel Assembly Replacement: crwdns2935265:011crwdnd2935265:02crwdnd2935265:02crwdne2935265:0
      • Use your thumb to slide the microSD card out of the slot.

      • Remove the microSD card from the phone.

      crwdns2952109:0crwdne2952109:0

      crwdns2917038:0crwdne2917038:0

    1. Samsung Galaxy S III Front Panel Assembly Replacement, Plastic Midframe: crwdns2935265:012crwdnd2935265:01crwdnd2935265:01crwdne2935265:0
      • Remove the ten 4.0 mm Phillips screws securing the midframe to the front panel assembly.

      crwdns2952109:0crwdne2952109:0

      crwdns2917038:0crwdne2917038:0

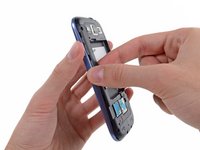
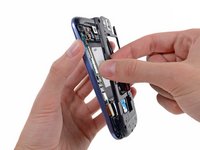
    2. Samsung Galaxy S III Front Panel Assembly Replacement: crwdns2935265:013crwdnd2935265:01crwdnd2935265:02crwdne2935265:0 Samsung Galaxy S III Front Panel Assembly Replacement: crwdns2935265:013crwdnd2935265:02crwdnd2935265:02crwdne2935265:0
      • Grasp the left side of the plastic midframe with your thumb and forefinger and lift it away from the phone.

      • The midframe lightly snaps in place, and can be removed with very little force.

      crwdns2952109:0crwdne2952109:0

      crwdns2917038:0crwdne2917038:0

    1. Samsung Galaxy S III Front Panel Assembly Replacement, Headphone Jack/Speaker Assembly: crwdns2935265:014crwdnd2935265:01crwdnd2935265:02crwdne2935265:0 Samsung Galaxy S III Front Panel Assembly Replacement, Headphone Jack/Speaker Assembly: crwdns2935265:014crwdnd2935265:02crwdnd2935265:02crwdne2935265:0
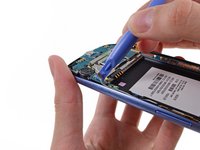
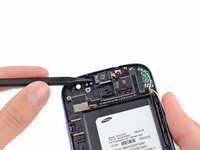
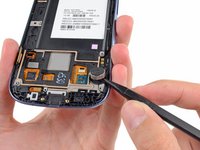
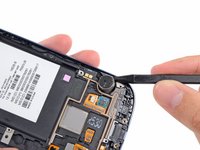
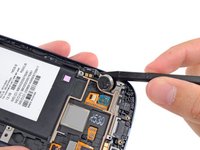
      • Use a plastic opening tool to pry the rear-facing camera connector up from its socket on the motherboard.

      • Make sure you are prying on the connector and not the socket, or you may damage the motherboard.

      crwdns2952109:0crwdne2952109:0

      crwdns2917038:0crwdne2917038:0

    2. Samsung Galaxy S III Front Panel Assembly Replacement: crwdns2935265:015crwdnd2935265:01crwdnd2935265:02crwdne2935265:0 Samsung Galaxy S III Front Panel Assembly Replacement: crwdns2935265:015crwdnd2935265:02crwdnd2935265:02crwdne2935265:0
      • Insert a plastic opening tool outboard of the speaker portion of the headphone jack/speaker assembly.

      • Gently pry the headphone jack/speaker assembly up from the front assembly.

      crwdns2952109:0crwdne2952109:0

      crwdns2917038:0crwdne2917038:0

    3. Samsung Galaxy S III Front Panel Assembly Replacement: crwdns2935265:016crwdnd2935265:01crwdnd2935265:01crwdne2935265:0
      • Lift the headphone jack/speaker assembly out of the Galaxy S III.

      crwdns2952109:0crwdne2952109:0

      crwdns2917038:0crwdne2917038:0

    1. Samsung Galaxy S III Front Panel Assembly Replacement, Motherboard Assembly: crwdns2935265:017crwdnd2935265:01crwdnd2935265:01crwdne2935265:0
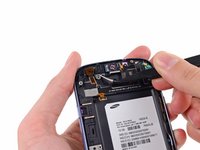
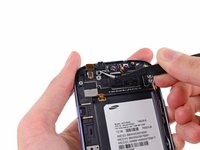
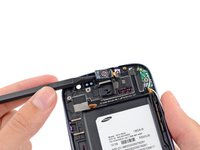
      • Use a plastic opening tool to pry the front-facing camera connector from its socket on the motherboard.

      • Do not try to remove the front-facing camera just yet. Its cable is still routed beneath the motherboard assembly to the ambient light sensor.

      crwdns2952109:0crwdne2952109:0

      crwdns2917038:0crwdne2917038:0

    2. Samsung Galaxy S III Front Panel Assembly Replacement: crwdns2935265:018crwdnd2935265:01crwdnd2935265:02crwdne2935265:0 Samsung Galaxy S III Front Panel Assembly Replacement: crwdns2935265:018crwdnd2935265:02crwdnd2935265:02crwdne2935265:0
      • Disconnect the digitizer cable by gently prying its connector up from its socket on the motherboard.

      crwdns2952109:0crwdne2952109:0

      crwdns2917038:0crwdne2917038:0

    3. Samsung Galaxy S III Front Panel Assembly Replacement: crwdns2935265:019crwdnd2935265:01crwdnd2935265:02crwdne2935265:0 Samsung Galaxy S III Front Panel Assembly Replacement: crwdns2935265:019crwdnd2935265:02crwdnd2935265:02crwdne2935265:0
      • Disconnect the display data cable from the motherboard.

      crwdns2952109:0crwdne2952109:0

      crwdns2917038:0crwdne2917038:0

    4. Samsung Galaxy S III Front Panel Assembly Replacement: crwdns2935265:020crwdnd2935265:01crwdnd2935265:03crwdne2935265:0 Samsung Galaxy S III Front Panel Assembly Replacement: crwdns2935265:020crwdnd2935265:02crwdnd2935265:03crwdne2935265:0 Samsung Galaxy S III Front Panel Assembly Replacement: crwdns2935265:020crwdnd2935265:03crwdnd2935265:03crwdne2935265:0
      • Pry the Wi-Fi antenna cable connector up from its socket on the motherboard.

      • Gently move the cable out of the way of the motherboard.

      crwdns2952109:0crwdne2952109:0

      crwdns2917038:0crwdne2917038:0

    5. Samsung Galaxy S III Front Panel Assembly Replacement: crwdns2935265:021crwdnd2935265:01crwdnd2935265:01crwdne2935265:0
      • Remove the single 3.0 mm Phillips screw securing the motherboard to the front panel assembly.

      crwdns2952109:0crwdne2952109:0

      crwdns2917038:0crwdne2917038:0

    6. Samsung Galaxy S III Front Panel Assembly Replacement: crwdns2935265:022crwdnd2935265:01crwdnd2935265:02crwdne2935265:0 Samsung Galaxy S III Front Panel Assembly Replacement: crwdns2935265:022crwdnd2935265:02crwdnd2935265:02crwdne2935265:0
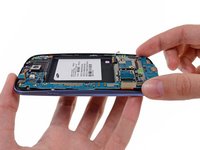
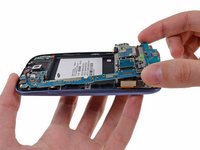
      • Carefully lift the bottom of the motherboard assembly away from the front panel assembly.

      • Remove the motherboard assembly from the front panel assembly, minding any cables that may snag on it.

      crwdns2952109:0crwdne2952109:0

      crwdns2917038:0crwdne2917038:0

    1. Samsung Galaxy S III Front Panel Assembly Replacement, Front-Facing Camera: crwdns2935265:023crwdnd2935265:01crwdnd2935265:01crwdne2935265:0
      • Remove the single 2.0 mm Phillips screw securing the front-facing camera bracket to the front panel.

      crwdns2952109:0crwdne2952109:0

      crwdns2917038:0crwdne2917038:0

    2. Samsung Galaxy S III Front Panel Assembly Replacement: crwdns2935265:024crwdnd2935265:01crwdnd2935265:02crwdne2935265:0 Samsung Galaxy S III Front Panel Assembly Replacement: crwdns2935265:024crwdnd2935265:02crwdnd2935265:02crwdne2935265:0
      crwdns2935267:0crwdne2935267:0
      Tweezers
      $4.99
      • Use a pair of tweezers to lift the front-facing camera/ambient light sensor/rear microphone assembly out from its socket in the front panel assembly.

      crwdns2952109:0crwdne2952109:0

      crwdns2917038:0crwdne2917038:0

    1. Samsung Galaxy S III Front Panel Assembly Replacement, Front Panel Assembly: crwdns2935265:025crwdnd2935265:01crwdnd2935265:02crwdne2935265:0 Samsung Galaxy S III Front Panel Assembly Replacement, Front Panel Assembly: crwdns2935265:025crwdnd2935265:02crwdnd2935265:02crwdne2935265:0
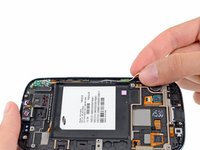
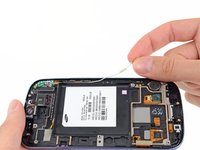
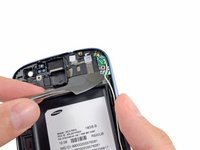
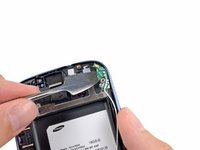
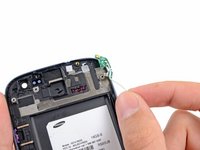
      • Peel the antenna cable up from its channel in the front panel assembly.

      • Do not completely remove the antenna cable, it is still connected to the antenna board.

      crwdns2952109:0crwdne2952109:0

      crwdns2917038:0crwdne2917038:0

    2. Samsung Galaxy S III Front Panel Assembly Replacement: crwdns2935265:026crwdnd2935265:01crwdnd2935265:02crwdne2935265:0 Samsung Galaxy S III Front Panel Assembly Replacement: crwdns2935265:026crwdnd2935265:02crwdnd2935265:02crwdne2935265:0
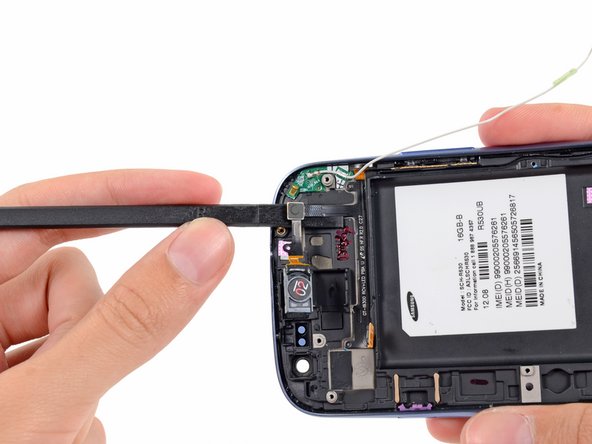
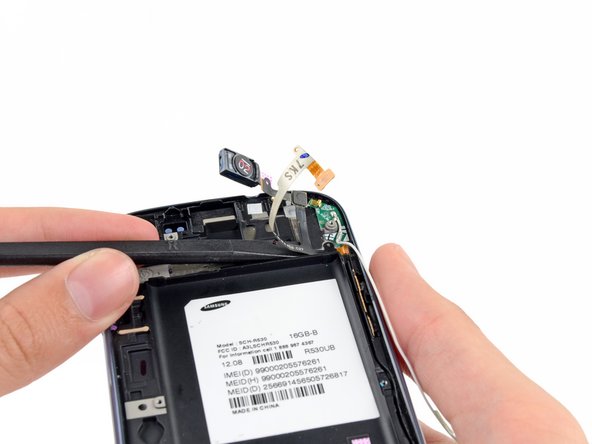
      • Wedge the tip of a spudger underneath the earpiece speaker and pry the earpiece speaker out of its recess in the front panel assembly.

      crwdns2952109:0crwdne2952109:0

      crwdns2917038:0crwdne2917038:0

    3. Samsung Galaxy S III Front Panel Assembly Replacement: crwdns2935265:027crwdnd2935265:01crwdnd2935265:01crwdne2935265:0
      • Use the flat edge of a spudger to peel the top portion of the earpiece/volume buttons/ambient light sensor ribbon cable from the front panel assembly.

      crwdns2952109:0crwdne2952109:0

      crwdns2917038:0crwdne2917038:0

    4. Samsung Galaxy S III Front Panel Assembly Replacement: crwdns2935265:028crwdnd2935265:01crwdnd2935265:02crwdne2935265:0 Samsung Galaxy S III Front Panel Assembly Replacement: crwdns2935265:028crwdnd2935265:02crwdnd2935265:02crwdne2935265:0
      • Carefully wedge the flat edge of a spudger underneath the ambient light sensor.

      • Continue peeling the earpiece/volume buttons/ambient light sensor ribbon cable up off the front panel assembly.

      crwdns2952109:0crwdne2952109:0

      crwdns2917038:0crwdne2917038:0

    5. Samsung Galaxy S III Front Panel Assembly Replacement: crwdns2935265:029crwdnd2935265:01crwdnd2935265:02crwdne2935265:0 Samsung Galaxy S III Front Panel Assembly Replacement: crwdns2935265:029crwdnd2935265:02crwdnd2935265:02crwdne2935265:0
      • Insert the flat edge of a spudger underneath the earpiece/volume buttons/ambient light sensor ribbon cable connector.

      • Gently run the spudger across to continue peeling the the earpiece/volume buttons/ambient light sensor ribbon cable from the front panel assembly.

      crwdns2952109:0crwdne2952109:0

      crwdns2917038:0crwdne2917038:0

    6. Samsung Galaxy S III Front Panel Assembly Replacement: crwdns2935265:030crwdnd2935265:01crwdnd2935265:03crwdne2935265:0 Samsung Galaxy S III Front Panel Assembly Replacement: crwdns2935265:030crwdnd2935265:02crwdnd2935265:03crwdne2935265:0 Samsung Galaxy S III Front Panel Assembly Replacement: crwdns2935265:030crwdnd2935265:03crwdnd2935265:03crwdne2935265:0
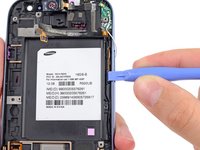
      • Insert a plastic opening tool in between the the buttons ribbon cable and the volume button.

      • Push the volume out of its recess in the front panel assembly.

      • Lift and remove the volume button out of the phone.

      crwdns2952109:0crwdne2952109:0

      crwdns2917038:0crwdne2917038:0

    7. Samsung Galaxy S III Front Panel Assembly Replacement: crwdns2935265:031crwdnd2935265:01crwdnd2935265:02crwdne2935265:0 Samsung Galaxy S III Front Panel Assembly Replacement: crwdns2935265:031crwdnd2935265:02crwdnd2935265:02crwdne2935265:0
      • Wedge the flat edge of a plastic opening tool in between the the earpiece/buttons/ambient light sensor ribbon cable and run it down to loosen the adhesive securing the ribbon cable.

      crwdns2952109:0crwdne2952109:0

      crwdns2917038:0crwdne2917038:0

    8. Samsung Galaxy S III Front Panel Assembly Replacement: crwdns2935265:032crwdnd2935265:01crwdnd2935265:01crwdne2935265:0
      • Grasp and remove the earpiece/buttons/ambient light sensor ribbon cable out of the phone.

      crwdns2952109:0crwdne2952109:0

      crwdns2917038:0crwdne2917038:0

    9. Samsung Galaxy S III Front Panel Assembly Replacement: crwdns2935265:033crwdnd2935265:01crwdnd2935265:03crwdne2935265:0 Samsung Galaxy S III Front Panel Assembly Replacement: crwdns2935265:033crwdnd2935265:02crwdnd2935265:03crwdne2935265:0 Samsung Galaxy S III Front Panel Assembly Replacement: crwdns2935265:033crwdnd2935265:03crwdnd2935265:03crwdne2935265:0
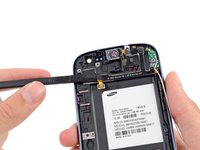
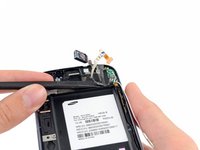
      • Use a metal spudger to carefully peel the antenna board off the front panel assembly.

      • Lift and remove the antenna board out of the phone.

      crwdns2952109:0crwdne2952109:0

      crwdns2917038:0crwdne2917038:0

    10. Samsung Galaxy S III Front Panel Assembly Replacement: crwdns2935265:034crwdnd2935265:01crwdnd2935265:03crwdne2935265:0 Samsung Galaxy S III Front Panel Assembly Replacement: crwdns2935265:034crwdnd2935265:02crwdnd2935265:03crwdne2935265:0 Samsung Galaxy S III Front Panel Assembly Replacement: crwdns2935265:034crwdnd2935265:03crwdnd2935265:03crwdne2935265:0
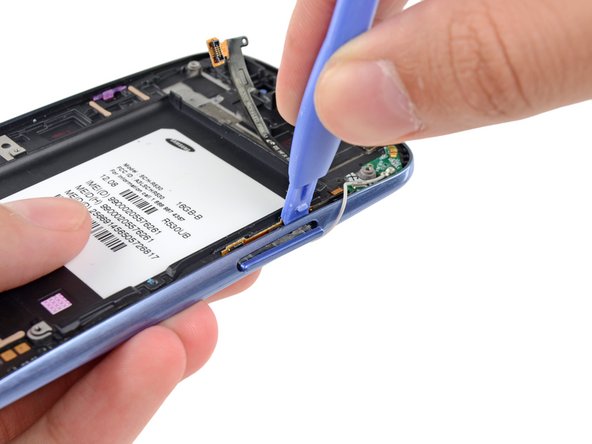
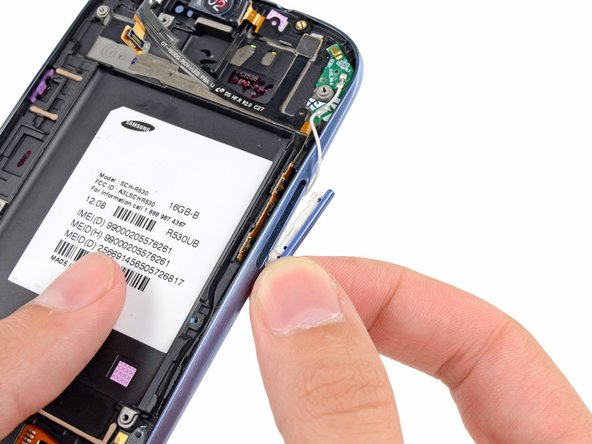
      • Push the power button out of its recess in the front panel assembly.

      • Remove the power button from the front panel assembly.

      crwdns2952109:0crwdne2952109:0

      crwdns2917038:0crwdne2917038:0

    11. Samsung Galaxy S III Front Panel Assembly Replacement: crwdns2935265:035crwdnd2935265:01crwdnd2935265:02crwdne2935265:0 Samsung Galaxy S III Front Panel Assembly Replacement: crwdns2935265:035crwdnd2935265:02crwdnd2935265:02crwdne2935265:0
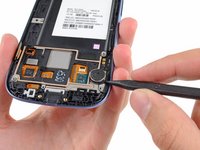
      • Use the tip of a spudger to pry the vibrator out of its recess in the front panel assembly.

      crwdns2952109:0crwdne2952109:0

      crwdns2917038:0crwdne2917038:0

    12. Samsung Galaxy S III Front Panel Assembly Replacement: crwdns2935265:036crwdnd2935265:01crwdnd2935265:02crwdne2935265:0 Samsung Galaxy S III Front Panel Assembly Replacement: crwdns2935265:036crwdnd2935265:02crwdnd2935265:02crwdne2935265:0
      • Use the tip of a spudger to peel the vibrator assembly off the front panel assembly.

      crwdns2952109:0crwdne2952109:0

      crwdns2917038:0crwdne2917038:0

    13. Samsung Galaxy S III Front Panel Assembly Replacement: crwdns2935265:037crwdnd2935265:01crwdnd2935265:01crwdne2935265:0
      • Lift and remove the vibrator out of the front panel assembly.

      crwdns2952109:0crwdne2952109:0

      crwdns2917038:0crwdne2917038:0

    14. Samsung Galaxy S III Front Panel Assembly Replacement: crwdns2935265:038crwdnd2935265:01crwdnd2935265:01crwdne2935265:0
      • Front panel assembly remains.

      • If you are replacing the front panel assembly with a new one, don't forget to transfer all the parts you removed to your new front panel assembly.

      crwdns2952109:0crwdne2952109:0

      crwdns2917038:0crwdne2917038:0

crwdns2915888:0crwdne2915888:0

To reassemble your device, follow these instructions in reverse order.

crwdns2935221:0crwdne2935221:0

crwdns2935229:0212crwdne2935229:0

Walter Galan

711,002 crwdns2915208:0crwdne2915208:0

crwdns2935297:01,203crwdne2935297:0

crwdns2947412:014crwdne2947412:0

Hi,

I wonder if this is guide to actually replace broken digitizer - if we have full Digitizer/LCD assembly?
Thanks

Akki S - crwdns2934203:0crwdne2934203:0 crwdns2950251:0crwdne2950251:0
I've just watched the video and... that was pure pleasure to watch repairer. She's professional and beautiful!

paczor - crwdns2934203:0crwdne2934203:0 crwdns2950251:0crwdne2950251:0
Thanks. This is the second time I've used this guide.

William Geisweit - crwdns2934203:0crwdne2934203:0 crwdns2950251:0crwdne2950251:0

And how Ill install thenew screen ?

Lea Efremov - crwdns2934203:0crwdne2934203:0 crwdns2950251:0crwdne2950251:0

Brilliant Step-By-Step guide. My phone needed new digitizer as just a black screen was showing when turned on, must have happened from a drop. I bought the digitizer screen combo from ebay and used this guide to dress across the components. Worked first time! There are a couple of other spongy or supportive rubber pieces around certain components that were in the original phone so I transferred those also, I guess they are there just to ensure tight connections etc. Absolute lifesaver!

James Lainchbury - crwdns2934203:0crwdne2934203:0 crwdns2950251:0crwdne2950251:0

crwdns2917038:0crwdne2917038:0

crwdns2936625:0crwdne2936625:0:

crwdns2936751:024crwdne2936751:0 10

crwdns2936753:07crwdne2936753:0 33

crwdns2936753:030crwdne2936753:0 79

crwdns2942667:0crwdne2942667:0 277,017