crwdns2933423:0crwdne2933423:0

Samsung Galaxy Note Pro 12.2 SD Port Replacement

crwdns2942213:0crwdne2942213:0

  1. Samsung Galaxy Note Pro 12.2 SD Port Replacement, SD Port: crwdns2935265:01crwdnd2935265:01crwdnd2935265:01crwdne2935265:0
    • Turn off your device before starting your repair.

    • Carefully remove the back cover with the plastic opening tool.

    • It is best to start with one corner and work your way around the device slowly.

  2. Samsung Galaxy Note Pro 12.2 SD Port Replacement: crwdns2935265:02crwdnd2935265:01crwdnd2935265:02crwdne2935265:0 Samsung Galaxy Note Pro 12.2 SD Port Replacement: crwdns2935265:02crwdnd2935265:02crwdnd2935265:02crwdne2935265:0
    • Pop up the orange tab connected to the SD port with the plastic opening tool.

  3. Samsung Galaxy Note Pro 12.2 SD Port Replacement: crwdns2935265:03crwdnd2935265:01crwdnd2935265:02crwdne2935265:0 Samsung Galaxy Note Pro 12.2 SD Port Replacement: crwdns2935265:03crwdnd2935265:02crwdnd2935265:02crwdne2935265:0
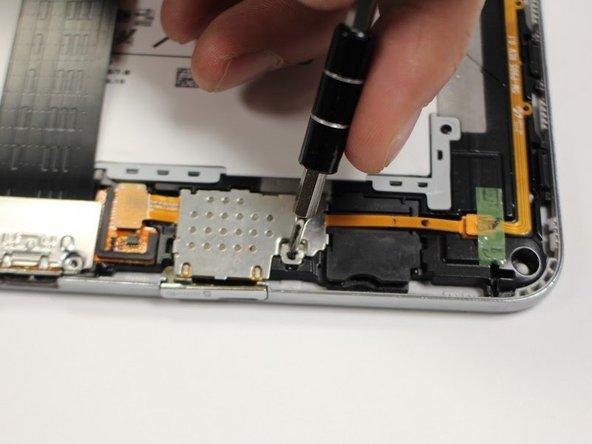
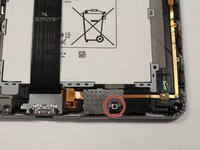
    • Remove the one 3mm Phillips #00 screw connected to the SD port.

  4. Samsung Galaxy Note Pro 12.2 SD Port Replacement: crwdns2935265:04crwdnd2935265:01crwdnd2935265:02crwdne2935265:0 Samsung Galaxy Note Pro 12.2 SD Port Replacement: crwdns2935265:04crwdnd2935265:02crwdnd2935265:02crwdne2935265:0
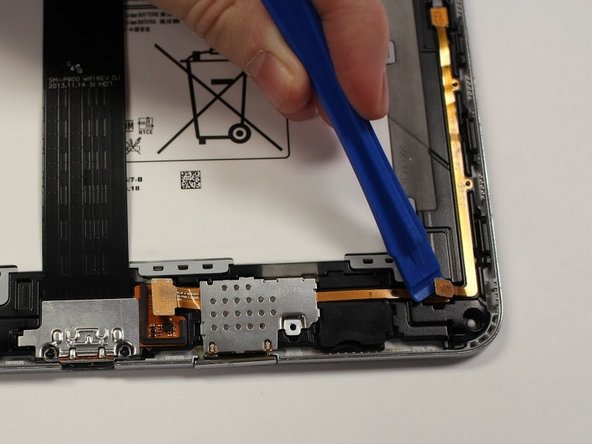
    • Pop open the orange wire tab connected to the SD port with the plastic opening tool.

    • If there is tape covering your tab, remove it with the tweezers before you pop open the tab.

  5. Samsung Galaxy Note Pro 12.2 SD Port Replacement: crwdns2935265:05crwdnd2935265:01crwdnd2935265:02crwdne2935265:0 Samsung Galaxy Note Pro 12.2 SD Port Replacement: crwdns2935265:05crwdnd2935265:02crwdnd2935265:02crwdne2935265:0
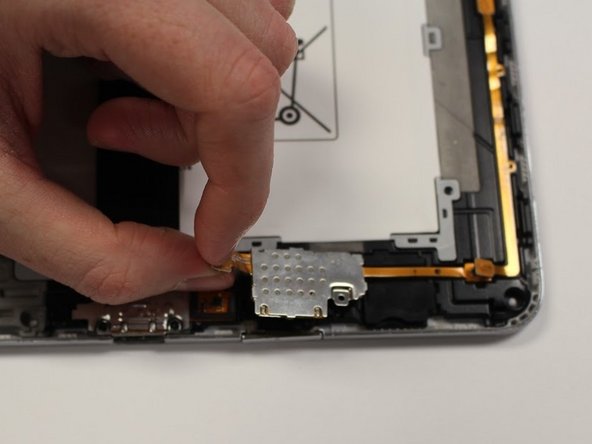
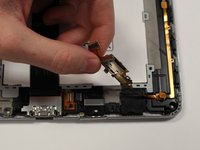
    • Using the orange tab, pull the SD port up and away from the device.

  6. Samsung Galaxy Note Pro 12.2 SD Port Replacement: crwdns2935265:06crwdnd2935265:01crwdnd2935265:01crwdne2935265:0
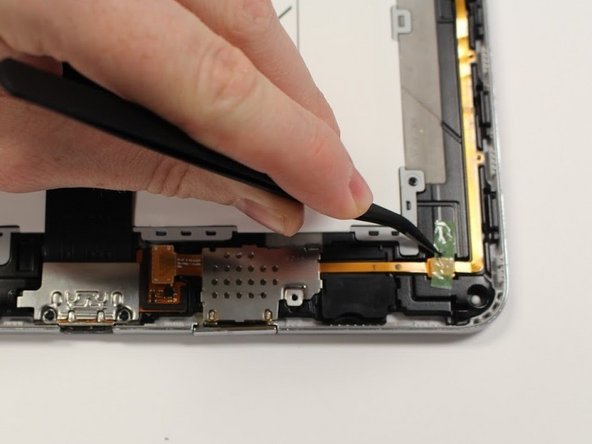
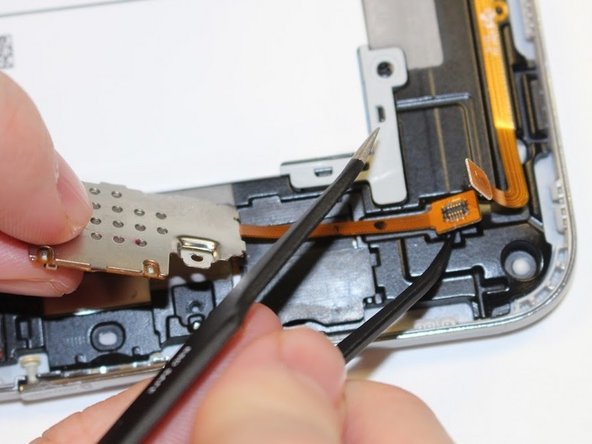
    • Using the plastic end of the tweezers pop up the orange tab connecting the SD port to the device.

    • There is a little indent below the orange tab to help get under this piece. It may be difficult to remove, push up hard.

crwdns2915888:0crwdne2915888:0

To reassemble your device, follow these instructions in reverse order.

Tina Kong

crwdns2935283:009/22/17crwdne2935283:0

1,278 crwdns2915208:0crwdne2915208:0

crwdns2935297:05crwdne2935297:0

crwdns2915084:0crwdne2915084:0

Central Washington University, Team S1-G4, Pengilly Fall 2017 crwdns2935289:0Central Washington University, Team S1-G4, Pengilly Fall 2017crwdne2935289:0

CWU-PENGILLY-F17S1G4

crwdns2931471:04crwdne2931471:0

crwdns2935297:010crwdne2935297:0

crwdns2944067:00crwdne2944067:0

crwdns2917038:0crwdne2917038:0

crwdns2936625:0crwdne2936625:0:

crwdns2936751:024crwdne2936751:0 0

crwdns2936753:07crwdne2936753:0 0

crwdns2936753:030crwdne2936753:0 0

crwdns2942667:0crwdne2942667:0 489