crwdns2915892:0crwdne2915892:0
If your charging port does not seem to be working properly when you plug in your Samsung Galaxy Note 10, this guide should help you solve this issue. As with any electronic device, be sure to wear anti-static gloves while performing repairs on the device.
crwdns2942213:0crwdne2942213:0
-
-
This is the back of the device and where you will begin to take it apart.
-
It is necessary to remove the silver piece covering the camera first before removing the bigger back piece.
-
Use a metal spudger to pop up the corner of the silver piece.
-
Use the plastic opening tools to pry along the edges of the silver piece.
-
Lift up the silver piece to reveal the rest of the back cover.
-
-
-
-
Remove the three 5mm screws indicated by the red circles with the Philips #00 Screwdriver.
-
Using the plastic opening tools pry along the bottom of the device, moving to the sides of the cover to the top.
-
Remove the back cover.
-
-
-
Remove the three 2 mm screws indicated by the red circles with the Phillips #00 screwdriver.
-
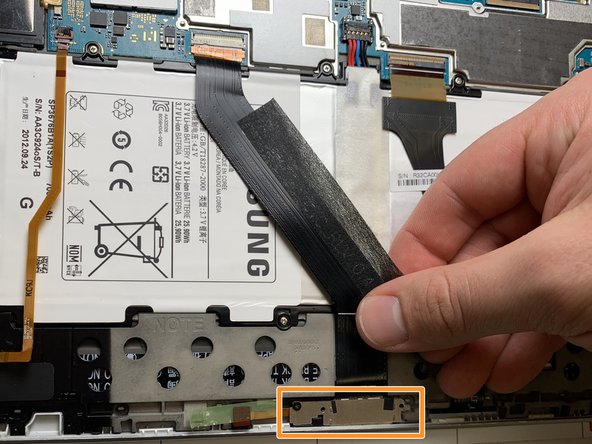
Pull the charging port indicated by the orange rectangle in picture two out from its position.
-
Unplug the black motherboard connector as indicated in the third picture.
-
Replace the charging port with a similar model.
-


To reassemble your device, follow these instructions in reverse order.
To reassemble your device, follow these instructions in reverse order.

crwdns2915084:0crwdne2915084:0

IUPUI, Team S3-G1, Harley Fall 2018 crwdns2935289:0IUPUI, Team S3-G1, Harley Fall 2018crwdne2935289:0
IUPUI-HARLEY-F18S3G1
crwdns2931471:03crwdne2931471:0
crwdns2935297:02crwdne2935297:0