crwdns2933423:0crwdne2933423:0

Samsung Galaxy Mega 2 Screen & Digitizer Assembly Replacement

crwdns2942213:0crwdne2942213:0

  1. Samsung Galaxy Mega 2 Screen & Digitizer Assembly Replacement, Screen & Digitizer Assembly: crwdns2935265:01crwdnd2935265:01crwdnd2935265:01crwdne2935265:0
    • Before beginning, make sure the phone is turned off.

    • On the back of the phone, find the slot at the charging port located at the bottom of the phone.

    • Either insert the plastic opening tool or use your fingernail to pull up on the back cover.

    • Once the corner is released, slide your finger around the outside until the back cover releases.

  2. Samsung Galaxy Mega 2 Screen & Digitizer Assembly Replacement: crwdns2935265:02crwdnd2935265:01crwdnd2935265:02crwdne2935265:0 Samsung Galaxy Mega 2 Screen & Digitizer Assembly Replacement: crwdns2935265:02crwdnd2935265:02crwdnd2935265:02crwdne2935265:0
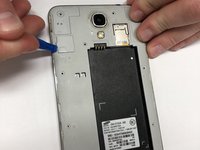
    • Locate the battery.

    • Insert fingernail or plastic opening tool into the slot on the bottom of the battery and gently lift up.

    • Remove the battery.

  3. Samsung Galaxy Mega 2 Screen & Digitizer Assembly Replacement: crwdns2935265:03crwdnd2935265:01crwdnd2935265:03crwdne2935265:0 Samsung Galaxy Mega 2 Screen & Digitizer Assembly Replacement: crwdns2935265:03crwdnd2935265:02crwdnd2935265:03crwdne2935265:0 Samsung Galaxy Mega 2 Screen & Digitizer Assembly Replacement: crwdns2935265:03crwdnd2935265:03crwdnd2935265:03crwdne2935265:0
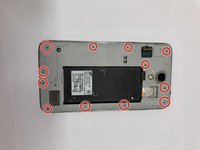
    • Use a phillips head PH000 and remove all 13, 1.4 mm visible screws.

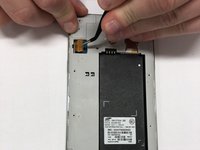
    • Using the pry tool, carefully pop the Digitizer cover off the device.

    • Use the pry tool to disconnect the digitizer

  4. Samsung Galaxy Mega 2 Screen & Digitizer Assembly Replacement: crwdns2935265:04crwdnd2935265:01crwdnd2935265:02crwdne2935265:0 Samsung Galaxy Mega 2 Screen & Digitizer Assembly Replacement: crwdns2935265:04crwdnd2935265:02crwdnd2935265:02crwdne2935265:0
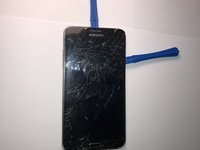
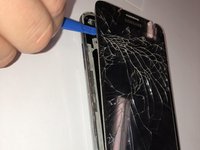
    • Insert the pry tool along the side of the device, then work your way around the borders of the screen, separating the screen from the rear assembly frame.

    • Be careful and do not lift the screen completely off yet, leave the screen at an angle.

    • Use the heat gun to heat up the bottom to loosen the adhesive from the menu and back buttons.

    • Once heated, gently pull the screen upward.

    • Make sure that the buttons are separating from the adhesive.

  5. Samsung Galaxy Mega 2 Screen & Digitizer Assembly Replacement: crwdns2935265:05crwdnd2935265:01crwdnd2935265:01crwdne2935265:0
    • Now, seperate the screen from the outside frame of the phone (the bezel).

crwdns2915888:0crwdne2915888:0

To reassemble your device, follow these instructions in reverse order.

crwdns2935229:03crwdne2935229:0

Taylor Powell

crwdns2935283:009/08/17crwdne2935283:0

753 crwdns2915208:0crwdne2915208:0

crwdns2935297:05crwdne2935297:0

crwdns2915084:0crwdne2915084:0

Western Carolina University, Team S1-G6, Virtue Fall 2017 crwdns2935289:0Western Carolina University, Team S1-G6, Virtue Fall 2017crwdne2935289:0

WCU-VIRTUE-F17S1G6

crwdns2931471:04crwdne2931471:0

crwdns2935297:05crwdne2935297:0

crwdns2917034:0crwdne2917034:0

crwdns2917038:0crwdne2917038:0

crwdns2936625:0crwdne2936625:0:

crwdns2936751:024crwdne2936751:0 0

crwdns2936753:07crwdne2936753:0 6

crwdns2936753:030crwdne2936753:0 17

crwdns2942667:0crwdne2942667:0 1,269