crwdns2942213:0crwdne2942213:0
-
-
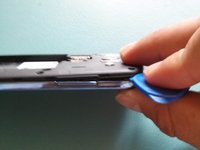
Flip the phone over and use your fingernail or an opening tool to remove the back cover.
-
-
-
Remove the 9 Phillips #00 screws from the mid-frame.
-
-
-
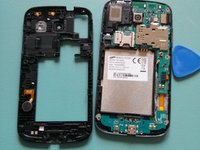
Use an opening pick to pry off the mid frame.
-
-
-
-
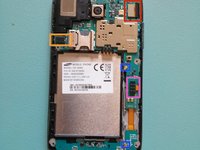
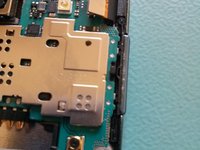
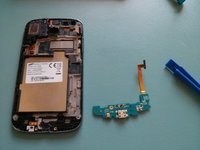
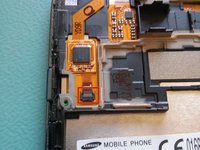
Disconnect the following ribbon cables from the motherboard:
-
The digitizer and LCD assembly.
-
Headphone Jack and Earpiece.
-
Daughter board flex cable.
-
Antenna connector.
-
-
-
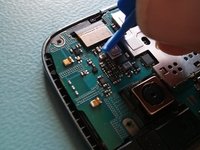
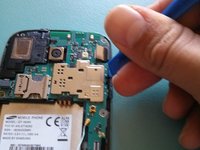
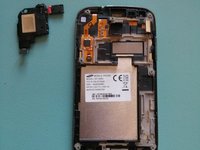
Use a plastic opening tool to remove the motherboard.
-
-
-
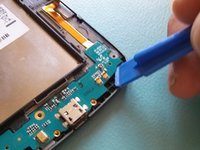
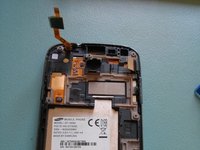
Remove the single Phillips screw that secures the daughterboard.
-
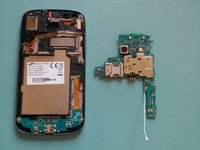
Remove the daughterboard.
-
-
-
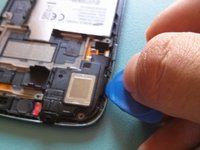
Use an opening pick to remove the audio jack.
-
-
-
Disconnect the digitizer's ribbon cable.
-
-
-
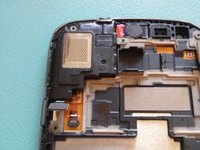
Push the earpiece mesh outwards to release it.
-
-
-
Use a heat gun or an iOpener to heat the digitizer and soften the glue securing it.
-
Use an opening pick to break up the glue around the edges of the digitizer.
-
You may apply more heat if needed.
-
Remove the digitizer and any broken glass.
-


To reassemble your device, follow these instructions in reverse order.
crwdns2935221:0crwdne2935221:0
crwdns2935229:090crwdne2935229:0
crwdns2947412:011crwdne2947412:0
yes, but where can I buy the screen replacement?
I bought it on Ebay...
Comment root galaxy core prime g361f android 5.1.1
Follow the instructions in reverse order? Do you need glue for the new screen? What kind of glue? How is it applied?
Nor do they show how the new digitizer plugs in...