crwdns2942213:0crwdne2942213:0
-
-
Begin removing the 3/16" screws for the device.
-
-
-
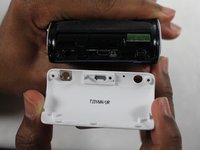
Turn the device and remove the additional 3/16" screws.
-
-
-
Turn the device and remove the additional 3/16" screw.
-
-
-
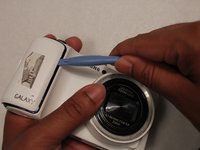
Using the plastic opening tools, pry open the camera from the bottom.
-
-
-
-
Gently pull the connector away from the motherboard.
-
-
-
Unscrew the motherboard's screws. There are 4 3/32" screws and 3 5/32" screws.
-
-
-
Unscrew the lens' screws. There are 1 black 4/32" screw, 3 3/16" black screws, and 2 white 5/32" screws.
-
-
-
Pull these connectors away from motherboard.
-
-
-
Lift the motherboard and lens out of the case.
-
-
-
Remove all the screws circled. There is 1 1/8" screw by the flash, 1 9/32" screw that holds the flash button, 2 5/32" screw that is on the grey frame for the flash, and 2 5/32" screws that holds the cable frames on the top left.
-
-
-
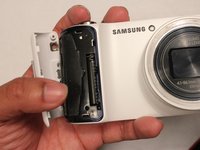
Unscrew the 3 5/32" screws that cover the battery plate.
-
-
-
The black plates on the other side can be removed after these screws.
-
-
-
Pull the flash and battery case out of the device.
-


To reassemble your device, follow these instructions in reverse order.
To reassemble your device, follow these instructions in reverse order.
crwdns2935221:0crwdne2935221:0
crwdns2935229:013crwdne2935229:0
crwdns2915084:0crwdne2915084:0

USF Tampa, Team 1-3, Sullivan Winter 2015 crwdns2935289:0USF Tampa, Team 1-3, Sullivan Winter 2015crwdne2935289:0
USFT-SULLIVAN-W15S1G3
crwdns2931471:03crwdne2931471:0
crwdns2935297:04crwdne2935297:0