crwdns2933423:0crwdne2933423:0

Samsung Chromebook Series 3 Motherboard Replacement

crwdns2942213:0crwdne2942213:0

  1. Samsung Chromebook Series 3 Motherboard Replacement, Bottom Cover: crwdns2935265:01crwdnd2935265:01crwdnd2935265:03crwdne2935265:0 Samsung Chromebook Series 3 Motherboard Replacement, Bottom Cover: crwdns2935265:01crwdnd2935265:02crwdnd2935265:03crwdne2935265:0 Samsung Chromebook Series 3 Motherboard Replacement, Bottom Cover: crwdns2935265:01crwdnd2935265:03crwdnd2935265:03crwdne2935265:0
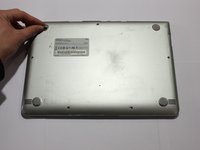
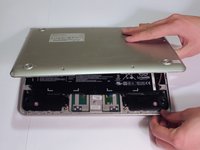
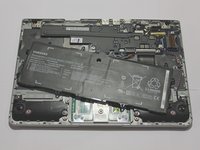
    • Lay the Chromebook down so that the bottom cover is facing up.

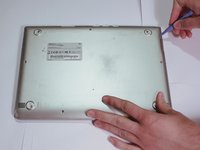
    • Remove the rubber feet on the four corners of the Chromebook in order to get to the screws underneath. They are stuck on with an adhesive.

  2. Samsung Chromebook Series 3 Motherboard Replacement: crwdns2935265:02crwdnd2935265:01crwdnd2935265:03crwdne2935265:0 Samsung Chromebook Series 3 Motherboard Replacement: crwdns2935265:02crwdnd2935265:02crwdnd2935265:03crwdne2935265:0 Samsung Chromebook Series 3 Motherboard Replacement: crwdns2935265:02crwdnd2935265:03crwdnd2935265:03crwdne2935265:0
    • Remove the nine 4.7 mm screws on the bottom cover using a Phillips #00 screwdriver.

  3. Samsung Chromebook Series 3 Motherboard Replacement: crwdns2935265:03crwdnd2935265:01crwdnd2935265:03crwdne2935265:0 Samsung Chromebook Series 3 Motherboard Replacement: crwdns2935265:03crwdnd2935265:02crwdnd2935265:03crwdne2935265:0 Samsung Chromebook Series 3 Motherboard Replacement: crwdns2935265:03crwdnd2935265:03crwdnd2935265:03crwdne2935265:0
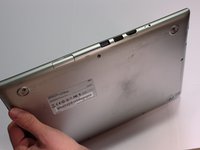
    • Pry up the plastic strip on the back of the Chromebook using a plastic opening tool.

    • It is not necessary to remove it completely. It just needs to be separated from the bottom cover.

  4. Samsung Chromebook Series 3 Motherboard Replacement: crwdns2935265:04crwdnd2935265:01crwdnd2935265:03crwdne2935265:0 Samsung Chromebook Series 3 Motherboard Replacement: crwdns2935265:04crwdnd2935265:02crwdnd2935265:03crwdne2935265:0 Samsung Chromebook Series 3 Motherboard Replacement: crwdns2935265:04crwdnd2935265:03crwdnd2935265:03crwdne2935265:0
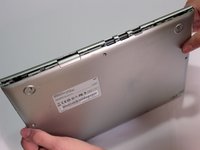
    • Pry off the bottom cover using a plastic opening tool.

  5. Samsung Chromebook Series 3 Motherboard Replacement, Battery: crwdns2935265:05crwdnd2935265:01crwdnd2935265:03crwdne2935265:0 Samsung Chromebook Series 3 Motherboard Replacement, Battery: crwdns2935265:05crwdnd2935265:02crwdnd2935265:03crwdne2935265:0 Samsung Chromebook Series 3 Motherboard Replacement, Battery: crwdns2935265:05crwdnd2935265:03crwdnd2935265:03crwdne2935265:0
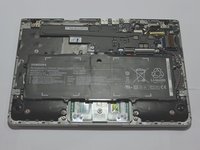
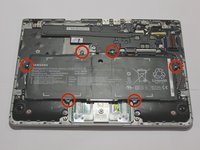
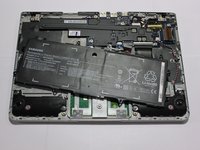
    • Remove six 3.5 mm screws holding the battery using a Phillips #00 screwdriver.

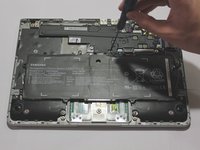
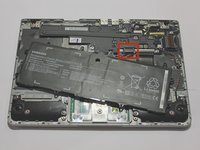
    • Pull out the battery partway in order to easily get to the battery connector.

  6. Samsung Chromebook Series 3 Motherboard Replacement: crwdns2935265:06crwdnd2935265:01crwdnd2935265:03crwdne2935265:0 Samsung Chromebook Series 3 Motherboard Replacement: crwdns2935265:06crwdnd2935265:02crwdnd2935265:03crwdne2935265:0 Samsung Chromebook Series 3 Motherboard Replacement: crwdns2935265:06crwdnd2935265:03crwdnd2935265:03crwdne2935265:0
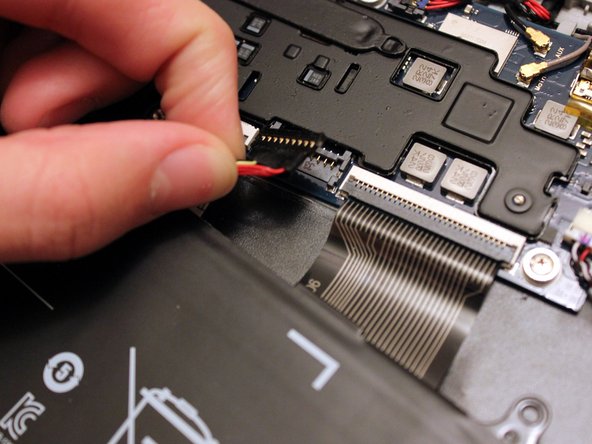
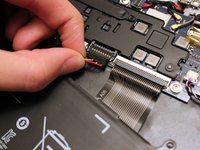
    • Disconnect the battery connector by pulling straight up at its base.

    • When reassembling, simply position the connector above it's original place, and push down.

  7. Samsung Chromebook Series 3 Motherboard Replacement: crwdns2935265:07crwdnd2935265:01crwdnd2935265:02crwdne2935265:0 Samsung Chromebook Series 3 Motherboard Replacement: crwdns2935265:07crwdnd2935265:02crwdnd2935265:02crwdne2935265:0
    • You can now remove the battery.

  8. Samsung Chromebook Series 3 Motherboard Replacement, Motherboard: crwdns2935265:08crwdnd2935265:01crwdnd2935265:03crwdne2935265:0 Samsung Chromebook Series 3 Motherboard Replacement, Motherboard: crwdns2935265:08crwdnd2935265:02crwdnd2935265:03crwdne2935265:0 Samsung Chromebook Series 3 Motherboard Replacement, Motherboard: crwdns2935265:08crwdnd2935265:03crwdnd2935265:03crwdne2935265:0
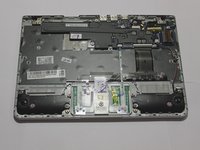
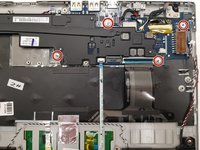
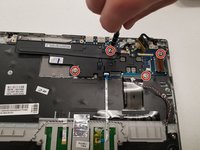
    • Unscrew the four 3.1 mm screws holding the motherboard with a Phillips #00 screwdriver.

  9. Samsung Chromebook Series 3 Motherboard Replacement: crwdns2935265:09crwdnd2935265:01crwdnd2935265:03crwdne2935265:0 Samsung Chromebook Series 3 Motherboard Replacement: crwdns2935265:09crwdnd2935265:02crwdnd2935265:03crwdne2935265:0 Samsung Chromebook Series 3 Motherboard Replacement: crwdns2935265:09crwdnd2935265:03crwdnd2935265:03crwdne2935265:0
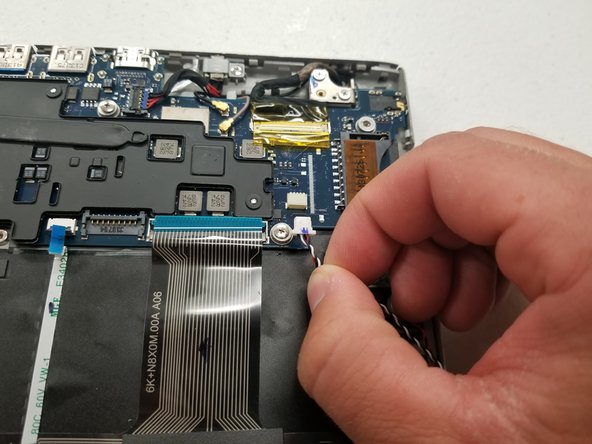
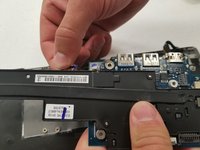
    • The audio cable can be removed by simply pulling gently.

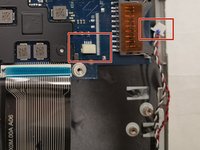
    • Use the iFixit opening tool to pop out the 2 antennae lines from the motherboard.

  10. Samsung Chromebook Series 3 Motherboard Replacement: crwdns2935265:010crwdnd2935265:01crwdnd2935265:03crwdne2935265:0 Samsung Chromebook Series 3 Motherboard Replacement: crwdns2935265:010crwdnd2935265:02crwdnd2935265:03crwdne2935265:0 Samsung Chromebook Series 3 Motherboard Replacement: crwdns2935265:010crwdnd2935265:03crwdnd2935265:03crwdne2935265:0
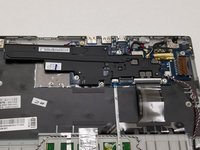
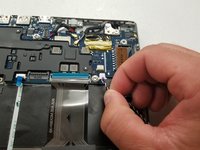
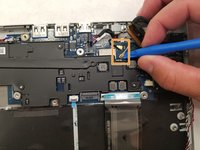
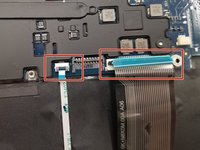
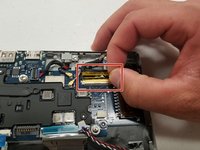
    • Now, disconnect the keyboard and trackpad ribbon cables.

    • This requires lifting the lever securing the cables to free them, and then gently pulling them out.

  11. Samsung Chromebook Series 3 Motherboard Replacement: crwdns2935265:011crwdnd2935265:01crwdnd2935265:03crwdne2935265:0 Samsung Chromebook Series 3 Motherboard Replacement: crwdns2935265:011crwdnd2935265:02crwdnd2935265:03crwdne2935265:0 Samsung Chromebook Series 3 Motherboard Replacement: crwdns2935265:011crwdnd2935265:03crwdnd2935265:03crwdne2935265:0
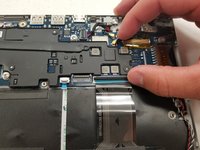
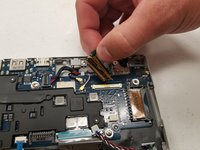
    • The screen cable is secure in place by a lever. Lift the lever to release it, then gently pull it out.

  12. Samsung Chromebook Series 3 Motherboard Replacement: crwdns2935265:012crwdnd2935265:01crwdnd2935265:01crwdne2935265:0
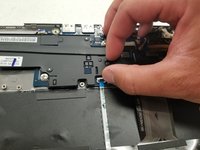
    • This cable comes out by just pulling gently.

  13. Samsung Chromebook Series 3 Motherboard Replacement: crwdns2935265:013crwdnd2935265:01crwdnd2935265:02crwdne2935265:0 Samsung Chromebook Series 3 Motherboard Replacement: crwdns2935265:013crwdnd2935265:02crwdnd2935265:02crwdne2935265:0
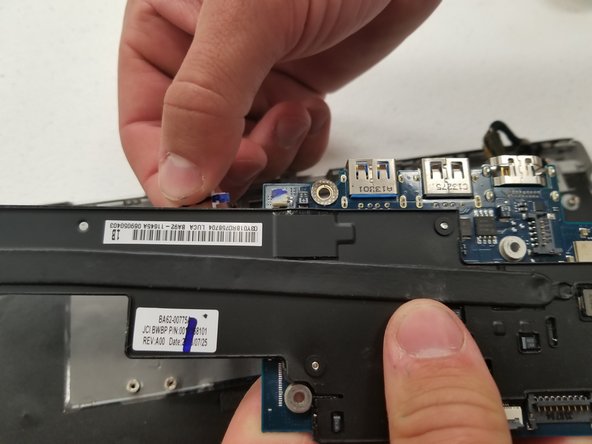
    • Lift the motherboard out of place and pull out the CMOS battery cable.

  14. Samsung Chromebook Series 3 Motherboard Replacement: crwdns2935265:014crwdnd2935265:01crwdnd2935265:02crwdne2935265:0 Samsung Chromebook Series 3 Motherboard Replacement: crwdns2935265:014crwdnd2935265:02crwdnd2935265:02crwdne2935265:0
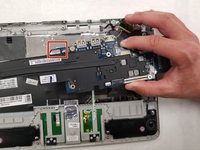
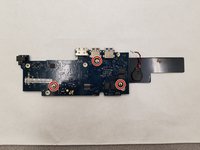
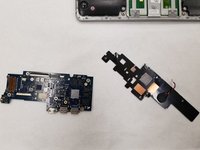
    • Finally, remove the three 3.1 mm screws with the Phillips #00 screwdriver to remove the plastic cover and completely free the motherboard.

crwdns2915888:0crwdne2915888:0

To reassemble your device, follow these instructions in reverse order.

crwdns2935229:03crwdne2935229:0

Tyler Schultz

crwdns2935283:003/25/19crwdne2935283:0

528 crwdns2915208:0crwdne2915208:0

crwdns2935297:03crwdne2935297:0

crwdns2915084:0crwdne2915084:0

IUPUI, Team S2-G1, Henning Spring 2019 crwdns2935289:0IUPUI, Team S2-G1, Henning Spring 2019crwdne2935289:0

IUPUI-HENNING-S19S2G1

crwdns2931471:03crwdne2931471:0

crwdns2935297:06crwdne2935297:0

crwdns2944067:02crwdne2944067:0

Please tell me what i can do to put a cmos back from scratch i understand how to wire and tape the cmos and i see where to connect it but i dont have the connector and am wondering if i solder negative where positive should go by accident am i goin to fry the mother board?

MrAaron Camethesameasalametame - crwdns2934203:0crwdne2934203:0

Why is it so important also what is the meaning of it? Like are these contraptions built with almost enough power but always need a tiny bit more or whats the deal with a cmos?

MrAaron Camethesameasalametame -

crwdns2917038:0crwdne2917038:0

crwdns2936625:0crwdne2936625:0:

crwdns2936751:024crwdne2936751:0 0

crwdns2936753:07crwdne2936753:0 2

crwdns2936753:030crwdne2936753:0 18

crwdns2942667:0crwdne2942667:0 1,662