crwdns2933423:0crwdne2933423:0

Samsung Chromebook Series 3 Bottom Cover Replacement

crwdns2942213:0crwdne2942213:0

  1. Samsung Chromebook Series 3 Bottom Cover Replacement, Bottom Cover: crwdns2935265:01crwdnd2935265:01crwdnd2935265:03crwdne2935265:0 Samsung Chromebook Series 3 Bottom Cover Replacement, Bottom Cover: crwdns2935265:01crwdnd2935265:02crwdnd2935265:03crwdne2935265:0 Samsung Chromebook Series 3 Bottom Cover Replacement, Bottom Cover: crwdns2935265:01crwdnd2935265:03crwdnd2935265:03crwdne2935265:0
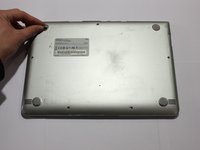
    • Lay the Chromebook down so that the bottom cover is facing up.

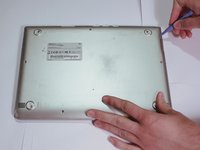
    • Remove the rubber feet on the four corners of the Chromebook in order to get to the screws underneath. They are stuck on with an adhesive.

  2. Samsung Chromebook Series 3 Bottom Cover Replacement: crwdns2935265:02crwdnd2935265:01crwdnd2935265:03crwdne2935265:0 Samsung Chromebook Series 3 Bottom Cover Replacement: crwdns2935265:02crwdnd2935265:02crwdnd2935265:03crwdne2935265:0 Samsung Chromebook Series 3 Bottom Cover Replacement: crwdns2935265:02crwdnd2935265:03crwdnd2935265:03crwdne2935265:0
    • Remove the nine 4.7 mm screws on the bottom cover using a Phillips #00 screwdriver.

  3. Samsung Chromebook Series 3 Bottom Cover Replacement: crwdns2935265:03crwdnd2935265:01crwdnd2935265:03crwdne2935265:0 Samsung Chromebook Series 3 Bottom Cover Replacement: crwdns2935265:03crwdnd2935265:02crwdnd2935265:03crwdne2935265:0 Samsung Chromebook Series 3 Bottom Cover Replacement: crwdns2935265:03crwdnd2935265:03crwdnd2935265:03crwdne2935265:0
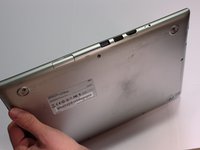
    • Pry up the plastic strip on the back of the Chromebook using a plastic opening tool.

    • It is not necessary to remove it completely. It just needs to be separated from the bottom cover.

  4. Samsung Chromebook Series 3 Bottom Cover Replacement: crwdns2935265:04crwdnd2935265:01crwdnd2935265:03crwdne2935265:0 Samsung Chromebook Series 3 Bottom Cover Replacement: crwdns2935265:04crwdnd2935265:02crwdnd2935265:03crwdne2935265:0 Samsung Chromebook Series 3 Bottom Cover Replacement: crwdns2935265:04crwdnd2935265:03crwdnd2935265:03crwdne2935265:0
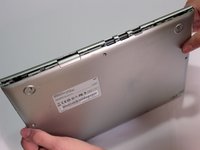
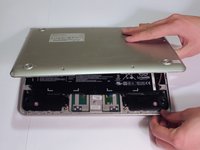
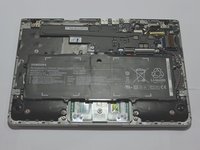
    • Pry off the bottom cover using a plastic opening tool.

crwdns2915888:0crwdne2915888:0

To reassemble your device, follow these instructions in reverse order.

crwdns2935229:07crwdne2935229:0

Andrey Radchishin

crwdns2935283:001/21/15crwdne2935283:0

1.833 crwdns2915208:0crwdne2915208:0

crwdns2935297:04crwdne2935297:0

crwdns2915084:0crwdne2915084:0

UWT Liner: Group 1 crwdns2935289:0UWT Liner: Group 1crwdne2935289:0

Community

crwdns2931471:05crwdne2931471:0

crwdns2935297:08crwdne2935297:0

crwdns2944067:00crwdne2944067:0

crwdns2917038:0crwdne2917038:0

crwdns2936625:0crwdne2936625:0:

crwdns2936751:024crwdne2936751:0 3

crwdns2936753:07crwdne2936753:0 19

crwdns2936753:030crwdne2936753:0 58

crwdns2942667:0crwdne2942667:0 5,905