crwdns2915892:0crwdne2915892:0
If your Samsung Chromebook 4 Plus XE350XBA-K05US is not making clear sound, has buzzing, or just is not producing any sound at all, you may need to replace the internal speakers. These internal speakers are what allow you to hear sound from your Samsung Chromebook, so when they stop working properly, the audio can be distorted or completely gone. Replacing the speakers is the best solution.
Before starting, check for dust or debris in the external speakers, and test with headphones to make sure the problem is the internal speakers and not the hardware. If the problem is the hardware, then this may not be the guide for you. Once you are certain it is the speakers, power off your Chromebook and disconnect it from any power source. Make sure you are working on a clean surface.
Important Tips:
- Make sure the Chromebook is completely shut down and not plugged into anything.
- Be careful not to touch other parts inside the Chromebook.
- Handle the battery carefully as swollen or damaged batteries can be dangerous.
- Check your local guidelines before disposing of old batteries if necessary.
-
-
Hold the power button on the keyboard until the device powers off.
-
Close the device and flip it over.
-
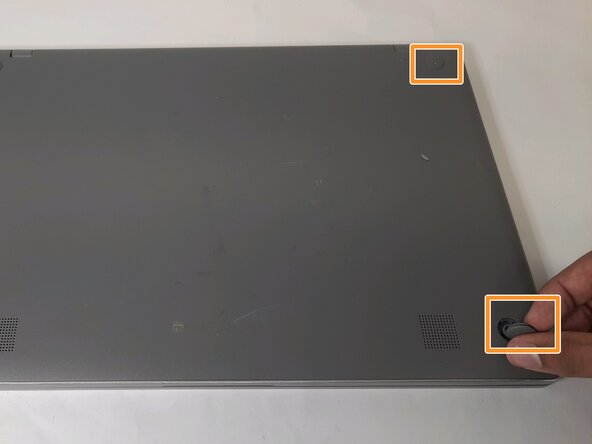
Remove the four rubber sockets on each corner of the device with your fingers.
-
Remove the four 4.6 mm screws with a Phillips #00 screwdriver.
-
-
-
Starting near the hinges, use a metal spudger to gently pry the back off. Continue along the edges until the back is completely detached.
-
-
-
Locate a long gray box labeled “Laptop Battery.”
-
Remove the two 4 mm screws with a Phillips #00 screwdriver.
-
After removing the screws, remove the gray piece labeled “bracket battery BA61 - 03983A.” This piece is located over the golden band connecting the battery and the motherboard.
-
-
-
Unplug the golden band that connects the battery to the motherboard.
-
Use the Phillips #000 screwdriver to remove the four 4 mm screws holding the battery in place.
-
-
-
Face the hinges of the motherboard toward you.
-
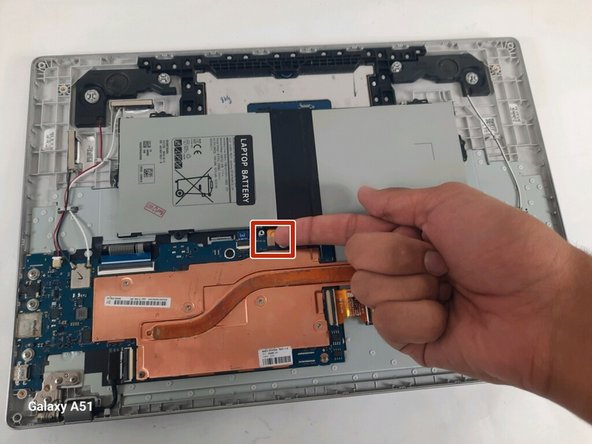
Pull out the white plug-in piece indicated in the photo.
-
Remove only the red and black wire from the wire guide, and ensure all other wires are in place.
-
Lift the black L-shaped piece called “>PC+ABS<S1-C(L) R0.0 BA96-07326A.”
-
-
-
Face the hinges of the motherboard toward you.
-
Pull out the white plug-in piece indicated in the photo.
-
Remove only the white and black wire from the wire guide, and ensure all other wires are in place.
-
Lift the black L-shaped piece called “>PC+ABS<S1-A(R) R0.0 BA96-07326B.”
-


To reassemble your device, follow these instructions in reverse order.

crwdns2935287:0crwdne2935287:0

University of New Orleans, Team 3-3, McDonald Fall 2023 crwdns2935289:0University of New Orleans, Team 3-3, McDonald Fall 2023crwdne2935289:0
UNO-MCDONALD-F23S3G3
crwdns2931471:03crwdne2931471:0
crwdns2935297:05crwdne2935297:0