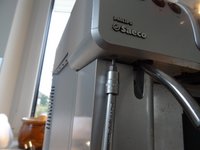
crwdns2915892:0crwdne2915892:0
The support valve is heavily used, as it docks with each cup of coffee inlet pipe of the brewing group. During a revision, you can replace the seals and inspect or replace the internal components. You have to open the machine and remove the thermoblock. There are units from the Royal series in which the support valve is not mounted to the thermoblock. On those it is sufficient to replace only the valve.
These instructions may also help with other Saeco models and with coffee makers from Philips and Gaggia—they are all made by the same manufacturer and have a very similar design.
crwdns2942213:0crwdne2942213:0
-
-
Remove all attachments like water tank, brewing unit etc.
-
-
-
The coffeebean supply is fixed with two screws. Unscrew them and lift it off.
-
There is a black rubber lid under the bean hopper that you can easily lift off, leaving a large opening.
-
The adjuster of the grinder has to be solved. Mark the position or just take a picture. This type is fixed with a screw, others are only sticked together.
-
-
-
There are two screws to be turned out.
-
-
-
The screws are situated on the underneath of the cover. This type is held by four screws.
-
-
-
Now the cover can be raised: first grip on left and right rear side and lift about 10 cm (4 in). Sometimes the cover jams a little bit.
-
Solve the hoses which lead to the water tank. Perhaps you have to pull out some contacts, (e.g. the yellow-green protection lead), don´t forget to put them on again later.
-
The cover can be drawn aslant towards the front, sliding it over the hot water pipe.
-
Most repairs can be done with the cover being laid up partially , it must not be completely removed.
-
-
-
This is what the removed thermoblock looks like. This one was 14 years old and leaking in various places.
-
-
-
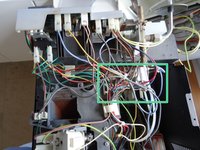
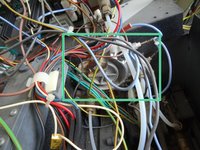
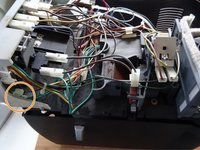
A look into the open device. The thermoblock is hidden under a pile of cables and tubes.
-
-
-
-
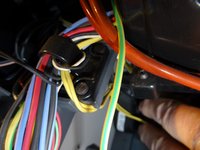
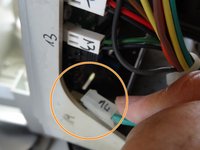
It's safer to number the cable connectors on the electronics. You probably just need to disconnect the slightly hidden # 14 connector on the two green cables at the very bottom and # 7 on the blue cable on the top.
-
-
-
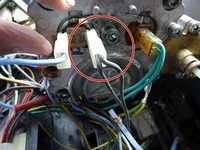
The thermoblock is attached to the wall behind the brew group with only two Phillips screws.
-
Remove the two Phillips screws circled in red.
-
-
-
Take out the thermoblock and place it on the machine.
-
-
-
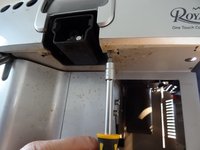
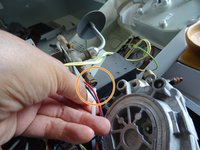
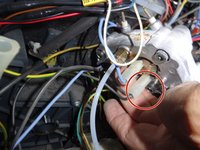
Pull the clamp on the hose to the steam valve off.
-
Pull the hose circled in orange out.
-
-
-
Remove the metal holder of the thermal fuse.
-
-
-
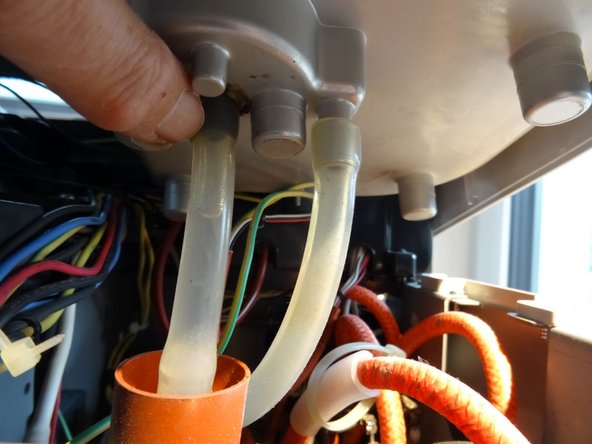
Pull first the clamp, and then the second pressure hose out of the thermoblock.
-
-
-
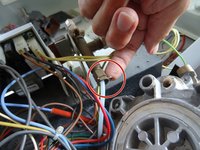
Disconnect the connector with the two gray cables from the thermal switch.
-
-
-
The blue cable from the thermoblock leads to the connector on the electronics, which is marked with 7 here. This particular plug stuck a lot, so force was required to pull it out.
-
-
-
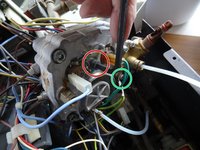
The Allen screw, which holds the holder of the two thermocouples, was not easy to open...
-
Therefore, the plug on the electronics with the two green cables was pulled out. The plug has the mark 14 and is at the very bottom of the electronics.
-
Disconnect the plug with the yellow-green grounding wire from the support valve.
-
-
-
Thread the green and blue cables out.
-
The thermoblock is free. Lift it out of the machine.
-
-
-
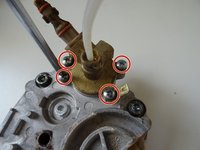
Remove the four Phillips screws securing the support valve.
-
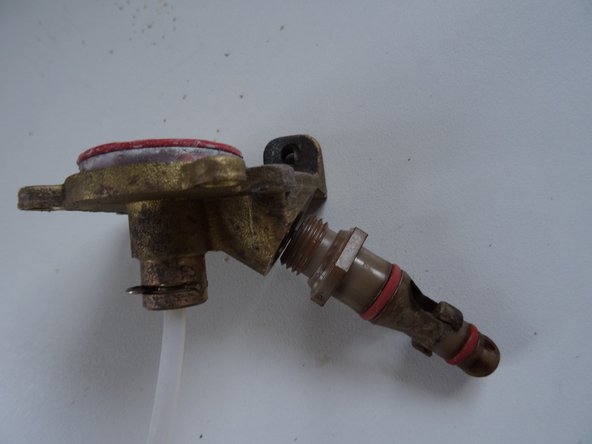
Lift the unit with the support valve out of the thermoblock
-
-
-
Unscrew the valve out of the unit with a 13mm open end wrench.
-
Check if everything moves smoothly. Clean all parts well. Careful, they are sensitive.
-
The valve spring
-
The valve stamp. Check if the gasket on the valve seat is still good. Change it if necessary.
-
The sliding piece
-
Support seal on the thermoblock. Medium size.
-
Support gasket top. The largest of the three.
-
Support gasket bottom. The smallest.
-


Repeat the steps in reverse order to reassemble your device.
Repeat the steps in reverse order to reassemble your device.
crwdns2935221:0crwdne2935221:0
crwdns2935227:0crwdne2935227:0
crwdns2934873:0crwdne2934873:0
100%


crwdns2934885:0crwdne2934885:0 crwdns2934875:0crwdne2934875:0
crwdns2934877:0crwdne2934877:0 ›