crwdns2915892:0crwdne2915892:0
The gasket of the brewing unit has to withstand heavy usage. Especially the large O-Ring on the piston needs replacing from time to time. Follow this guide to replace the gasket.
These instructions may also help with other Saeco models and with coffee makers from Philips and Gaggia—they are all made by the same manufacturer and have a very similar design.
crwdns2942213:0crwdne2942213:0
-
-
Open the hatch on the side panel and remove the brewing unit.
-
-
-
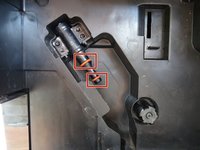
Remove the two Torx T10 screws on the crema valve.
-
Lift off the crema valve minding the spring and the glass ball.
-
-
-
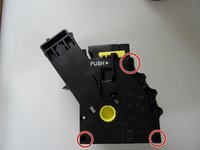
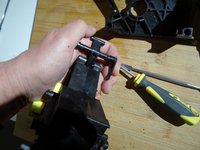
The upper piston is held in place in the frame with four locking pawls. Push down all four latches with a spudger, then remove the piston by pushing it downward.
-
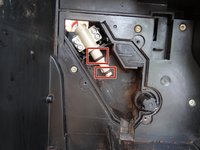
Unscrew the Torx T10 screw on the brewing sieve and remove it.
-
-
-
-
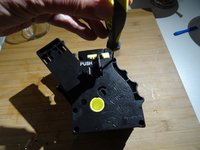
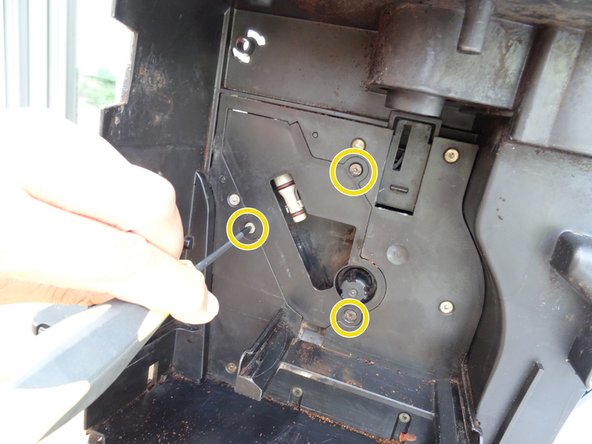
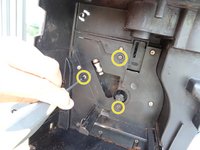
There are three Torx T10 screws in deep blind holes that hold together the two parts of the brewing unit. Unscrew them and lift off the upper side panel.
-
-
-
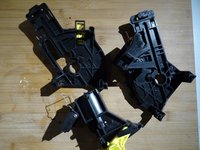
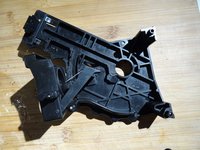
Now you can disassemble the brewing unit into its three main parts: the brewing unit and the two side panels.
-
-
-
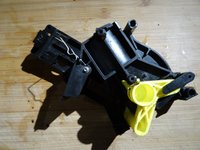
You can push out the lower piston from the brewing unit if you snap the deflection lever out of its socket with a screw driver.
-
Clean all parts with very hot water and dishwasher liquid.
-
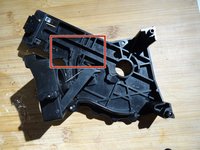
Grease all moving parts with food grade silicone fat. Dont forget the tracks in the side panels.
-
-
-
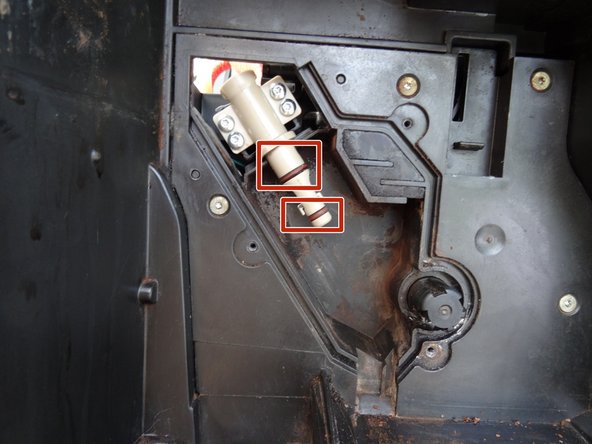
Take this opportunity to carefully replace the two O-rings on the support valve. The larger one is at the top. These two seals are stressed during every brewing process. Therefore, lubricate them with food-safe silicone grease.
-
On some models, the support valve is covered. In this case, you must unscrew the cover first.
-


Follow the steps in reverse order to reassemble your device.
crwdns2935221:0crwdne2935221:0
crwdns2935229:02crwdne2935229:0
crwdns2934873:0crwdne2934873:0
100%


crwdns2934885:0crwdne2934885:0 crwdns2934875:0crwdne2934875:0
crwdns2934877:0crwdne2934877:0 ›
crwdns2947412:09crwdne2947412:0
I like the statement that this guide works for many machines that use the Saeco brew group, but it would be great if that were somehow in the title, too. When checking to see whether a guide on this brew group was written, I first skipped this guide because I thought "minuto" referred to a "mini" Saeco.
Thank you for this hint. I placed three links to Saeco, Philips and Gaggia coffeemakers.
VauWeh -
Hello all, I have a saeco minuto model HD8867. I have o. Screen error 23 but it feel like error 4. I have entered in test menu and all ar on parameters. Is there another way to reset this machine?
@florinpopp16782 This is an issue with the "CoffeeSwitch" for either espresso or coffee. I have two informations for you,both in german, you need a translation app: iFixit and a forum.
VauWeh -
Hello VauWeh, Thank you for your response. My model HD8867 does not have a "CoffeeSwitch". I have seen this and checked for it. I want to mention that I was able to go in Test mode and test all the components, and all fine. I have found this morning another hint. that I can maybe go back to factory parameters and delete some errors from memory that maybe it is hanging. If not I dont have other ideas.
To enter in SteamOut
The machine enters SteamOut mode by holding pressed together the COFFEE button and the MENU button while switching on the machine
When the Steam-Out is complete the following parameters are reset to their default values:
· Length Espresso product
· Length Coffee product
· Length Cappuccino (Coffee + Milk product)
· Length Milk product
· StandBy Time
· Count Coffee
· The request for Priming the Circuit at the fifi rst switch on is set.
· Brewing Unit Empty
· Aroma
· Aroma Impulses
· Filter Presence
· Filter Pulses
· Dynamic threshold
· History of grindings for Beans Presence detection· Filter Presence