crwdns2915892:0crwdne2915892:0
The following guide details steps on how to reach your SONY Ericsson's motherboard. Once you reach the motherboard, you can identify issues the part may have.
crwdns2942213:0crwdne2942213:0
-
-
Flick the two lock tabs into the unlocked positions by pushing each button forward.
-
-
-
Pop the back cover up using the groove on the top of the phone.
-
-
-
You can now access the phone's battery.
-
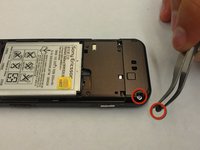
Using a spudger, remove the battery and set it aside.
-
-
-
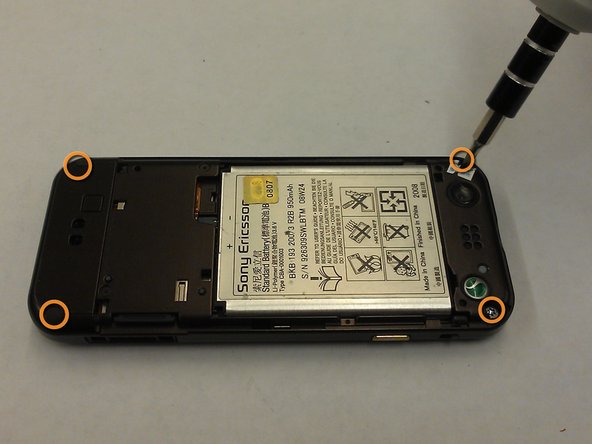
Remove the two small rubber pieces that cover the lower screws.
-
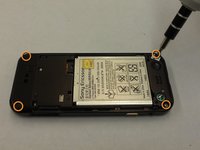
Using a T-6 Torx wrench or screwdriver, remove all four of the small screws at the top and bottom corners on the back of the phones.
-
-
-
-
Gently pry off the faceplate using a plastic opening tool.
-
Insert the plastic opening tool into the middle of the front and back panels of the phone.
-
-
-
Separate the front and back panels that were pryed open with the plastic opening tool.
-
-
crwdns2935267:0crwdne2935267:0Tweezers$4.99
-
Now that the faceplate is off, use tweezers to separate the backplate from the inner manifold.
-
-
-
With both insides of the phone exposed, gently detach the ribbon cable connecting the two inner sides. You can now separate the two sides of the phone.
-
-
-
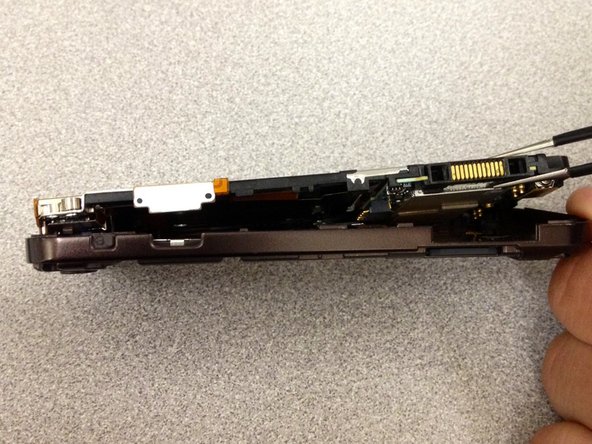
The motherboard is located on the side with the green and black bumper on the bottom. Use the plastic opening tool to pry the bumper off.
-
-
-
To remove the motherboard, apply upwards pressure on the bottom green tab.
-


To reassemble your device, follow these instructions in reverse order.
crwdns2935221:0crwdne2935221:0
crwdns2935227:0crwdne2935227:0

crwdns2935287:0crwdne2935287:0

SUNY Cortland, Team 1-3, Getto Spring 2013 crwdns2935289:0SUNY Cortland, Team 1-3, Getto Spring 2013crwdne2935289:0
SUNYCORT-GETTO-S13S1G3
crwdns2931471:03crwdne2931471:0
crwdns2935297:08crwdne2935297:0