crwdns2933423:0crwdne2933423:0

SONY Alpha NEX-3N Flash Assembly Replacement

crwdns2942213:0crwdne2942213:0

  1. SONY Alpha NEX-3N Flash Assembly Replacement, Getting Started: crwdns2935265:01crwdnd2935265:01crwdnd2935265:02crwdne2935265:0 SONY Alpha NEX-3N Flash Assembly Replacement, Getting Started: crwdns2935265:01crwdnd2935265:02crwdnd2935265:02crwdne2935265:0
    • Remove battery and card

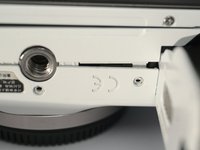
  2. SONY Alpha NEX-3N Flash Assembly Replacement, Back Case 1: crwdns2935265:02crwdnd2935265:01crwdnd2935265:03crwdne2935265:0 SONY Alpha NEX-3N Flash Assembly Replacement, Back Case 1: crwdns2935265:02crwdnd2935265:02crwdnd2935265:03crwdne2935265:0 SONY Alpha NEX-3N Flash Assembly Replacement, Back Case 1: crwdns2935265:02crwdnd2935265:03crwdnd2935265:03crwdne2935265:0
    • Right side, remove 1 M1.4x3.7 screw

    • Left side, remove 3 M1.4x3.7 screws

    • Bottom side, remove 5 M1.4x3.7 screws, including 2 in battery bay. 2 of them out of this photo, you can find them.

    • Do NOT touch screws on the bottom of LCD assembly.

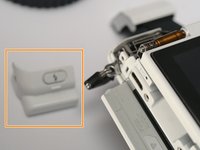
  3. SONY Alpha NEX-3N Flash Assembly Replacement, Back Case 2: crwdns2935265:03crwdnd2935265:01crwdnd2935265:01crwdne2935265:0
    • Pop the flash.

    • In flash room, remove 1 (one) M1.4x3.8 black screw.

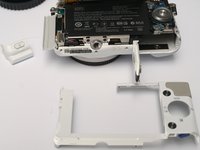
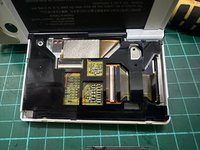
  4. SONY Alpha NEX-3N Flash Assembly Replacement, Back Case 3: crwdns2935265:04crwdnd2935265:01crwdnd2935265:03crwdne2935265:0 SONY Alpha NEX-3N Flash Assembly Replacement, Back Case 3: crwdns2935265:04crwdnd2935265:02crwdnd2935265:03crwdne2935265:0 SONY Alpha NEX-3N Flash Assembly Replacement, Back Case 3: crwdns2935265:04crwdnd2935265:03crwdnd2935265:03crwdne2935265:0
    • Remove LCD hinge cover, by sliding to the left.

    • Remove back cover, actually just a plastic frame.

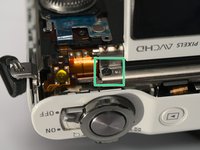
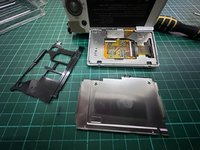
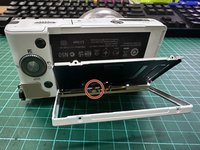
  5. SONY Alpha NEX-3N Flash Assembly Replacement, LCD assembly: crwdns2935265:05crwdnd2935265:01crwdnd2935265:02crwdne2935265:0 SONY Alpha NEX-3N Flash Assembly Replacement, LCD assembly: crwdns2935265:05crwdnd2935265:02crwdnd2935265:02crwdne2935265:0
    • Remove 1 M1.4x2 screw

    • Remove another M1.4x2 screw, sorry for the angle.

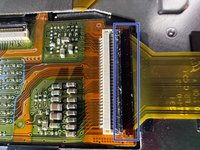
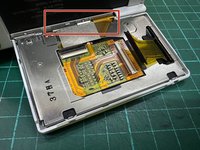
  6. SONY Alpha NEX-3N Flash Assembly Replacement, LCD Assembly: crwdns2935265:06crwdnd2935265:01crwdnd2935265:03crwdne2935265:0 SONY Alpha NEX-3N Flash Assembly Replacement, LCD Assembly: crwdns2935265:06crwdnd2935265:02crwdnd2935265:03crwdne2935265:0 SONY Alpha NEX-3N Flash Assembly Replacement, LCD Assembly: crwdns2935265:06crwdnd2935265:03crwdnd2935265:03crwdne2935265:0
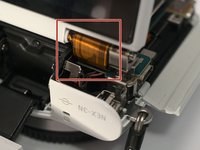
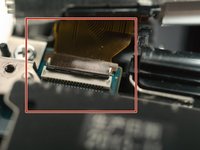
    • CAUTION. Sony makes world's MOST BRITTLE FPC!

    • Loosen LCD assemble with caution!

    • Release FPC cable, the connector is flip type.

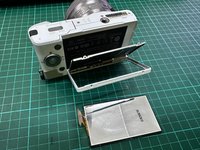
  7. SONY Alpha NEX-3N Flash Assembly Replacement, The LCD assembly: crwdns2935265:07crwdnd2935265:01crwdnd2935265:01crwdne2935265:0
    • The LCD assembly

  8. SONY Alpha NEX-3N Flash Assembly Replacement, Screws: crwdns2935265:08crwdnd2935265:01crwdnd2935265:01crwdne2935265:0
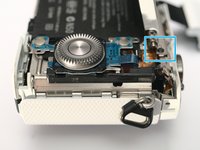
    • Remove 3 M1.4x3.6 black screws, 2 of them out of focus

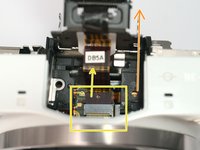
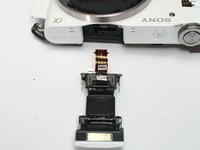
  9. SONY Alpha NEX-3N Flash Assembly Replacement: crwdns2935265:09crwdnd2935265:01crwdnd2935265:02crwdne2935265:0 SONY Alpha NEX-3N Flash Assembly Replacement: crwdns2935265:09crwdnd2935265:02crwdnd2935265:02crwdne2935265:0
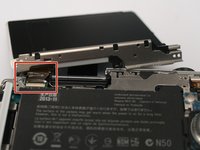
    • Slide the flash assembly backwards with caution.

    • Detach flash FPC by pulling it out of the socket.

    • High Voltage! Do NOT touch metal on FPC.

    • Then remove the flash assembly.

  10. SONY Alpha NEX-3N Flash Assembly Replacement: crwdns2935265:010crwdnd2935265:01crwdnd2935265:01crwdne2935265:0
    • Remove that part whatever called, by sliding it backwards.

crwdns2915888:0crwdne2915888:0

To reassemble your device, follow these instructions in reverse order.

crwdns2935227:0crwdne2935227:0

Terrance

crwdns2935283:011/17/09crwdne2935283:0

6,368 crwdns2915208:0crwdne2915208:0

crwdns2935297:017crwdne2935297:0

crwdns2944067:00crwdne2944067:0
crwdns2917038:0crwdne2917038:0
crwdns2936625:0crwdne2936625:0:

crwdns2936751:024crwdne2936751:0 2

crwdns2936753:07crwdne2936753:0 5

crwdns2936753:030crwdne2936753:0 20

crwdns2942667:0crwdne2942667:0 281