crwdns2933423:0crwdne2933423:0

S7 MaxV Ultra Dock: Motherboard replacement

crwdns2942213:0crwdne2942213:0

  1. S7 MaxV Ultra Dock: Motherboard replacement, Removing the back cover: crwdns2935265:01crwdnd2935265:01crwdnd2935265:03crwdne2935265:0 S7 MaxV Ultra Dock: Motherboard replacement, Removing the back cover: crwdns2935265:01crwdnd2935265:02crwdnd2935265:03crwdne2935265:0 S7 MaxV Ultra Dock: Motherboard replacement, Removing the back cover: crwdns2935265:01crwdnd2935265:03crwdnd2935265:03crwdne2935265:0
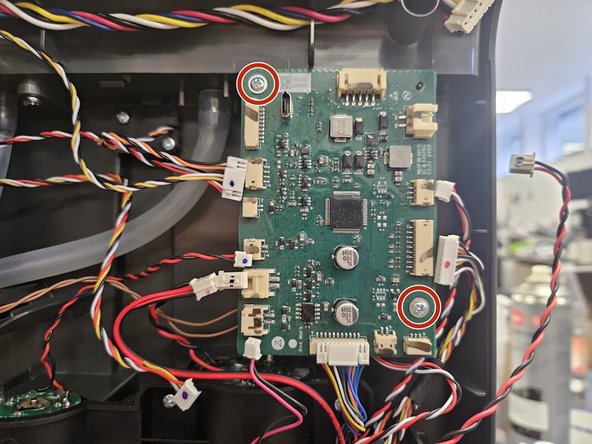
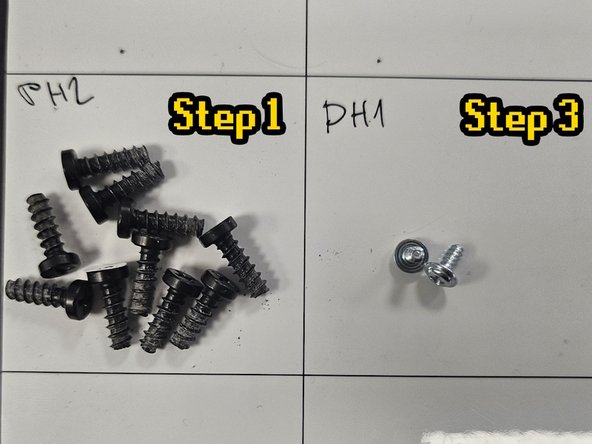
    • Remove the marked screws.

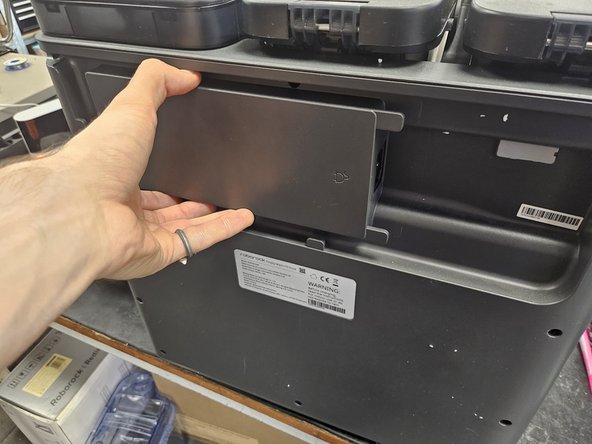
    • Pull the back cover off.

  2. S7 MaxV Ultra Dock: Motherboard replacement, Disconnect the motherboard.: crwdns2935265:02crwdnd2935265:01crwdnd2935265:02crwdne2935265:0 S7 MaxV Ultra Dock: Motherboard replacement, Disconnect the motherboard.: crwdns2935265:02crwdnd2935265:02crwdnd2935265:02crwdne2935265:0
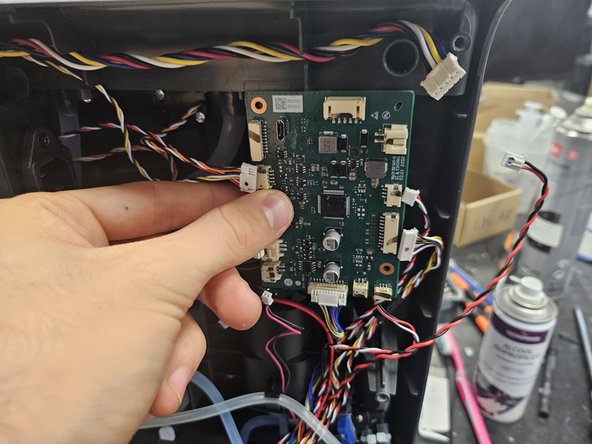
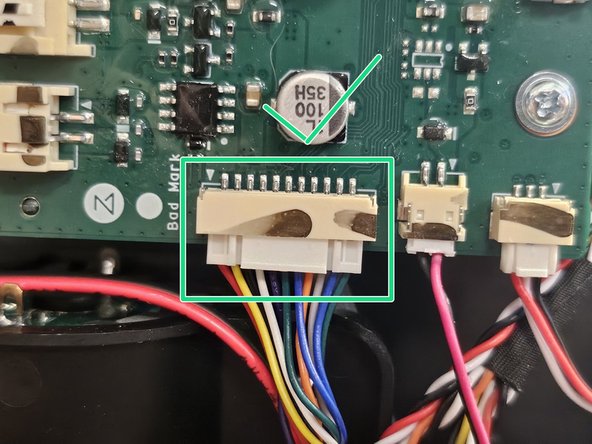
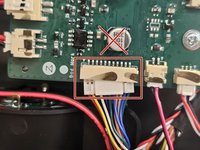
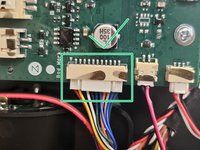
    • Disconnect the cables from the motherboard.

    • The motherboard is in the top right of the dock itself.

  3. S7 MaxV Ultra Dock: Motherboard replacement, Remove the motherboard.: crwdns2935265:03crwdnd2935265:01crwdnd2935265:03crwdne2935265:0 S7 MaxV Ultra Dock: Motherboard replacement, Remove the motherboard.: crwdns2935265:03crwdnd2935265:02crwdnd2935265:03crwdne2935265:0 S7 MaxV Ultra Dock: Motherboard replacement, Remove the motherboard.: crwdns2935265:03crwdnd2935265:03crwdnd2935265:03crwdne2935265:0
    • Remove the screws.

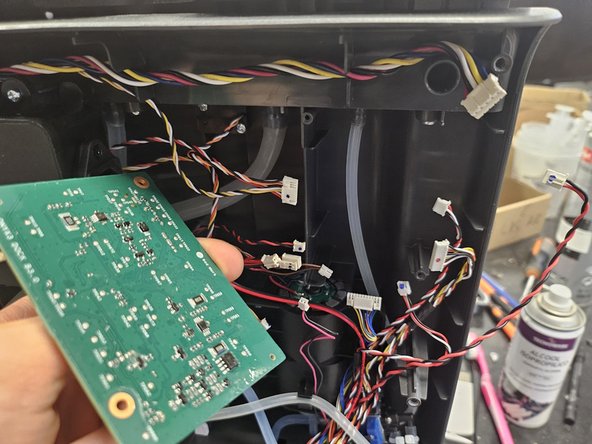
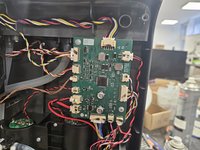
    • Once those are removed, take the motherboard out.

  4. S7 MaxV Ultra Dock: Motherboard replacement, Caution!: crwdns2935265:04crwdnd2935265:01crwdnd2935265:03crwdne2935265:0 S7 MaxV Ultra Dock: Motherboard replacement, Caution!: crwdns2935265:04crwdnd2935265:02crwdnd2935265:03crwdne2935265:0 S7 MaxV Ultra Dock: Motherboard replacement, Caution!: crwdns2935265:04crwdnd2935265:03crwdnd2935265:03crwdne2935265:0
    • When connecting the cables to a new motherboard, ensure all connectors are fully connected.

  5. S7 MaxV Ultra Dock: Motherboard replacement, Screeeeeeeeeews: crwdns2935265:05crwdnd2935265:01crwdnd2935265:01crwdne2935265:0
    • Here are the screws organised by steps and size.

    • Use this if needed as a reference during reassembly.

crwdns2915888:0crwdne2915888:0

To finish the reassembly, simply add the back cover and screw it back on.

DegenFixer

crwdns2935283:009/18/24crwdne2935283:0

4,721 crwdns2915208:0crwdne2915208:0

crwdns2935297:024crwdne2935297:0

crwdns2947412:00crwdne2947412:0

crwdns2917038:0crwdne2917038:0

crwdns2936625:0crwdne2936625:0:

crwdns2936751:024crwdne2936751:0 2

crwdns2936753:07crwdne2936753:0 18

crwdns2936753:030crwdne2936753:0 61

crwdns2942667:0crwdne2942667:0 507