crwdns2915892:0crwdne2915892:0
Operating your mower with a dull blade can be hard on your lawn, leaving the grass tattered or torn rather than cut. This will cause it to look yellow and restrict healthy growth. Also, a damaged blade can be a danger to the operator or nearby people.
Replacing the blade isn't difficult and is a task that anyone should be able to complete in 15-30 minutes. There are some things to keep in mind as you start this project though. You will be working with a sharp object (the blade), so using a pair of heavy-duty gloves, removing the battery, and carefully blocking the blade are important safety measures to keep in mind as you start your work.
Once you've completed the replacement, I recommend mowing your yard right away and experience the satisfaction of your crisply mowed lawn!
crwdns2942213:0crwdne2942213:0
-
-
Firmly grasp the battery, depressing the battery release and slide the battery out.
-
-
-
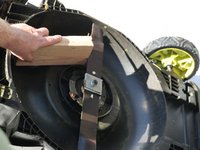
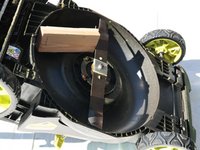
Turn the mower upside down on a flat, stable surface.
-
-
-
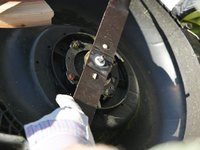
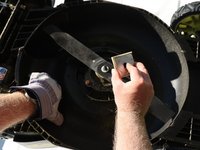
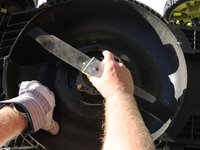
Use an 8" to 10" block of 2x4 to prevent the blade from spinning counterclockwise.
-
-
-
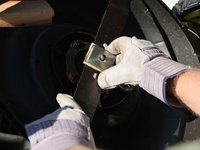
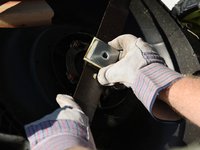
Using a 15 mm socket wrench, remove the blade nut by turning it counterclockwise.
-
-
-
-
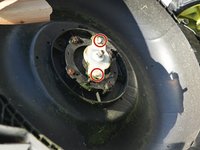
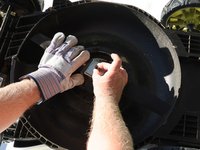
Remove the nut spacer and blade insulator.
-
Remove the blade.
-
-
-
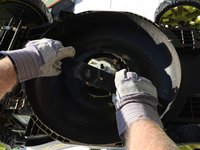
Identify the alignment shapes on the blade hub.
-
Install the new blade on the hub using the alignment posts.
-
-
-
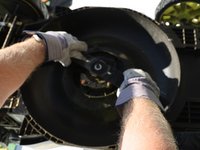
Replace the insulator, spacer, and nut.
-
-
-
Set the torque wrench to between 350-400lbs.
-
-
-
Tighten the blade nut with the torque wrench by rotating the wrench clockwise.
-


crwdns2915084:0crwdne2915084:0

CSU Sacramento, Team 1-8, Laflen Fall 2024 crwdns2935289:0CSU Sacramento, Team 1-8, Laflen Fall 2024crwdne2935289:0
CSUSAC-LAFLEN-F24S1G8
crwdns2934841:01crwdne2934841:0
crwdns2935303:01crwdne2935303:0