crwdns2915892:0crwdne2915892:0
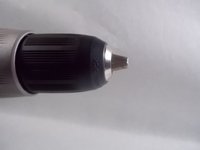
This guide shows how to fix the drill bit holder for the Ryobi P271. The clamps may be too tight or loose. You can adjust the tightness of the drill bit holder by turning the chuck. Turning the chuck right will tighten the clamps while turning them left will loosen them. Make sure your clamps are adjusted properly so that it may fit your drill bit.
Something may be jamming the drill bit holder. Try to make sure to keep the drill bit holder clean and completely empty before use. Broken pieces of steel or dirt may be in the holder itself so be sure it is completely clean so that the drill bit may go in properly. If the drill bit is empty but either still wont full clamp or fit the drill bit then you can try to use a different drill bit to ensure the problem is with the drill itself. If the problem persists, you may need to purchase and replace a new drill bit holder for the drill. You can check on this guide for more details about getting a new drill bit holder.
crwdns2942213:0crwdne2942213:0
-
-
Detach the battery unit from the drill body by pressing the battery release buttons on both sides of the unit and pulling outwards.
-
-
-
Remove all ten screws from the drill's casing to gain access to the interior.
-
-
-
-
Using your hands, lift and remove the right cover of the drill body off from the left side and place it down.
-
-
-
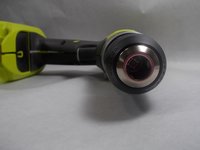
Remove the drill bit holder from the body of the drill.
-


To reassemble your device, follow these instructions in reverse order.
To reassemble your device, follow these instructions in reverse order.

crwdns2915084:0crwdne2915084:0

UMass Dartmouth, Team S2-G6, Barthe Fall 2019 crwdns2935289:0UMass Dartmouth, Team S2-G6, Barthe Fall 2019crwdne2935289:0
UMASSD-BARTHE-F19S2G6
crwdns2931471:03crwdne2931471:0
crwdns2935297:010crwdne2935297:0
crwdns2947410:01crwdne2947410:0
These instructions are utterly useless. Step 4 makes absolutely no sense.