crwdns2915892:0crwdne2915892:0
Full disassembly guide for the Robot Vacuum Cleaner. Only tool required is a small Phillips screwdriver. Additionally, you can use a pair of small pliers if it is difficult to reach small places with your fingers.
crwdns2942213:0crwdne2942213:0
-
-
Insert a finger into the small indent at the back of the lid and tilt upwards. Once tilted up detach the lid from the hinges.
-
Pinch the dustbin from the side and lift up to remove.
-
Once the dustbin is removed detach the lid and filter from the bin
-
-
-
Flip the robot upside down with the wheels pointing upwards. Make sure the red power switch is flipped to the off position.
-
Using a small Phillips screwdriver, remove the single screw from the battery cover and slide the cover off.
-
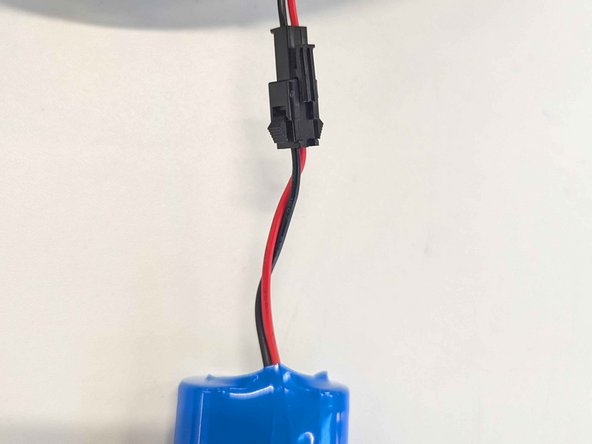
Press the plastic clip in and pull gently to disconnect the battery
-
-
-
Lift up on the two brushes from beneath and firmly pull them off the stems.
-
Using a small Phillips screwdriver, remove the 12 screws from the base of the robot.
-
Push down gently on the bumper and pull away from the front to detach.
-
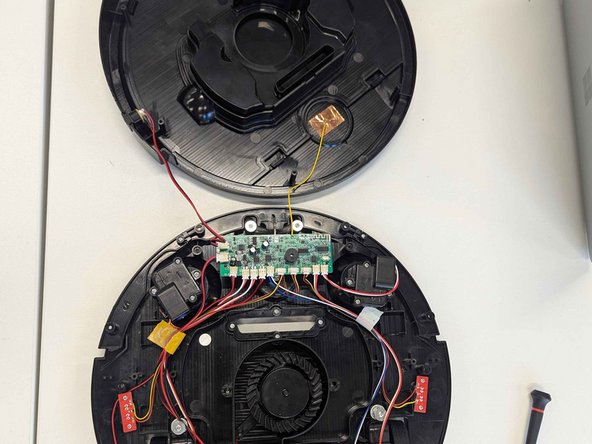
Once the bumper is removed carefully flip the robot back onto its wheels and gently lift the cover off. Take care to not pull on the yellow wire that attaches the start/stop button to the PCB.
-
-
-
Pressing gently on the side, carefully remove the 2 pin connection for the motors from the PCB.
-
Using a small Phillips screwdriver, remove the 2 screws on the side that holds the brush motor to the robot.
-
Make sure the wire is free and untangled. Once it is free pull the motor out of the robot.
-
Repeat for the other motor.
-
-
-
Pressing gently on the side, carefully remove the 2 pin connection for the motors from the PCB.
-
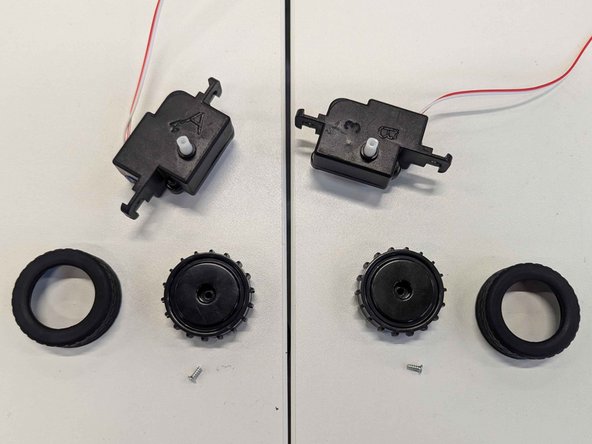
Using a small Phillips screwdriver, remove the 2 screws holding in the wheel motors. Take care when removing to not lose the springs and washers.
-
Make sure the wire is free and untangled. Once it is free pull the motor out of the robot.
-
Using a small Phillips screwdriver, remove the single screw from the centre of the wheel.
-
Remove the wheel from the shaft. While putting pressure on the plastic wheel, pull the tyre to detach from the wheel.
-
Repeat for the other motor and wheel.
-
-
-
-
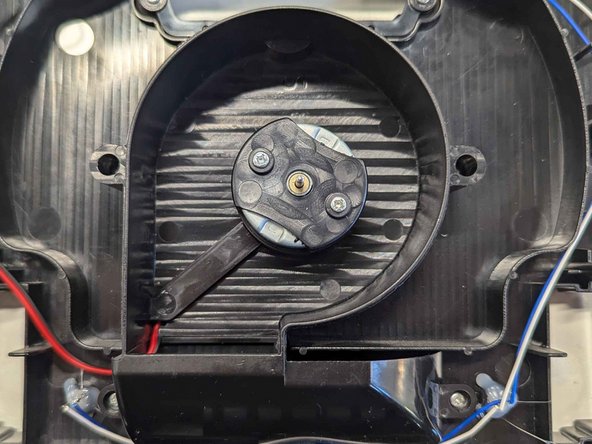
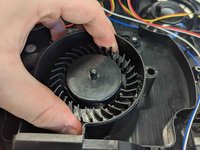
Using a small Phillips screwdriver, remove the single screw from the centre of the fan.
-
Grab around the side of the fan and pull directly upwards to remove from the motor. This may require a decent amount of force.
-
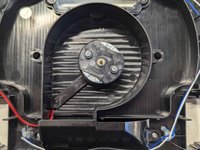
Pressing gently on the side, carefully remove the 2 pin connection for the motor from the PCB.
-
Again using a small Phillips screwdriver, remove the 4 screws from the fan housing.
-
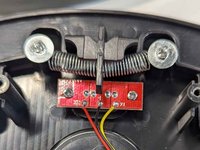
Make sure the motor wire is free and untangled. Once it is free remove the entire housing from the robot.
-
Once the housing is removed, using a small Phillips screwdriver, remove the 2 screws holding in the motor and detach the motor from the housing.
-
-
-
Using a small Phillips screwdriver, remove the 4 screws holding in the central brush. Once removed, lift away the brush from the robot.
-
-
-
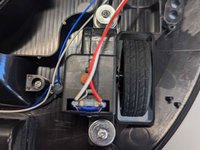
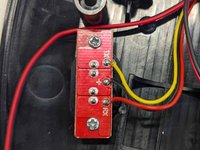
Pressing gently on the side, carefully remove the 2 pin connection for the power switch.
-
Make sure the wire is free and untangled. Once it is, press in on the clips and pull upwards to remove the power switch from the robot.
-
-
-
Pressing gently on the side, carefully remove the 2 pin connection for the charging port from the PCB.
-
Lift the charging port up and slide it out of the lid.
-
-
-
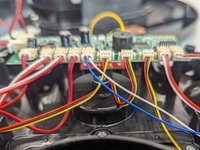
Pressing gently on the side, carefully remove the 2 pin connection for the 3 remaining IR sensors. The PCB should now be fully disconnected from all components, aside from the start/stop button for which the connection cannot be removed without soldering.
-
Using a small Phillips screwdriver, remove the 2 screws from the PCB.
-
Placing your fingers on the side to avoid damaging the PCB, lift away from the robot. Be careful to not pull on the yellow wire connecting it to the start/stop button.
-
-
-
Using a small Phillips screwdriver, remove the 2 screws that hold the IR sensor PCB to the robot.
-
Placing your fingers on the side to avoid damaging the PCB, lift away from the robot.
-
Once the PCB has been removed, lift out the plastic covers for the IR sensor from the robot.
-
Repeat for the other 2 IR sensors. Note, the sensor at the front is only accessible once the main PCB has been removed, hence why it was avoided until now.
-
-
-
Using a small Phillips screwdriver, remove the single screw from the centre of the caster wheel.
-
Lifting up on the robot slightly, the wheel should drop out from the bottom.
-
-
-
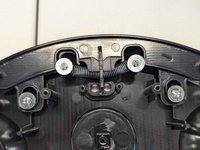
Using a small Phillips screwdriver, remove the 4 screws holding in the bumper mechanism.
-
Gently lift the mechanism away from the robot whilst taking care to not lose the springs.
-
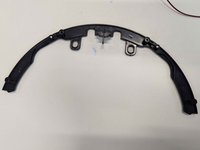
Once the springs have been detached, using a small Phillips screwdriver remove the 2 springs from the lower bumper, allowing it to split into 3 separate pieces.
-
-
-
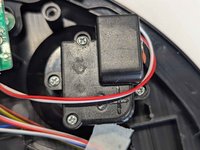
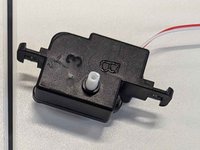
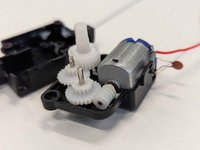
Using a small Phillips screwdriver, remove the 2 screws from the motor casing.
-
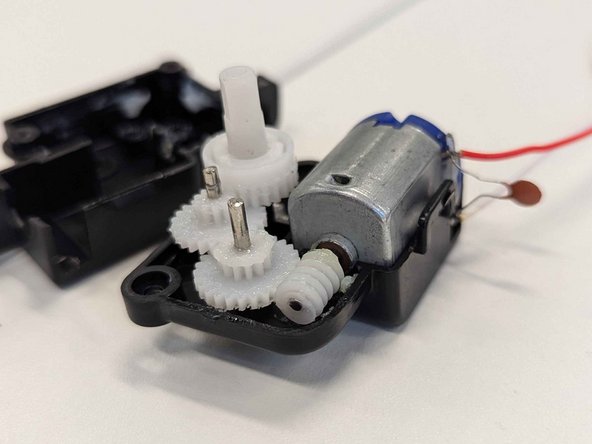
Pressing firmly in on the clip on the side, lift up the motor cover. Take care when lifting that the output shaft is facing upwards so that the gears do not fall out.
-
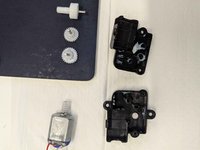
Once the casing is opened, carefully lift out each gear and the motor separately. Remove the pin from the centre of each gear.
-
Repeat the same process for the other 3 motors.
-
-
-
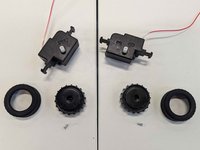
When finished, it should look like this.
-


To reassemble your device, follow these instructions in reverse order.
