crwdns2933423:0crwdne2933423:0

crwdns2942213:0crwdne2942213:0

crwdns2935311:0crwdnd2935311:0crwdne2935311:0 crwdns2935313:0Roborock S8 MaxV Ultracrwdnd2935313:0crwdnd2935313:0crwdne2935313:0

  1. Roborock S8 MaxV Ultra: Teardown, Remove the top: crwdns2935265:01crwdnd2935265:01crwdnd2935265:01crwdne2935265:0
    • Begin by removing the back and front halves of the top plate.

    • The back is held in place by magnets, and is easily removable. Just grab it on the sides or the back and give it a lift.

    • The front is held in by a couple latches. They're not super tight, so you should be able to pull it off by grabbing the front edge and pulling on it.

    • Try not to bend the front while getting the latches free.

  2. Roborock S8 MaxV Ultra: Teardown, Removing the LiDAR: crwdns2935265:02crwdnd2935265:01crwdnd2935265:03crwdne2935265:0 Roborock S8 MaxV Ultra: Teardown, Removing the LiDAR: crwdns2935265:02crwdnd2935265:02crwdnd2935265:03crwdne2935265:0 Roborock S8 MaxV Ultra: Teardown, Removing the LiDAR: crwdns2935265:02crwdnd2935265:03crwdnd2935265:03crwdne2935265:0
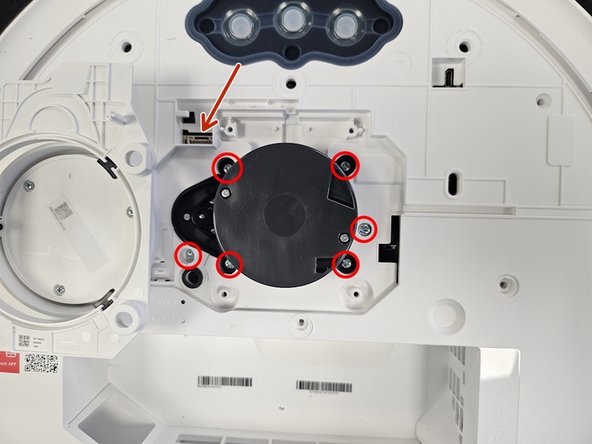
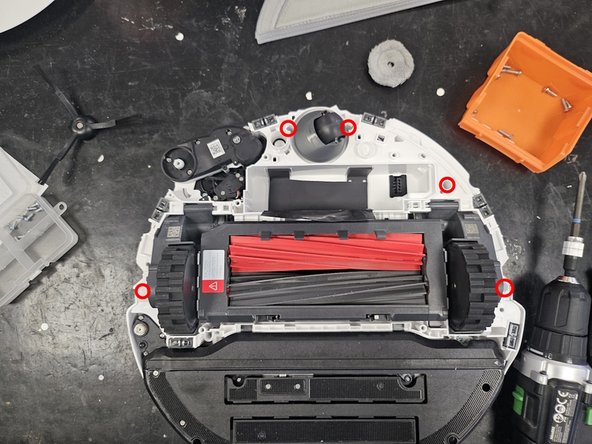
    • Start by removing the visible screws.

    • The bottom 4 are covered by plastic tabs that are glued on. Use your tweezers or box cutter/exacto knife to pry them off.

    • The top left is covered by a warranty sticker.

    • When removing the liDAR cage, be careful of the cable. It is connected on the left side.

    • When removing the LiDAR, be careful of the cable once again. It is connected to the PCB on the bottom of the LiDAR.

  3. Roborock S8 MaxV Ultra: Teardown, Removing the bottom plate: crwdns2935265:03crwdnd2935265:01crwdnd2935265:01crwdne2935265:0
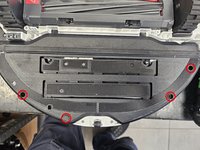
    • Now flip the robot over and remove visible screws.

    • The top right is covered by a warranty sticker.

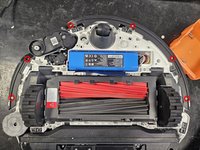
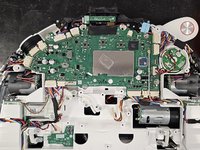
    • Now simply pull the bottom plate off. If you got all the screws, nothing else should be holding it in place.

  4. Roborock S8 MaxV Ultra: Teardown, Removing the bumper: crwdns2935265:04crwdnd2935265:01crwdnd2935265:02crwdne2935265:0 Roborock S8 MaxV Ultra: Teardown, Removing the bumper: crwdns2935265:04crwdnd2935265:02crwdnd2935265:02crwdne2935265:0
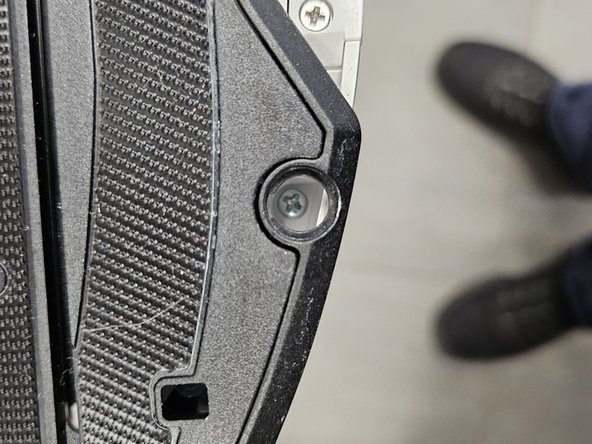
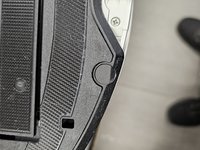
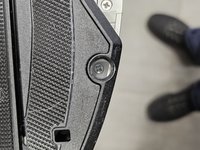
    • Remove the screws on the bumper.

    • Now remove the cover that held the bumper in place. You will need to move it around a bit around the FlexiArm (Top left in the picture)

    • When moving it around, do not bend it too much. You can permanently deform it.

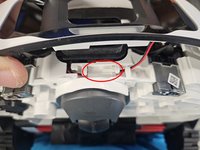
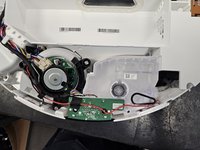
    • Once you have removed the cover of the bumper, make sure to disconnect the connector that connects the light in the bumper to the motherboard.

    • Detach it before pulling the bumper off, as you could tear the cables.

  5. Roborock S8 MaxV Ultra: Teardown, Pet your feline assistant.: crwdns2935265:05crwdnd2935265:01crwdnd2935265:01crwdne2935265:0
    • Try not to get bitten or scratched.

  6. Roborock S8 MaxV Ultra: Teardown, Removing the screws in the VibraRise: crwdns2935265:06crwdnd2935265:01crwdnd2935265:03crwdne2935265:0 Roborock S8 MaxV Ultra: Teardown, Removing the screws in the VibraRise: crwdns2935265:06crwdnd2935265:02crwdnd2935265:03crwdne2935265:0 Roborock S8 MaxV Ultra: Teardown, Removing the screws in the VibraRise: crwdns2935265:06crwdnd2935265:03crwdnd2935265:03crwdne2935265:0
    • Remove the screws.

    • One is covered by a rubber cap.

  7. Roborock S8 MaxV Ultra: Teardown, Removing the rest of the screws: crwdns2935265:07crwdnd2935265:01crwdnd2935265:03crwdne2935265:0 Roborock S8 MaxV Ultra: Teardown, Removing the rest of the screws: crwdns2935265:07crwdnd2935265:02crwdnd2935265:03crwdne2935265:0 Roborock S8 MaxV Ultra: Teardown, Removing the rest of the screws: crwdns2935265:07crwdnd2935265:03crwdnd2935265:03crwdne2935265:0
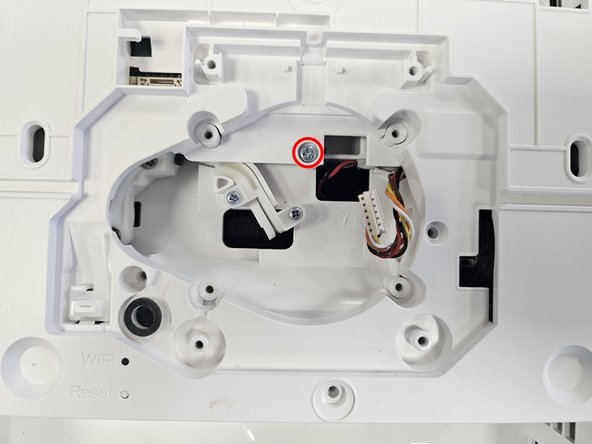
    • Now, flip it over and remove a screw on top.

    • Flip it over again and remove the rest of the screws.

    • One is covered by a pretty long rubber cap.

  8. Roborock S8 MaxV Ultra: Teardown, It's open!: crwdns2935265:08crwdnd2935265:01crwdnd2935265:02crwdne2935265:0 Roborock S8 MaxV Ultra: Teardown, It's open!: crwdns2935265:08crwdnd2935265:02crwdnd2935265:02crwdne2935265:0
    • You've got it open!

    • The front half houses the motherboard, as well as a myriad of other sensors and elements.

    • The back half houses the suction fan, and water tank. I measured the water tank to be roughly 100ml.

  9. Roborock S8 MaxV Ultra: Teardown, Removing the VibraRise module: crwdns2935265:09crwdnd2935265:01crwdnd2935265:03crwdne2935265:0 Roborock S8 MaxV Ultra: Teardown, Removing the VibraRise module: crwdns2935265:09crwdnd2935265:02crwdnd2935265:03crwdne2935265:0 Roborock S8 MaxV Ultra: Teardown, Removing the VibraRise module: crwdns2935265:09crwdnd2935265:03crwdnd2935265:03crwdne2935265:0
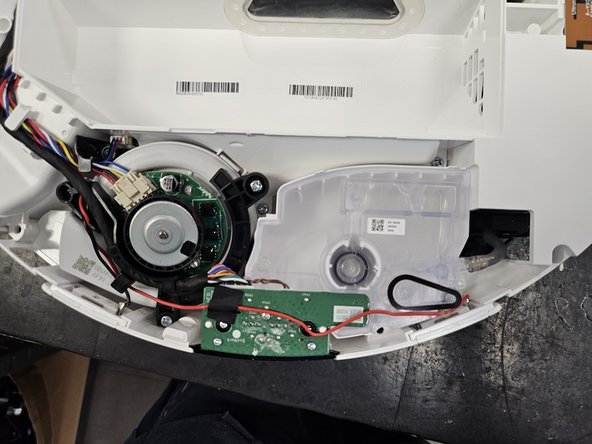
    • First, disconnect the connector from the motherboard.

    • Do be gentle doing this. I've broken the connector on the motherboard before.

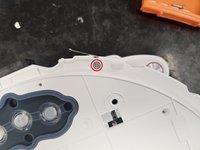
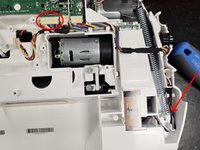
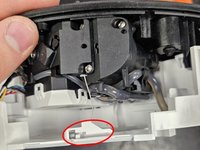
    • Get the cable out of the housing and through the hole indicated by the arrow.

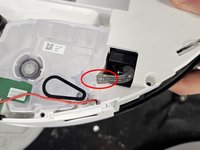
    • Flip it over, then get the wire out of the housing. Use your tweezers for this.

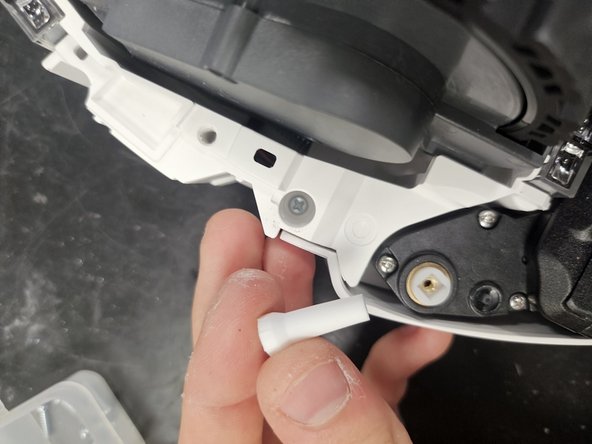
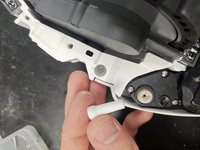
    • Flip it over again, then detach the pipe from the water tank.

    • The VibraRise is still loosely held in place by 2 latches on the left and right sides.

DegenFixer

crwdns2935283:009/18/24crwdne2935283:0

4.579 crwdns2915208:0crwdne2915208:0

crwdns2935297:024crwdne2935297:0

crwdns2947412:00crwdne2947412:0

crwdns2917038:0crwdne2917038:0

crwdns2936625:0crwdne2936625:0:

crwdns2936751:024crwdne2936751:0 18

crwdns2936753:07crwdne2936753:0 124

crwdns2936753:030crwdne2936753:0 533

crwdns2942667:0crwdne2942667:0 3,037