crwdns2933423:0crwdne2933423:0

Roborock S5 Series Sidebrush Motor Replacement

crwdns2942213:0crwdne2942213:0

  1. Roborock S5 Series Sidebrush Motor Replacement, Side Brush: crwdns2935265:01crwdnd2935265:01crwdnd2935265:02crwdne2935265:0 Roborock S5 Series Sidebrush Motor Replacement, Side Brush: crwdns2935265:01crwdnd2935265:02crwdnd2935265:02crwdne2935265:0
    • Power down your Roborock and place it upside down on a flat work surface.

    • Use a Phillips #2 screwdriver to loosen the captive screw holding the side brush in place.

  2. Roborock S5 Series Sidebrush Motor Replacement: crwdns2935265:02crwdnd2935265:01crwdnd2935265:01crwdne2935265:0
    • Gently lift the side brush away from the robot vacuum.

  3. Roborock S5 Series Sidebrush Motor Replacement, Remove the bottom lid: crwdns2935265:03crwdnd2935265:01crwdnd2935265:01crwdne2935265:0
    • Remove the 7 screws holding the bottom lid in place.

    • Lift off the bottom lid.

  4. Roborock S5 Series Sidebrush Motor Replacement, Remove gearbox with motor: crwdns2935265:04crwdnd2935265:01crwdnd2935265:02crwdne2935265:0 Roborock S5 Series Sidebrush Motor Replacement, Remove gearbox with motor: crwdns2935265:04crwdnd2935265:02crwdnd2935265:02crwdne2935265:0
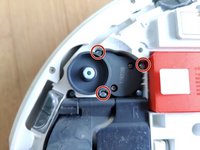
    • Remove the 3 screws holding the gearbox in place and lift it out.

  5. Roborock S5 Series Sidebrush Motor Replacement, Open the gearbox: crwdns2935265:05crwdnd2935265:01crwdnd2935265:02crwdne2935265:0 Roborock S5 Series Sidebrush Motor Replacement, Open the gearbox: crwdns2935265:05crwdnd2935265:02crwdnd2935265:02crwdne2935265:0
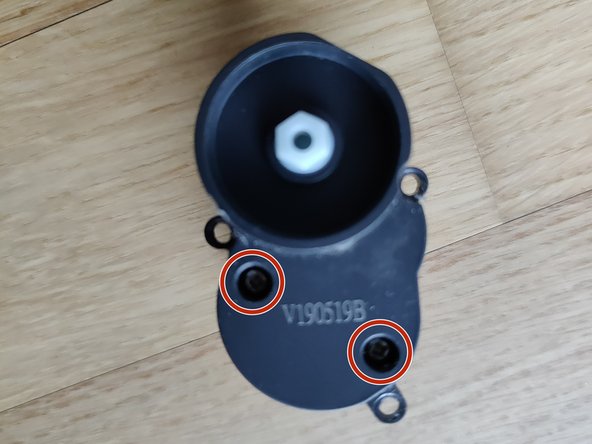
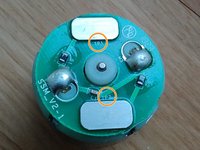
    • Remove the 2 screws of the gearbox.

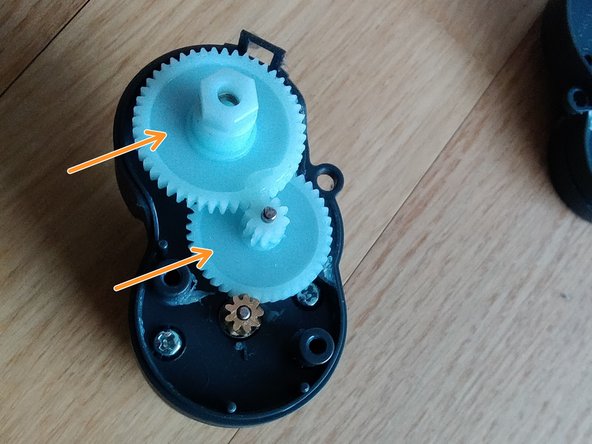
    • Carefully lift of the lid (try not to break the clip or loose the gears)

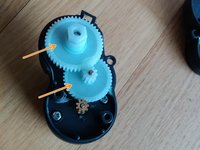
    • Pull the 2 white plastic gear wheels off to the top (potentially inspect those for damage while it's open anyway).

  6. Roborock S5 Series Sidebrush Motor Replacement, Remove the motor: crwdns2935265:06crwdnd2935265:01crwdnd2935265:02crwdne2935265:0 Roborock S5 Series Sidebrush Motor Replacement, Remove the motor: crwdns2935265:06crwdnd2935265:02crwdnd2935265:02crwdne2935265:0
    • Check the orientation on the motor by looking at it from the back. Note the TP1 and TP2 markers on the PCB.

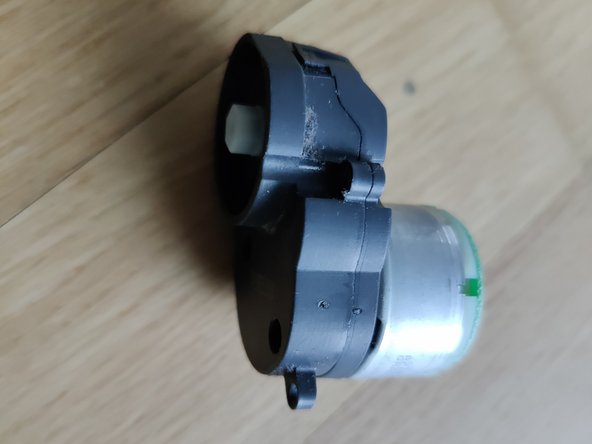
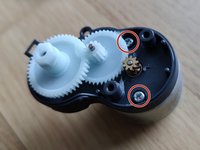
    • Remove 2 screws holding the motor in place.

    • Pull it off to the back.

crwdns2915888:0crwdne2915888:0

To reassemble your device, follow these instructions in reverse order.

particleflux

crwdns2935283:001/24/25crwdne2935283:0

109 crwdns2915208:0crwdne2915208:0

crwdns2935295:0crwdne2935295:0

crwdns2947412:00crwdne2947412:0

crwdns2917038:0crwdne2917038:0

crwdns2936625:0crwdne2936625:0:

crwdns2936751:024crwdne2936751:0 0

crwdns2936753:07crwdne2936753:0 3

crwdns2936753:030crwdne2936753:0 22

crwdns2942667:0crwdne2942667:0 85