crwdns2915892:0crwdne2915892:0
This guide will show you how to completely disassemble your Ridgid R860054 drill.
If you are using this guide to assist with a repair, we recommend checking out our troubleshooting guide. There you may find a guide that is more specific to your needs.
Make sure to remove the battery from the drill before beginning the tear down.
crwdns2942213:0crwdne2942213:0
-
-
Using a T10 Torx security bit, remove the ten screws from the housing assembly.
-
-
-
Separate one half of the drill casing from the other by gently pulling both halves apart.
-
-
-
-
Remove the plastic speed switch and forward/reverse switch by softly lifting them from the casing.
-
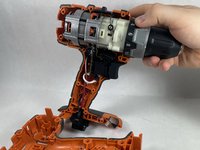
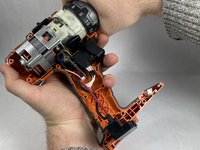
Remove the internal components of the drill by lightly pulling on the drill chuck.
-


To reassemble your device, follow these instructions in reverse order.
crwdns2935287:0crwdne2935287:0

UMass Dartmouth, Team 1-1, Shaddix Spring 2023 crwdns2935289:0UMass Dartmouth, Team 1-1, Shaddix Spring 2023crwdne2935289:0
UMASSD-SHADDIX-S23S1G1
crwdns2931471:04crwdne2931471:0
crwdns2935297:04crwdne2935297:0