crwdns2933423:0crwdne2933423:0

Ridgid R82005 Motor Replacement

crwdns2942213:0crwdne2942213:0

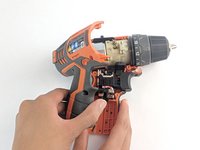
  1. Ridgid R82005  Motor Replacement, Housing Assembly: crwdns2935265:01crwdnd2935265:01crwdnd2935265:01crwdne2935265:0
    • Eject the battery from the drill.

    • Unscrew the seven M3x15.3mm screws, with the 2mm hex screwdriver bit, that secures the Housing Assembly.

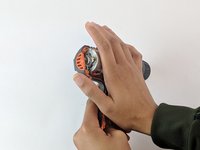
  2. Ridgid R82005  Motor Replacement: crwdns2935265:02crwdnd2935265:01crwdnd2935265:01crwdne2935265:0
    • Push the metallic Housing Connecting clip out with flat side of the plastic opening tool.

    • Eject battery before attempting this step.

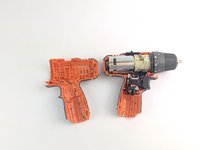
  3. Ridgid R82005  Motor Replacement: crwdns2935265:03crwdnd2935265:01crwdnd2935265:02crwdne2935265:0 Ridgid R82005  Motor Replacement: crwdns2935265:03crwdnd2935265:02crwdnd2935265:02crwdne2935265:0
    • Remove the top half of the Housing Assembly.

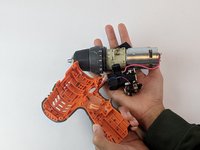
  4. Ridgid R82005  Motor Replacement: crwdns2935265:04crwdnd2935265:01crwdnd2935265:02crwdne2935265:0 Ridgid R82005  Motor Replacement: crwdns2935265:04crwdnd2935265:02crwdnd2935265:02crwdne2935265:0
    • Grasp carefully the top and bottom of drill components.

    • LED light needs to be manually removed.

    • Lift and transfer, as a whole, the drill components from the old housing assembly to the new housing.

    • Make sure all drill components fit properly in the grooves of new Housing Assembly.

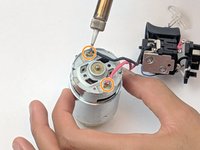
  5. Ridgid R82005  Motor Replacement, Motor: crwdns2935265:05crwdnd2935265:01crwdnd2935265:03crwdne2935265:0 Ridgid R82005  Motor Replacement, Motor: crwdns2935265:05crwdnd2935265:02crwdnd2935265:03crwdne2935265:0 Ridgid R82005  Motor Replacement, Motor: crwdns2935265:05crwdnd2935265:03crwdnd2935265:03crwdne2935265:0
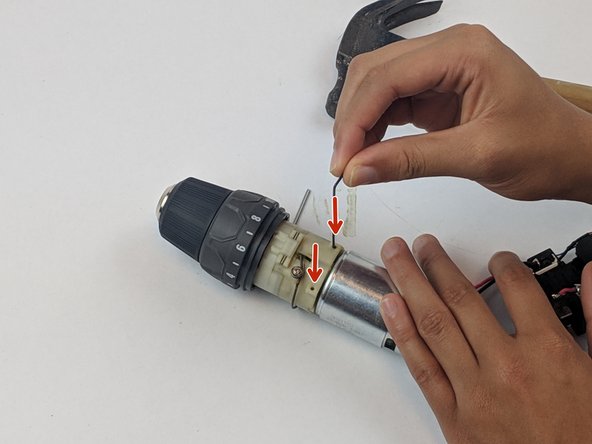
    • Push the two pins through the motor assembly.

    • We used an Alan wrench to push the pins through, but any small tool will do.

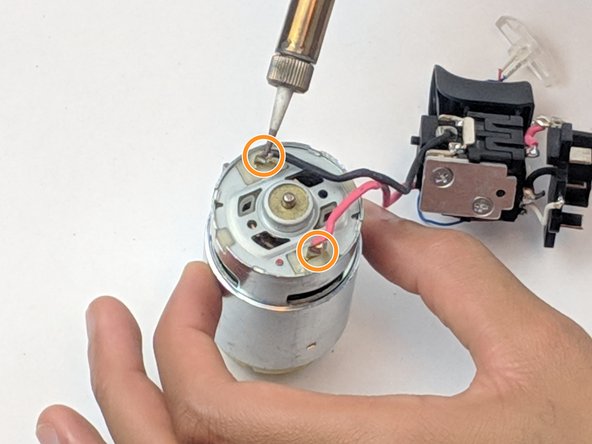
    • Unsolder the wires from the back of the motor to free the motor from the trigger assembly.

    • To learn how to solder, check out the How to Solder and Desolder Connections guide.

    • Make sure all drill components fit properly in the grooves of the Housing Assembly.

crwdns2915888:0crwdne2915888:0

To reassemble your device, follow these instructions in reverse order.

crwdns2935229:03crwdne2935229:0

Andrew McPherson

crwdns2935283:002/14/19crwdne2935283:0

479 crwdns2915208:0crwdne2915208:0

crwdns2935297:03crwdne2935297:0

crwdns2915084:0crwdne2915084:0

USF Tampa, Team S1-G2, Leahy Spring 2019 crwdns2935289:0USF Tampa, Team S1-G2, Leahy Spring 2019crwdne2935289:0

USFT-LEAHY-S19S1G2

crwdns2931471:04crwdne2931471:0

crwdns2935297:010crwdne2935297:0

crwdns2944067:00crwdne2944067:0

crwdns2917038:0crwdne2917038:0

crwdns2936625:0crwdne2936625:0:

crwdns2936751:024crwdne2936751:0 1

crwdns2936753:07crwdne2936753:0 3

crwdns2936753:030crwdne2936753:0 18

crwdns2942667:0crwdne2942667:0 793