crwdns2915892:0crwdne2915892:0
If the zoom lens on your Ricoh Shotmaster 130Z is stuck, cracked, or not focusing properly, this guide will help you replace the lens. You'll learn how to remove the damaged lens and install a new one in this step by step guide. Basic tools and careful handling are all you need for this guide.
crwdns2942213:0crwdne2942213:0
-
-
Set the dials to "A" (Auto), and Off mode.
-
-
-
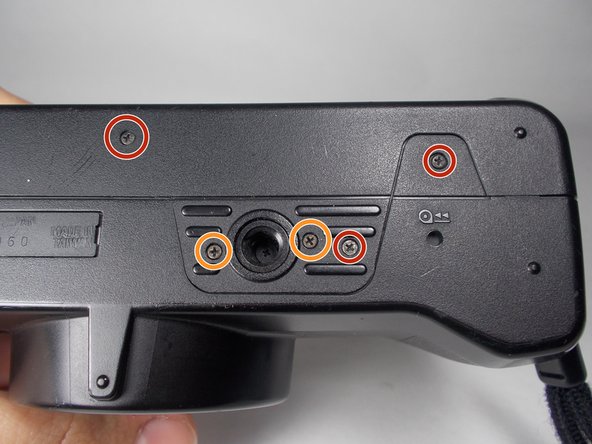
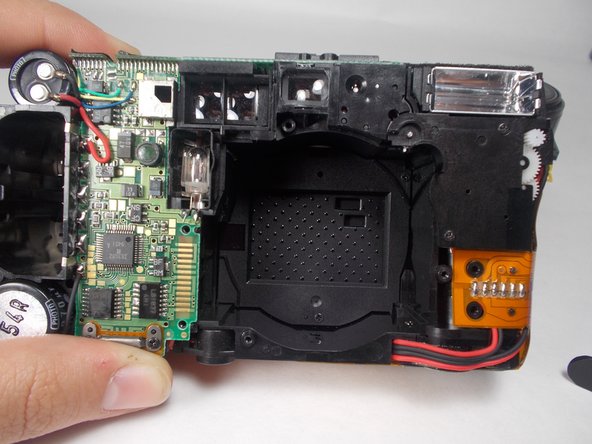
Remove the 5 Phillips screws from the sides and the back.
-
-
-
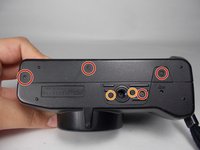
Remove the 5mm JIS #00 screws from the bottom of the camera.
-
Pay attention to the 6mm screws on the sides of the tripod slot, as they are a slightly different size from the rest of the screws. However, you still may use a J00 screwdriver to remove them.
-
-
-
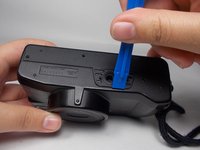
Using an opening tool, lift the case of the tripod slot (on the bottom) until the back portion of the case is released.
-
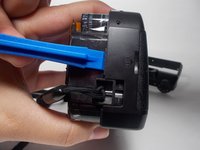
Continue to use the the opening tool to insert it and lift right next to the strap of the camera.
-
-
-
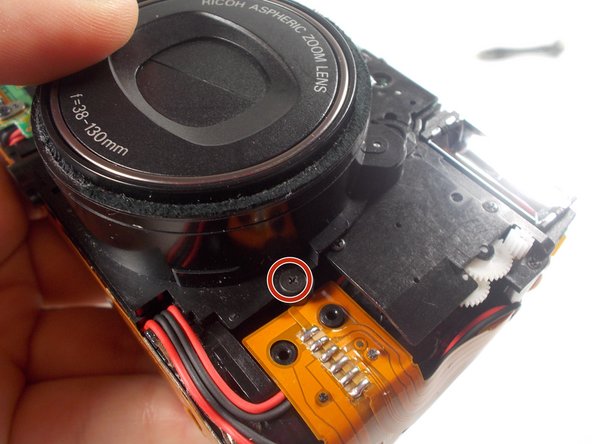
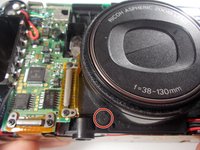
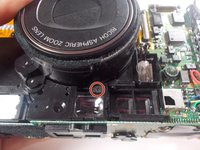
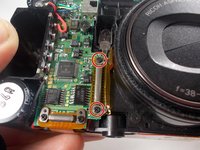
Use a JIS #0 screwdriver to remove the three marked screws found around the perimeter of the lens.
-
-
crwdns2935267:0crwdne2935267:0Tweezers$4.99
-
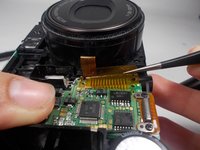
Proceed to remove the two screws using a JIS #00 screwdriver.
-
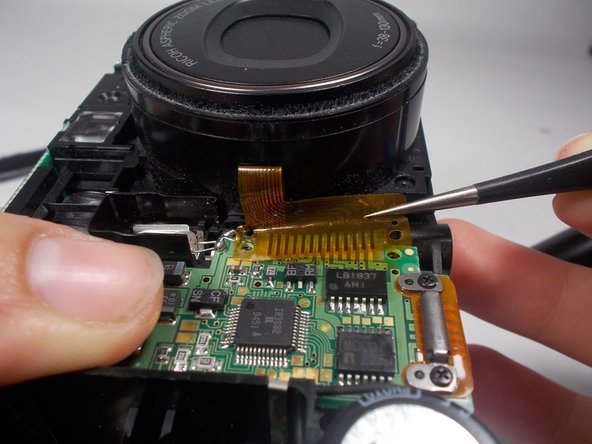
Use tweezers to lift the lens off of the board.
-


To reassemble your device, follow these instructions in reverse order.

crwdns2935287:0crwdne2935287:0

UMass Dartmouth, Team 3-4, Isaacson Fall 2016 crwdns2935289:0UMass Dartmouth, Team 3-4, Isaacson Fall 2016crwdne2935289:0
UMASSD-ISAACSON-F16S3G4
crwdns2931471:03crwdne2931471:0
crwdns2935297:010crwdne2935297:0