crwdns2933423:0crwdne2933423:0

Rexing V1P Plus Rear Camera Replacement

crwdns2942213:0crwdne2942213:0

  1. Rexing V1P Plus Rear Camera Replacement, Rear Camera: crwdns2935265:01crwdnd2935265:01crwdnd2935265:03crwdne2935265:0 Rexing V1P Plus Rear Camera Replacement, Rear Camera: crwdns2935265:01crwdnd2935265:02crwdnd2935265:03crwdne2935265:0 Rexing V1P Plus Rear Camera Replacement, Rear Camera: crwdns2935265:01crwdnd2935265:03crwdnd2935265:03crwdne2935265:0
    • Begin by orienting the rear camera lens facing up.

    • Twist the adhesive mount surface parallel to the camera lens.

    • Pull the mounting ring axially away from the camera case.

  2. Rexing V1P Plus Rear Camera Replacement: crwdns2935265:02crwdnd2935265:01crwdnd2935265:03crwdne2935265:0 Rexing V1P Plus Rear Camera Replacement: crwdns2935265:02crwdnd2935265:02crwdnd2935265:03crwdne2935265:0 Rexing V1P Plus Rear Camera Replacement: crwdns2935265:02crwdnd2935265:03crwdnd2935265:03crwdne2935265:0
    • Locate the small indentation on the camera case previously covered by the mounting ring.

    • Insert a spudger in the case seam and twist it to lever open the camera case.

    • Use the spudger to pry the case the rest of the way open.

    • Remove the top casing from the rear camera.

  3. Rexing V1P Plus Rear Camera Replacement: crwdns2935265:03crwdnd2935265:01crwdnd2935265:02crwdne2935265:0 Rexing V1P Plus Rear Camera Replacement: crwdns2935265:03crwdnd2935265:02crwdnd2935265:02crwdne2935265:0
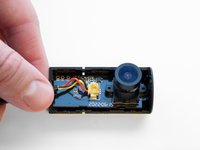
    • Remove the camera and camera motherboard from the casing.

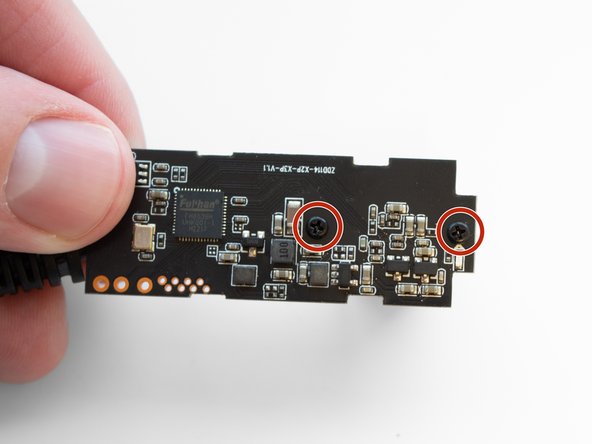
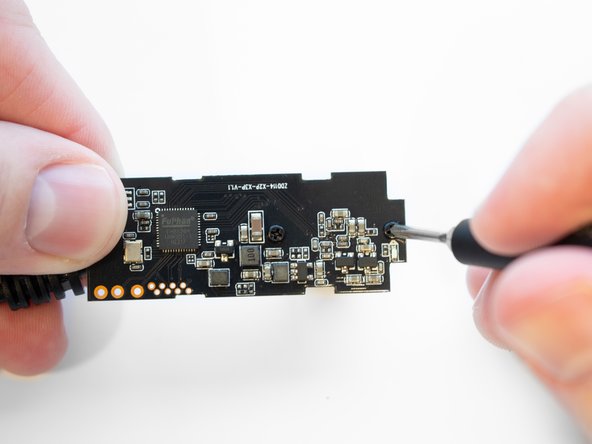
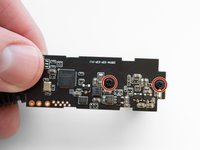
    • Flip the camera board over revealing the two 3.5 mm screws on the back holding the rear camera to the board.

  4. Rexing V1P Plus Rear Camera Replacement: crwdns2935265:04crwdnd2935265:01crwdnd2935265:03crwdne2935265:0 Rexing V1P Plus Rear Camera Replacement: crwdns2935265:04crwdnd2935265:02crwdnd2935265:03crwdne2935265:0 Rexing V1P Plus Rear Camera Replacement: crwdns2935265:04crwdnd2935265:03crwdnd2935265:03crwdne2935265:0
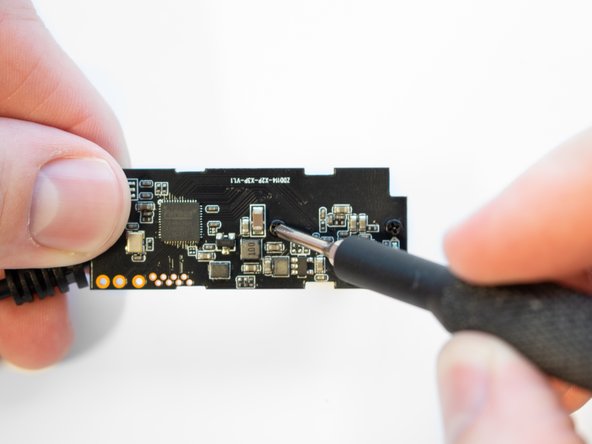
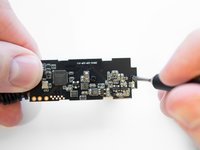
    • Remove the two 3.5 mm screws securing the camera to the motherboard using the Phillips #00 screwdriver.

  5. Rexing V1P Plus Rear Camera Replacement: crwdns2935265:05crwdnd2935265:01crwdnd2935265:01crwdne2935265:0
    • With the screws removed, the rear camera can be separated from the motherboard.

crwdns2915888:0crwdne2915888:0

To reassemble your device, follow these instructions in reverse order.

Luke Blair

crwdns2935283:002/14/23crwdne2935283:0

171 crwdns2915208:0crwdne2915208:0

crwdns2935295:0crwdne2935295:0

crwdns2915084:0crwdne2915084:0

Western Carolina University, Team 1-1, Virtue Spring 2023 crwdns2935289:0Western Carolina University, Team 1-1, Virtue Spring 2023crwdne2935289:0

WCU-VIRTUE-S23S1G1

crwdns2931471:04crwdne2931471:0

crwdns2935297:05crwdne2935297:0

crwdns2944067:00crwdne2944067:0

crwdns2917038:0crwdne2917038:0

crwdns2936625:0crwdne2936625:0:

crwdns2936751:024crwdne2936751:0 0

crwdns2936753:07crwdne2936753:0 2

crwdns2936753:030crwdne2936753:0 14

crwdns2942667:0crwdne2942667:0 208