crwdns2915892:0crwdne2915892:0
If your hair dryer will not power on after multiple troubleshooting attempts, the setting dial may be defective. As a result, this guide will instruct users on how to properly replace the setting dial at the bottom of the hair dryer.
crwdns2942213:0crwdne2942213:0
-
-
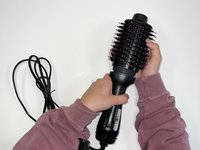
First, remove the pink panels on each side of the handle in order to access the screws.
 crwdns2952109:0crwdne2952109:0
-
-
-
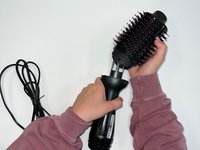
After removing the pink panels, there will be one visible screw on each side of the dryer handle measuring at 11mm.
-
Carefully unscrew both of these screws with a tri-point Y000 screwdriver.
-
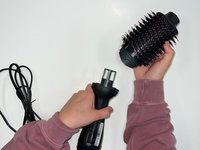
Next, completely remove the screws out of the dryer handle.
-
-
-
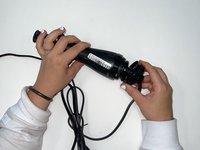
Remove the barrel by twisting and pulling it away from the handle of the dryer.
-
-
-
-
Next, slide down the air inlet and the setting dial to reveal the 11mm screws on each side of the handle at the bottom of the hair dryer.
-
-
-
There will be one visible screw on each side of the dryer at the bottom of the handle, measuring at 11mm.
-
Carefully unscrew both of these screws with a tri-point Y000 screwdriver.
-
-
-
Place the iFixit opening tool along the seams of the handle and pry the two pieces apart.
-
-
-
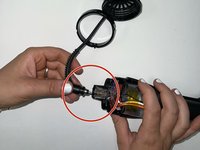
Once you have exposed the inside of the dryer, you will see a clear port at the very end where the cord is connected and plugged into.
-
Now, with your thumb and pointer finger gently pinch the top and bottom of the clear port.
-
Next with your free hand carefully pull the cord out of the port of the dryer handle.
-
-
-
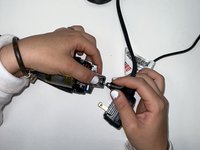
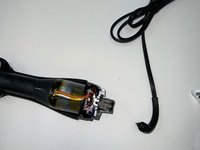
Once the cord is disconnected from the handle, you should be able to slide the dial setting off completely and free it from the cord.
-


To reassemble your device, follow these instructions in reverse order.
crwdns2935221:0crwdne2935221:0
crwdns2935229:02crwdne2935229:0
crwdns2935287:0crwdne2935287:0

University of Alabama, Team 1-4, Bedsole Spring 2022 crwdns2935289:0University of Alabama, Team 1-4, Bedsole Spring 2022crwdne2935289:0
UA-BEDSOLE-S22S1G4
crwdns2931471:03crwdne2931471:0
crwdns2935297:010crwdne2935297:0
crwdns2947412:02crwdne2947412:0
Referring to step 4, how do you release the first part with the metal mesh inside from the body
Richard Funnell - crwdns2934203:0crwdne2934203:0 crwdns2950251:0crwdne2950251:0
This video shows very good how to dissamble the hairdryer. https://youtu.be/Qc-jcJbNQzE?si=wibfeCDW...
Tobi - crwdns2934203:0crwdne2934203:0 crwdns2950251:0crwdne2950251:0