crwdns2933423:0crwdne2933423:0
crwdns2947577:0crwdnd2947577:0crwdne2947577:0

Retroid Pocket 3 Button Pad Replacement

crwdns2869540:0crwdne2869540:0: 1.5K

crwdns2959988:0crwdne2959988:0

crwdns2959990:0crwdne2959990:0
3
crwdns2959992:0crwdne2959992:0
22
crwdns2959994:0crwdne2959994:0
91
crwdns2959996:0crwdne2959996:0
1,476
crwdns2955950:0crwdne2955950:0: 0

crwdns2959998:0crwdne2959998:0

crwdns2960000:0crwdne2960000:0
crwdns2959984:0crwdne2959984:0: 0

crwdns2959956:0crwdne2959956:0

crwdns2959986:0crwdne2959986:0: 0

crwdns2959958:0crwdne2959958:0

crwdns2955944:0crwdne2955944:0: crwdns2931287:020crwdne2931287:0
crwdns2955970:0crwdne2955970:0: crwdns2937801:0crwdne2937801:0
Retroid Pocket 3 Button Pad Replacement

crwdns2915892:0crwdne2915892:0

crwdns2959928:0crwdne2959928:0 ↓

If the device buttons on your Retroid Pocket 3 are not responding to touch, follow this guide to remove and replace the faulty button pad and install a new one. This process will take approximately 25-30 minutes to complete, and the tools needed for replacement are listed in this guide.


crwdns2959930:0crwdne2959930:0

crwdns2943213:0crwdne2943213:0

crwdns2943215:0crwdne2943215:0

    1. Retroid Pocket 3 Button Pad Replacement, Battery: crwdns2935265:01crwdnd2935265:01crwdnd2935265:01crwdne2935265:0
      • Unplug any cables connected to the Retroid Pocket 3+.

      • Ensure your device has a charge of 5% or less as a charged battery can be dangerous if punctured.

      crwdns2952109:0crwdne2952109:0

      crwdns2917038:0crwdne2917038:0

    2. Retroid Pocket 3 Button Pad Replacement: crwdns2935265:02crwdnd2935265:01crwdnd2935265:03crwdne2935265:0 Retroid Pocket 3 Button Pad Replacement: crwdns2935265:02crwdnd2935265:02crwdnd2935265:03crwdne2935265:0 Retroid Pocket 3 Button Pad Replacement: crwdns2935265:02crwdnd2935265:03crwdnd2935265:03crwdne2935265:0
      • Remove the four 6 mm screws from the backplate of the device with a T5 Torx screwdriver.

      • Use a plastic opening tool or spudger to gently pry apart the backplate from the device.

      crwdns2952109:0crwdne2952109:0

      crwdns2917038:0crwdne2917038:0

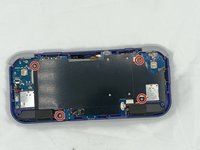
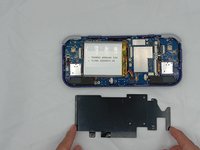
    3. Retroid Pocket 3 Button Pad Replacement: crwdns2935265:03crwdnd2935265:01crwdnd2935265:02crwdne2935265:0 Retroid Pocket 3 Button Pad Replacement: crwdns2935265:03crwdnd2935265:02crwdnd2935265:02crwdne2935265:0
      • Remove the four 4.5 mm screws with a Phillips #00 screwdriver.

      • Lift off the metal plate.

      crwdns2952109:0crwdne2952109:0

      crwdns2917038:0crwdne2917038:0

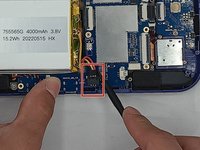
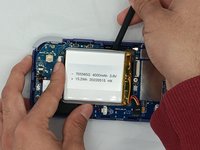
    4. Retroid Pocket 3 Button Pad Replacement: crwdns2935265:04crwdnd2935265:01crwdnd2935265:03crwdne2935265:0 Retroid Pocket 3 Button Pad Replacement: crwdns2935265:04crwdnd2935265:02crwdnd2935265:03crwdne2935265:0 Retroid Pocket 3 Button Pad Replacement: crwdns2935265:04crwdnd2935265:03crwdnd2935265:03crwdne2935265:0
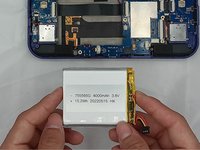
      • Use a plastic opening tool or spudger to unclip the battery connector.

      • Carefully lift the battery from the case.

      • The battery has double-sided tape at the bottom. Gently push a spudger or opening tool underneath the battery to help free it from the adhesive. Do not bend or puncture the battery.

      • Lift and remove the battery.

      crwdns2952109:0crwdne2952109:0

      crwdns2917038:0crwdne2917038:0

    1. Retroid Pocket 3 Button Pad Replacement, Button Pad: crwdns2935265:05crwdnd2935265:01crwdnd2935265:03crwdne2935265:0 Retroid Pocket 3 Button Pad Replacement, Button Pad: crwdns2935265:05crwdnd2935265:02crwdnd2935265:03crwdne2935265:0 Retroid Pocket 3 Button Pad Replacement, Button Pad: crwdns2935265:05crwdnd2935265:03crwdnd2935265:03crwdne2935265:0
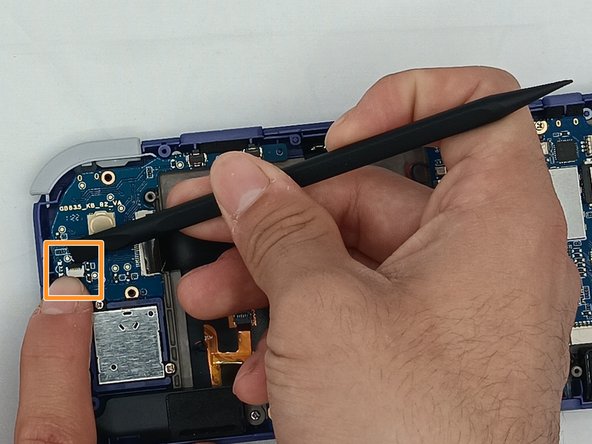
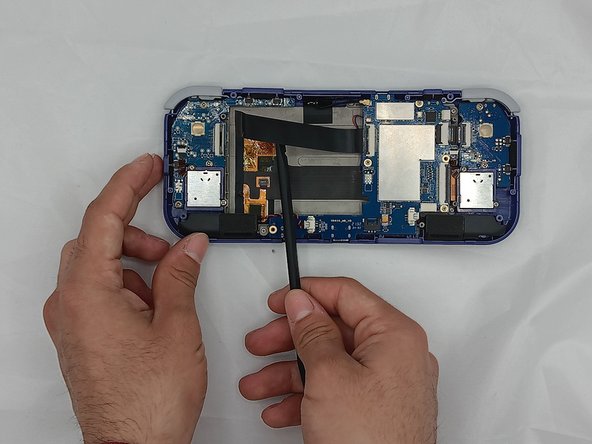
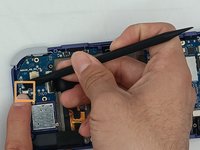
      • Undo the ribbon cable clips using the Spudger tool.

      • Unclip the cable on the left side of the board.

      • Carefully lift the ribbon cable to the right to remove it from the clip.

      crwdns2952109:0crwdne2952109:0

      crwdns2917038:0crwdne2917038:0

    2. Retroid Pocket 3 Button Pad Replacement: crwdns2935265:06crwdnd2935265:01crwdnd2935265:02crwdne2935265:0 Retroid Pocket 3 Button Pad Replacement: crwdns2935265:06crwdnd2935265:02crwdnd2935265:02crwdne2935265:0
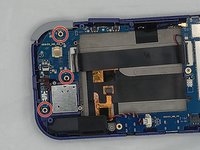
      • Use a Phillips #00 screwdriver to remove the three 5.9 mm screws from the controller board.

      • Carefully lift the board out of the device.

      crwdns2952109:0crwdne2952109:0

      crwdns2917038:0crwdne2917038:0

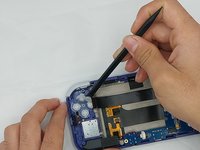
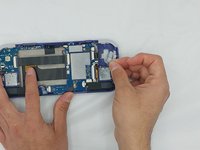
    3. Retroid Pocket 3 Button Pad Replacement: crwdns2935265:07crwdnd2935265:01crwdnd2935265:02crwdne2935265:0 Retroid Pocket 3 Button Pad Replacement: crwdns2935265:07crwdnd2935265:02crwdnd2935265:02crwdne2935265:0
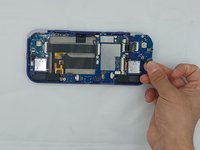
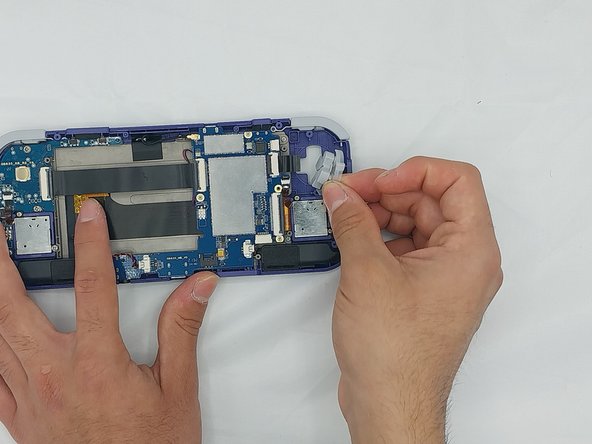
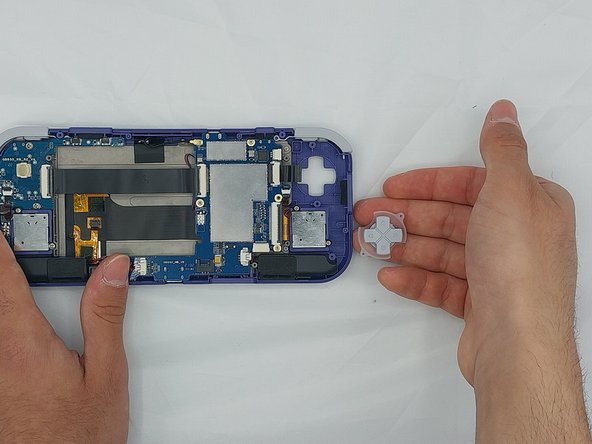
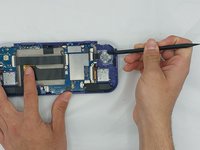
      • Using the Spudger tool, put the tip under the edge of the rubber button pad to start lifting it.

      • Button pad will loosen and lift straight out of the casing.

      crwdns2952109:0crwdne2952109:0

      crwdns2917038:0crwdne2917038:0

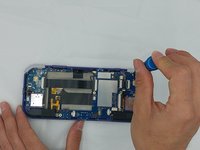
    4. Retroid Pocket 3 Button Pad Replacement: crwdns2935265:08crwdnd2935265:01crwdnd2935265:01crwdne2935265:0
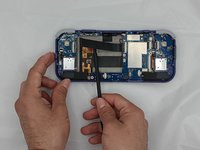
      • Move to the right side of the device.

      • Using a spudger, undo the ribbon cable clip connected to the main PCB along with the joystick ribbon cable.

      crwdns2952109:0crwdne2952109:0

      crwdns2917038:0crwdne2917038:0

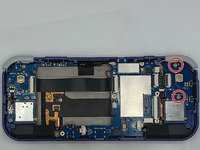
    5. Retroid Pocket 3 Button Pad Replacement: crwdns2935265:09crwdnd2935265:01crwdnd2935265:03crwdne2935265:0 Retroid Pocket 3 Button Pad Replacement: crwdns2935265:09crwdnd2935265:02crwdnd2935265:03crwdne2935265:0 Retroid Pocket 3 Button Pad Replacement: crwdns2935265:09crwdnd2935265:03crwdnd2935265:03crwdne2935265:0
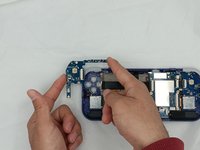
      • Use a Phillips #00 screwdriver to remove the two 5.9 mm screws.

      • Carefully lift the board out of the device.

      crwdns2952109:0crwdne2952109:0

      crwdns2917038:0crwdne2917038:0

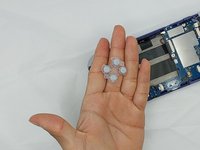
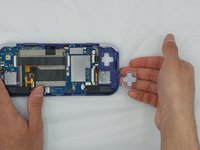
    6. Retroid Pocket 3 Button Pad Replacement: crwdns2935265:010crwdnd2935265:01crwdnd2935265:03crwdne2935265:0 Retroid Pocket 3 Button Pad Replacement: crwdns2935265:010crwdnd2935265:02crwdnd2935265:03crwdne2935265:0 Retroid Pocket 3 Button Pad Replacement: crwdns2935265:010crwdnd2935265:03crwdnd2935265:03crwdne2935265:0
      • Carefully pry up the silicone button pad with a Spudger tool.

      crwdns2952109:0crwdne2952109:0

      crwdns2917038:0crwdne2917038:0

crwdns2915888:0crwdne2915888:0

To reassemble your device, follow these instructions in reverse order.

crwdns2935221:0crwdne2935221:0

Cassidy Anderson

crwdns2935283:002/08/24crwdne2935283:0

271 crwdns2915208:0crwdne2915208:0

crwdns2935297:02crwdne2935297:0

crwdns2935287:0crwdne2935287:0

University of North Texas, Team 4-7, Harold Spring 2024 crwdns2935289:0University of North Texas, Team 4-7, Harold Spring 2024crwdne2935289:0

UNT-HAROLD-S24S4G7

crwdns2931471:04crwdne2931471:0

crwdns2935297:060crwdne2935297:0

crwdns2947412:00crwdne2947412:0

crwdns2917038:0crwdne2917038:0

crwdns2936625:0crwdne2936625:0:

crwdns2936751:024crwdne2936751:0 3

crwdns2936753:07crwdne2936753:0 22

crwdns2936753:030crwdne2936753:0 91

crwdns2959996:0crwdne2959996:0 1,476