crwdns2933423:0crwdne2933423:0
crwdns2947577:0crwdnd2947577:0crwdne2947577:0

Retro-Bit Retro Duo Circuit Board Replacement

crwdns2869540:0crwdne2869540:0: 3521

crwdns2959988:0crwdne2959988:0

crwdns2959990:0crwdne2959990:0
4
crwdns2959992:0crwdne2959992:0
29
crwdns2959994:0crwdne2959994:0
108
crwdns2959996:0crwdne2959996:0
3,521
crwdns2955950:0crwdne2955950:0: 1

crwdns2960006:01crwdne2960006:0

crwdns2960000:0crwdne2960000:0
crwdns2959984:0crwdne2959984:0: 0

crwdns2959956:0crwdne2959956:0

crwdns2959986:0crwdne2959986:0: 2

crwdns2959982:02crwdne2959982:0

crwdns2955944:0crwdne2955944:0: crwdns2931287:05crwdne2931287:0
crwdns2955970:0crwdne2955970:0: crwdns2937799:0crwdne2937799:0
crwdns2862591:0crwdne2862591:0

crwdns2862592:0crwdne2862592:0

Retro-Bit Retro Duo Circuit Board Replacement

crwdns2915892:0crwdne2915892:0

crwdns2959928:0crwdne2959928:0 ↓

The circuit board is essential to the console's functions. Using Phillips #0 and Phillips #2 screwdrivers, you can replace it.

crwdns2959930:0crwdne2959930:0

crwdns2943215:0crwdne2943215:0

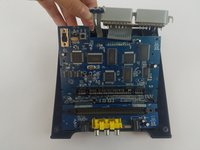
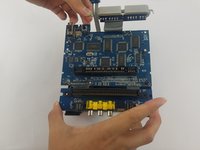
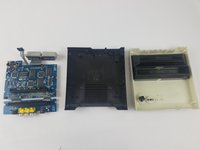
    1. Retro-Bit Retro Duo Circuit Board Replacement, Circuit Board: crwdns2935265:01crwdnd2935265:01crwdnd2935265:03crwdne2935265:0 Retro-Bit Retro Duo Circuit Board Replacement, Circuit Board: crwdns2935265:01crwdnd2935265:02crwdnd2935265:03crwdne2935265:0 Retro-Bit Retro Duo Circuit Board Replacement, Circuit Board: crwdns2935265:01crwdnd2935265:03crwdnd2935265:03crwdne2935265:0
      • With the console on its top, remove the four 12 mm Phillips #2 screws.

      • There may be a sticker covering one or more of the screws. Simply remove the sticker before screw removal.

      • Flip the console on its feet. Carefully lift the top casing from the back (where the AV/S and power ports are).

      • To avoid damage, do not remove the top casing completely. There is a small LED circuit board connected to the main circuit board.

      crwdns2952109:0crwdne2952109:0

      crwdns2917038:0crwdne2917038:0

    2. Retro-Bit Retro Duo Circuit Board Replacement: crwdns2935265:02crwdnd2935265:01crwdnd2935265:03crwdne2935265:0 Retro-Bit Retro Duo Circuit Board Replacement: crwdns2935265:02crwdnd2935265:02crwdnd2935265:03crwdne2935265:0 Retro-Bit Retro Duo Circuit Board Replacement: crwdns2935265:02crwdnd2935265:03crwdnd2935265:03crwdne2935265:0
      • Remove the one 6 mm Phillips #0 LED circuit board screw.

      • Lift the top case and set aside.

      crwdns2952109:0crwdne2952109:0

      crwdns2917038:0crwdne2917038:0

    3. Retro-Bit Retro Duo Circuit Board Replacement: crwdns2935265:03crwdnd2935265:01crwdnd2935265:03crwdne2935265:0 Retro-Bit Retro Duo Circuit Board Replacement: crwdns2935265:03crwdnd2935265:02crwdnd2935265:03crwdne2935265:0 Retro-Bit Retro Duo Circuit Board Replacement: crwdns2935265:03crwdnd2935265:03crwdnd2935265:03crwdne2935265:0
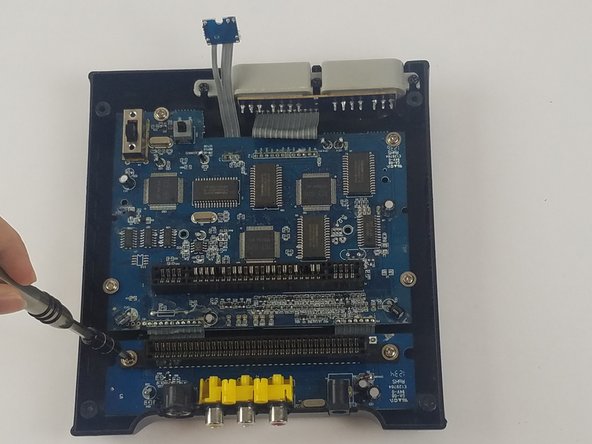
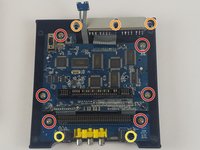
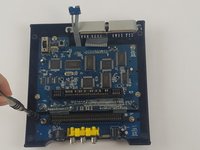
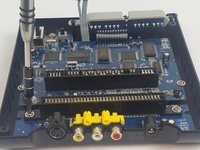
      • Remove the 11 screws holding the circuit boards and ports in place.

      • Six 11 mm Phillips #2 holding the circuit boards.

      • Three 12 mm Phillips #2 screws holding the controller ports.

      • Two 7 mm Philllips #2 screws holding the back ports

      crwdns2952109:0crwdne2952109:0

      crwdns2917038:0crwdne2917038:0

    4. Retro-Bit Retro Duo Circuit Board Replacement: crwdns2935265:04crwdnd2935265:01crwdnd2935265:03crwdne2935265:0 Retro-Bit Retro Duo Circuit Board Replacement: crwdns2935265:04crwdnd2935265:02crwdnd2935265:03crwdne2935265:0 Retro-Bit Retro Duo Circuit Board Replacement: crwdns2935265:04crwdnd2935265:03crwdnd2935265:03crwdne2935265:0
      • Carefully lift the circuit board while holding either the AV or controller ports. Alternatively, you can hold the circuit board on its edges.

      • Make sure to lift the circuit board completely out of the bottom case.

      • To avoid damage, do not to touch the top or bottom faces of the circuit board.

      crwdns2952109:0crwdne2952109:0

      crwdns2917038:0crwdne2917038:0

crwdns2915888:0crwdne2915888:0

To reassemble your device, follow these instructions in reverse order.
crwdns2935221:0crwdne2935221:0

Truong Vo

crwdns2935283:009/25/17crwdne2935283:0

324 crwdns2915208:0crwdne2915208:0

crwdns2935297:03crwdne2935297:0

crwdns2935287:0crwdne2935287:0

USF Tampa, Team S4-G4, Eyestone Fall 2017 crwdns2935289:0USF Tampa, Team S4-G4, Eyestone Fall 2017crwdne2935289:0

USFT-EYESTONE-F17S4G4

crwdns2931471:03crwdne2931471:0

crwdns2935297:060crwdne2935297:0

crwdns2947410:01crwdne2947410:0

I hope you show the second part were you replace the 72pin connector. Please include part source.

The 72 pin connector grabs too tightly on the cart.

Thanks.

George Tedrick - crwdns2934203:0crwdne2934203:0 crwdns2950251:0crwdne2950251:0

crwdns2917038:0crwdne2917038:0

crwdns2936625:0crwdne2936625:0:

crwdns2936751:024crwdne2936751:0 4

crwdns2936753:07crwdne2936753:0 29

crwdns2936753:030crwdne2936753:0 108

crwdns2959996:0crwdne2959996:0 3,521