crwdns2915892:0crwdne2915892:0
You will need to remove the scanner tray before replacing the printer carriage. You can see a guide for this under Removing Scanner Tray.
After this step is completed you are now ready to follow the steps in order to replace the printer carriage.
crwdns2942213:0crwdne2942213:0
-
-
Remove the back panel by inserting your fingers into the indentations next to the tabs. Press the tabs inward towards each other while pulling the back panel toward you.
-
-
-
Using the T10 Torx Security Bit Screwdriver, unscrew the screws on the upper left and right corners of the inner panel to remove the inner back panel.
-
-
-
Press down on the two plastic hinges to remove the upper portion of printer.
-
-
-
Grasp the plastic plug on the end of the speaker wire, then gently pull the plug away from the printer until the wire is removed.
-
-
-
Rotate the printer so the paper tray is facing towards you.
-
Gently lift the scanner tray up and away from the printer.
-
Press the gray plastic tabs inward to release the tabs from the printer.
-
-
-
-
Returning to the back of the printer, remove the scanner from the back hinges.
-
-
-
Gently grasp and unplug the two white ribbon cables from the printer body.
-
-
-
Unplug the white plastic multi-wire connector (with orange, black, red, and brown wires) from it's port.
-
-
-
Detach the scanner tray from the printer by lifting the scanner tray off the printer body.
-
-
-
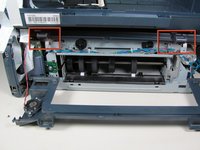
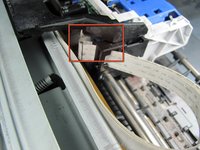
Remove printer carriage cover by unscrewing four black coarse thread T-10 torx screws marked with red circles.
-
-
-
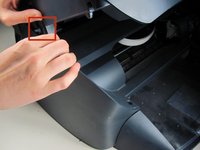
Depress the plastic tabs marked in red to release the cover from the sides.
-
-
-
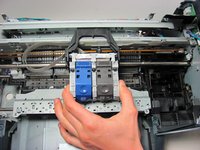
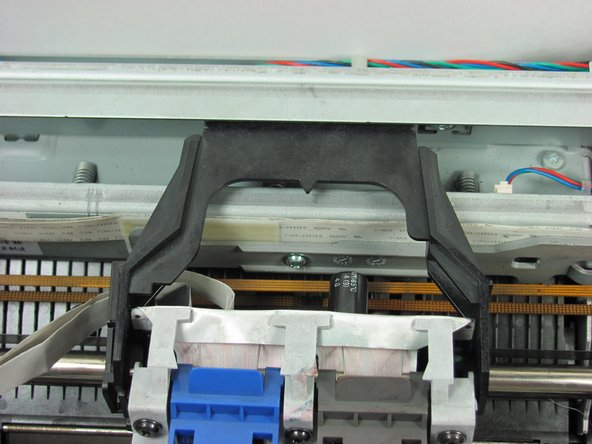
Slide the printer carriage to the center of the printer.
-
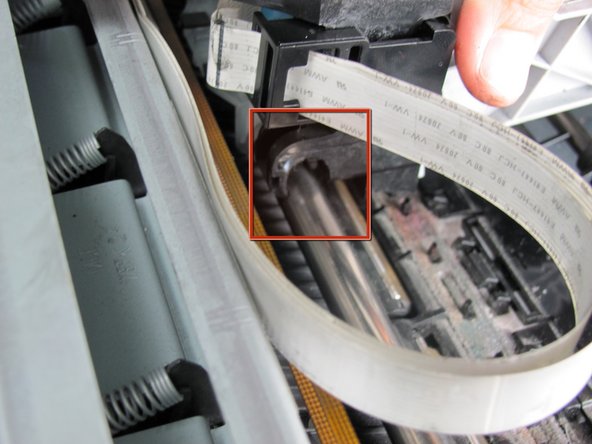
Disconnect the printer carriage from the rod one side at a a time by pulling upward from the bottom.
-
-
-
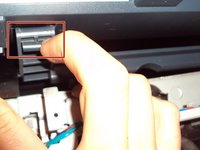
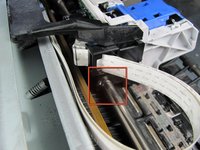
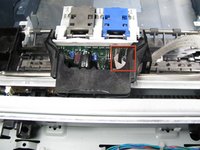
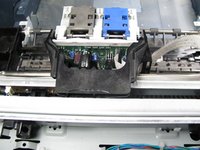
Pull on the two white wire strips on the printer carriage to remove which are marked in red.
-
-
-
Place new printer carriage on the carriage rod one side at a time.
-


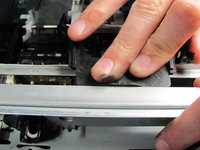

You have now successfully replaced your printer carriage for the Photosmart All In One Printer Scanner.
Follow these instructions in reverse order to reassemble your device.
crwdns2935221:0crwdne2935221:0
crwdns2935229:04crwdne2935229:0
crwdns2935287:0crwdne2935287:0

Cal Poly, Team 12-31, Maness Spring 2011 crwdns2935289:0Cal Poly, Team 12-31, Maness Spring 2011crwdne2935289:0
CPSU-MANESS-S11S12G31
crwdns2931471:05crwdne2931471:0
crwdns2935297:09crwdne2935297:0
crwdns2947410:01crwdne2947410:0
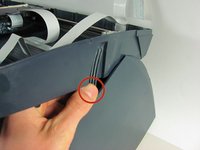
It would be a good idea to unhook the guide film whilst changing the carriage, then feeding it carefully through the IR head on the carriage PCB & re hooking it.