crwdns2933423:0crwdne2933423:0

Replacing Strings on Floating Tremolo Bridge Guitar

crwdns2942213:0crwdne2942213:0

  1. Replacing Strings on Floating Tremolo Bridge Guitar, Strings: crwdns2935265:01crwdnd2935265:01crwdnd2935265:03crwdne2935265:0 Replacing Strings on Floating Tremolo Bridge Guitar, Strings: crwdns2935265:01crwdnd2935265:02crwdnd2935265:03crwdne2935265:0 Replacing Strings on Floating Tremolo Bridge Guitar, Strings: crwdns2935265:01crwdnd2935265:03crwdnd2935265:03crwdne2935265:0
    • Use a string winder to loosen each string by turning the peg counter-clockwise.

    • Once loosened, pull the string out of the tuning peg.

  2. Replacing Strings on Floating Tremolo Bridge Guitar: crwdns2935265:02crwdnd2935265:01crwdnd2935265:03crwdne2935265:0 Replacing Strings on Floating Tremolo Bridge Guitar: crwdns2935265:02crwdnd2935265:02crwdnd2935265:03crwdne2935265:0 Replacing Strings on Floating Tremolo Bridge Guitar: crwdns2935265:02crwdnd2935265:03crwdnd2935265:03crwdne2935265:0
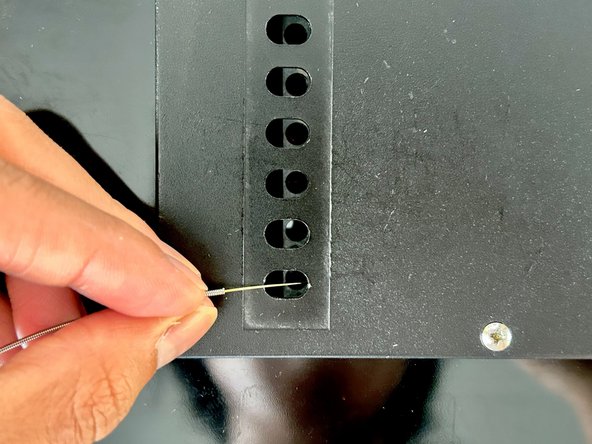
    • Move to the bridge of the guitar and push the strings through.

    • Flip the guitar around and pull the string out of the hole in the back.

  3. Replacing Strings on Floating Tremolo Bridge Guitar: crwdns2935265:03crwdnd2935265:01crwdnd2935265:02crwdne2935265:0 Replacing Strings on Floating Tremolo Bridge Guitar: crwdns2935265:03crwdnd2935265:02crwdnd2935265:02crwdne2935265:0
    • Insert the new strings through the holes in the back.

    • Many strings will be color coded or have guides so you'll know which holes to put each string through.

    • Feed the string through to the other end and pull until the end of the string is reached.

    • You will know if you reached the end of the string if you can't pull any further.

  4. Replacing Strings on Floating Tremolo Bridge Guitar: crwdns2935265:04crwdnd2935265:01crwdnd2935265:01crwdne2935265:0
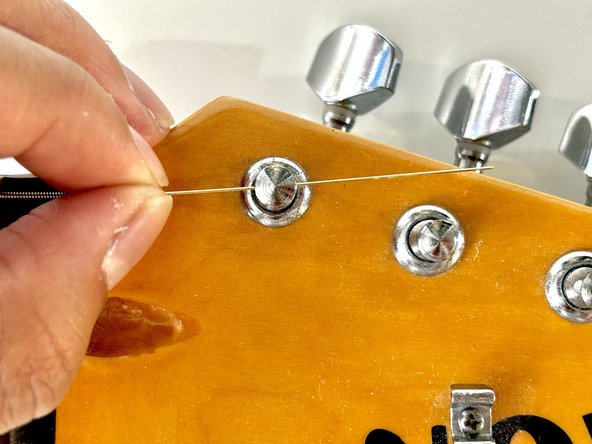
    • Turn each tuning peg until the holes are perpendicular to the nut.

    • The nut is the piece of wood with grooves that hold the strings.

  5. Replacing Strings on Floating Tremolo Bridge Guitar: crwdns2935265:05crwdnd2935265:01crwdnd2935265:03crwdne2935265:0 Replacing Strings on Floating Tremolo Bridge Guitar: crwdns2935265:05crwdnd2935265:02crwdnd2935265:03crwdne2935265:0 Replacing Strings on Floating Tremolo Bridge Guitar: crwdns2935265:05crwdnd2935265:03crwdnd2935265:03crwdne2935265:0
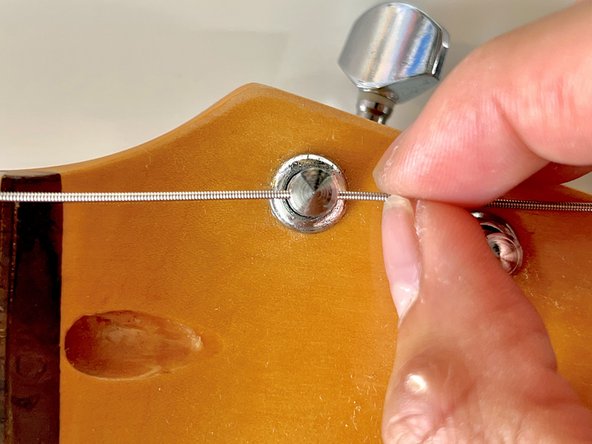
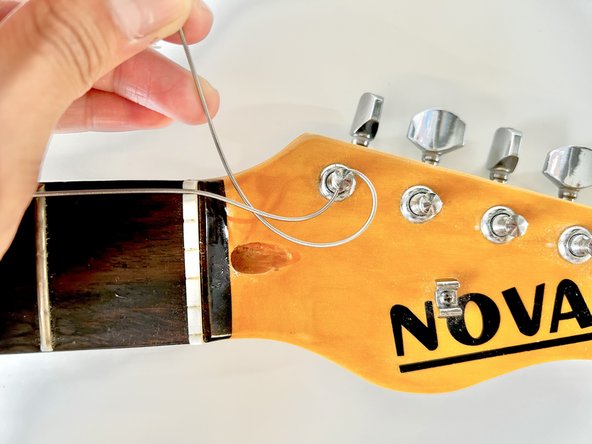
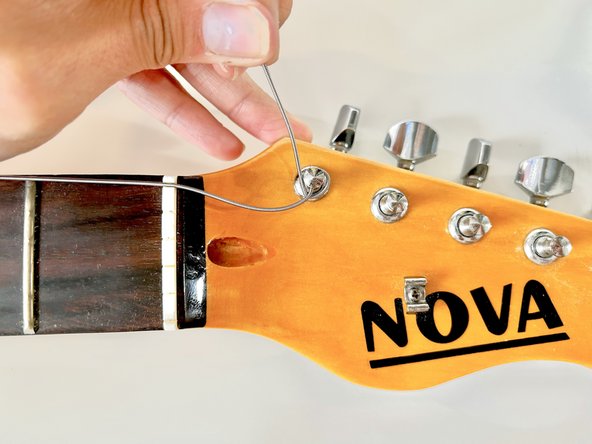
    • Align each string to the groove in the nut.

    • Insert the strings into the corresponding tuning peg.

    • Leave about an inch or 2 of slack.

  6. Replacing Strings on Floating Tremolo Bridge Guitar: crwdns2935265:06crwdnd2935265:01crwdnd2935265:03crwdne2935265:0 Replacing Strings on Floating Tremolo Bridge Guitar: crwdns2935265:06crwdnd2935265:02crwdnd2935265:03crwdne2935265:0 Replacing Strings on Floating Tremolo Bridge Guitar: crwdns2935265:06crwdnd2935265:03crwdnd2935265:03crwdne2935265:0
    • To tie the knot, begin by looping the string around and then under.

    • Pull up on the string until you can feel tension.

    • Loop the string over and pull.

  7. Replacing Strings on Floating Tremolo Bridge Guitar: crwdns2935265:07crwdnd2935265:01crwdnd2935265:01crwdne2935265:0
    • Tighten the string using the string winder.

    • One or two rotations should do the trick.

    • Be careful not to tighten the stings too much, the strings may snap under excessive tension.

  8. Replacing Strings on Floating Tremolo Bridge Guitar: crwdns2935265:08crwdnd2935265:01crwdnd2935265:01crwdne2935265:0
    • Snip off the excess string at the end.

    • Keep a safe distance when cutting each string. It can snap and hit your face or skin. Be extra careful to protect your eyes.

crwdns2915888:0crwdne2915888:0

All that's left to do is tune your guitar and then it will be ready for playing!

PATRICK B COLORINA

crwdns2935283:009/10/23crwdne2935283:0

157 crwdns2915208:0crwdne2915208:0

crwdns2935295:0crwdne2935295:0

crwdns2915084:0crwdne2915084:0

York University, Team 1-9, O'Regan Fall 2023 crwdns2935289:0York University, Team 1-9, O'Regan Fall 2023crwdne2935289:0

YORK-O'REGAN-F23S1G9

crwdns2934841:01crwdne2934841:0

crwdns2935303:01crwdne2935303:0

crwdns2944067:00crwdne2944067:0

crwdns2917038:0crwdne2917038:0

crwdns2936625:0crwdne2936625:0:

crwdns2936751:024crwdne2936751:0 0

crwdns2936753:07crwdne2936753:0 4

crwdns2936753:030crwdne2936753:0 10

crwdns2942667:0crwdne2942667:0 103