crwdns2915892:0crwdne2915892:0
The support valve docks with the brewing group during each brewing process. Either the brewing group itself opens it, or the valve inside opens when a certain pressure (about 4 bar) is exceeded. Then the hot water can flow into the brewing group. The seals on the support valve are subject to quite a lot of wear and should be replaced and greased regularly.
The instructions can also help with Saeco models and with other fully automatic coffee machines from Philips and Gaggia – the devices are all from the same manufacturer and are very similar in design.
crwdns2942213:0crwdne2942213:0
-
-
If the brewing unit is still in the machine, remove it now.
-
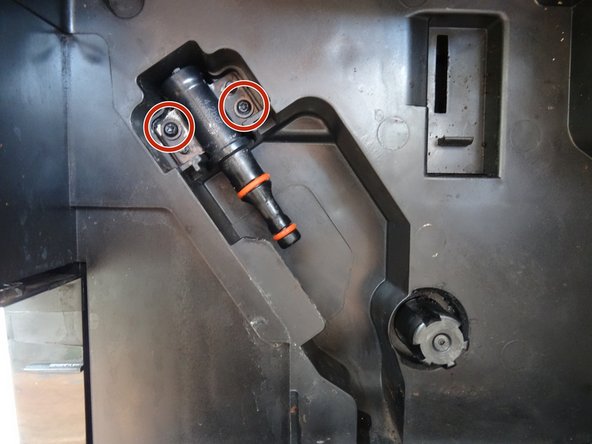
The support valve will become visible. It is attached with two Torx T10 screws. Unscrew them.
-
Pull the support valve out towards you, using a little force and wiggling movements.
-
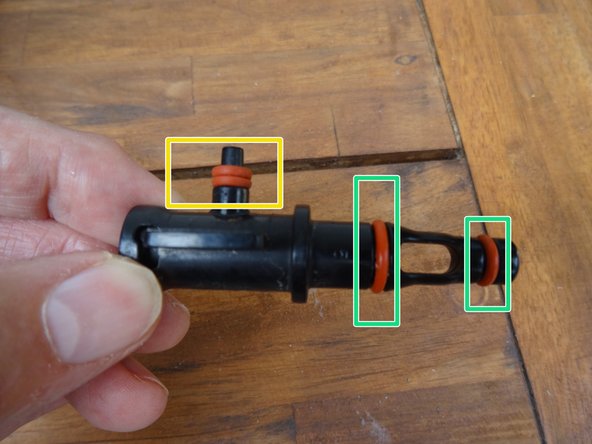
Pay attention to the seals: there is a double seal at the inlet, which may also get stuck in the opening. Replace it.
-
There are two seals at the outlet, with the larger one at the top. Replace them.
-
-
-
-
Turn the valve so that the top is facing you. You will see a slot. Take a flat screwdriver and turn it slightly counterclockwise.
-
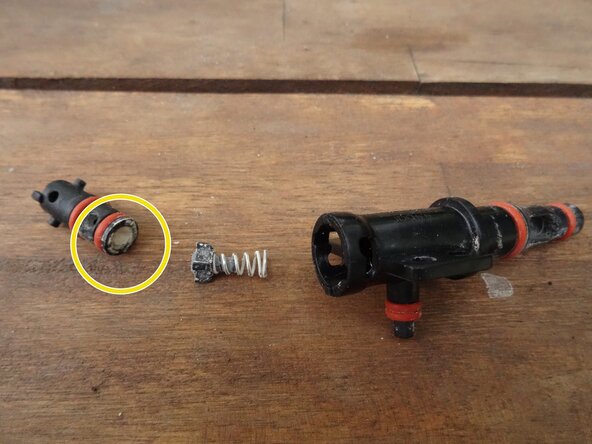
Use some tweezers to carefully lift out the inside of the valve
-
-
-
The valve stem points upwards.
-
If the two green O-rings do no longer properly seal, the valve will no longer work. Replace the seals.
-
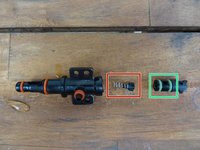
Picture 2 shows a valve where the opening was completely caked with limescale. The machine was able to produce water for tea, but of course no coffee. After some time soaking in descaler, the valve opening was cleared up again.
-


Follow the steps in reverse order to reassemble your device.
crwdns2935221:0crwdne2935221:0
crwdns2935227:0crwdne2935227:0
crwdns2934873:0crwdne2934873:0
100%


crwdns2934885:0crwdne2934885:0 crwdns2934875:0crwdne2934875:0
crwdns2934877:0crwdne2934877:0 ›
crwdns2935287:0crwdne2935287:0

Repair is War on Entropy crwdns2935289:0Repair is War on Entropycrwdne2935289:0
Community
crwdns2931471:032crwdne2931471:0
crwdns2935297:01 557crwdne2935297:0