crwdns2933423:0crwdne2933423:0

Replace Kärcher RC3000 brush motor. replacement

  1. Replace Kärcher RC3000 brush motor. replacement, Replace brush motor.: crwdns2935265:01crwdnd2935265:01crwdnd2935265:01crwdne2935265:0
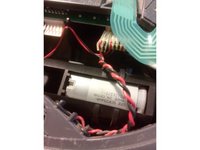
    • Remove both batteries.

    • Tools: Wide slotted screwdriver or better 20 Torx.

  2. Replace Kärcher RC3000 brush motor. replacement: crwdns2935265:02crwdnd2935265:01crwdnd2935265:01crwdne2935265:0
    • Remove protective rubber collision protection and cover.

  3. Replace Kärcher RC3000 brush motor. replacement: crwdns2935265:03crwdnd2935265:01crwdnd2935265:02crwdne2935265:0 Replace Kärcher RC3000 brush motor. replacement: crwdns2935265:03crwdnd2935265:02crwdnd2935265:02crwdne2935265:0
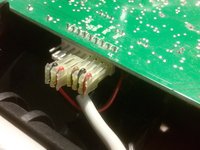
    • Unplug the on/off switch.

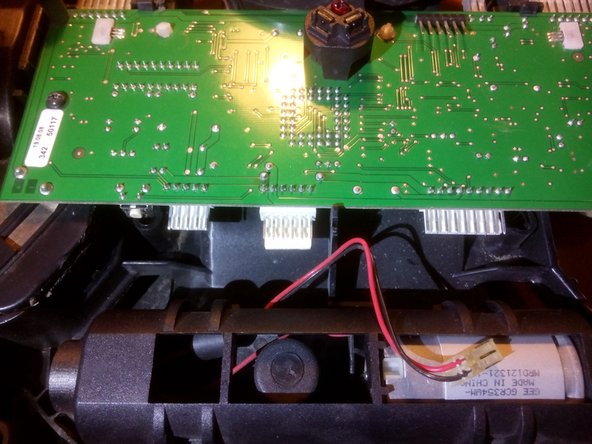
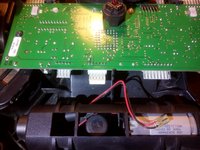
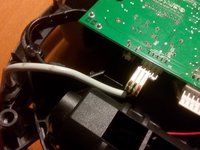
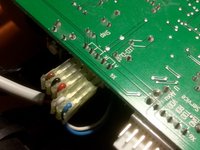
    • Unplug the connector for the charging contacts.

  4. Replace Kärcher RC3000 brush motor. replacement: crwdns2935265:04crwdnd2935265:01crwdnd2935265:03crwdne2935265:0 Replace Kärcher RC3000 brush motor. replacement: crwdns2935265:04crwdnd2935265:02crwdnd2935265:03crwdne2935265:0 Replace Kärcher RC3000 brush motor. replacement: crwdns2935265:04crwdnd2935265:03crwdnd2935265:03crwdne2935265:0
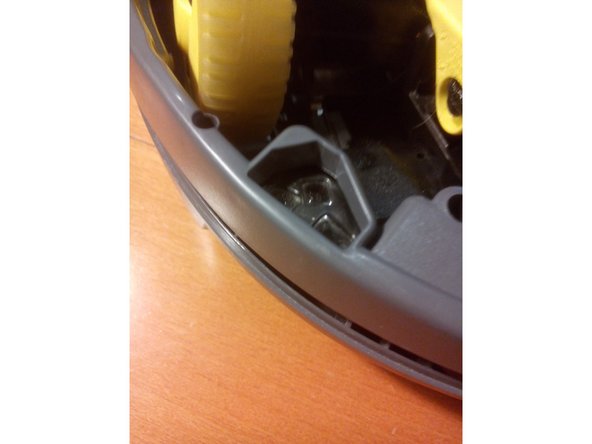
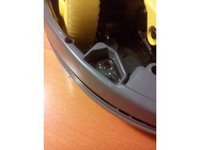
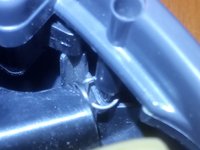
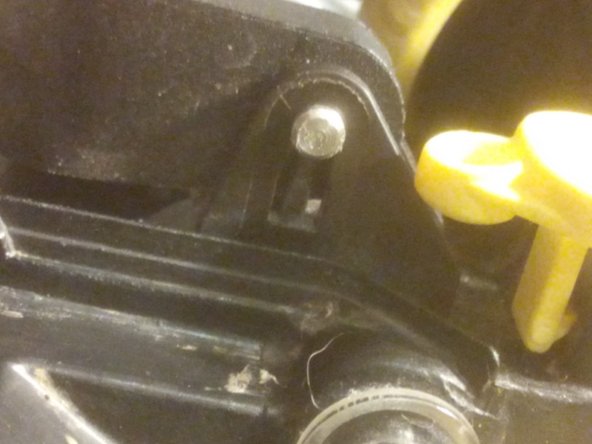
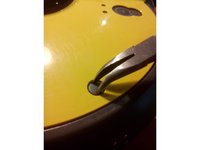
    • remove pins. Caution, risk of injury for the inexperienced.

  5. Replace Kärcher RC3000 brush motor. replacement: crwdns2935265:05crwdnd2935265:01crwdnd2935265:01crwdne2935265:0
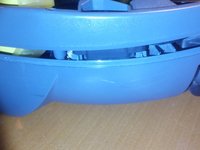
    • Detach outer upper case (do not remove yet!). To do this, loosen 4 screws. With slotted screwdriver or 8 Torx.

  6. Replace Kärcher RC3000 brush motor. replacement: crwdns2935265:06crwdnd2935265:01crwdnd2935265:01crwdne2935265:0
    • rotate device. Hold both frames. Be careful, the screws will fall out. 4 left?

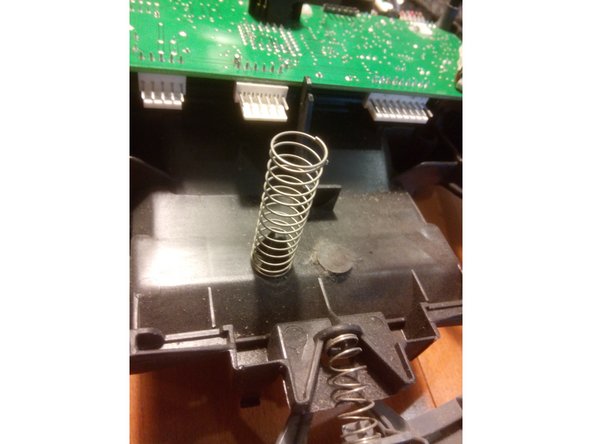
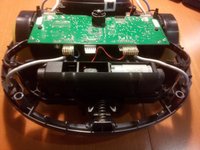
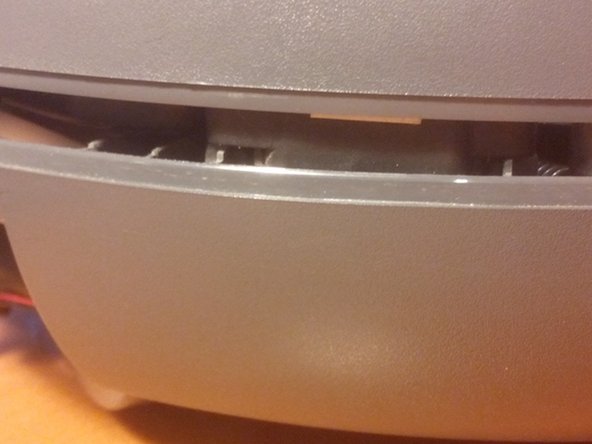
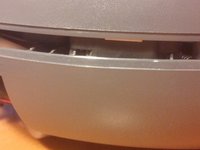
    • Now carefully remove the upper cover without pressing the lower part down. Then the springs remain mounted!

  7. Replace Kärcher RC3000 brush motor. replacement: crwdns2935265:07crwdnd2935265:01crwdnd2935265:02crwdne2935265:0 Replace Kärcher RC3000 brush motor. replacement: crwdns2935265:07crwdnd2935265:02crwdnd2935265:02crwdne2935265:0
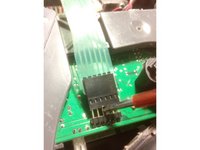
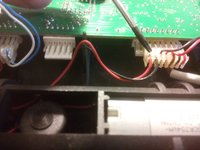
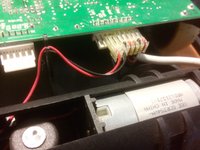
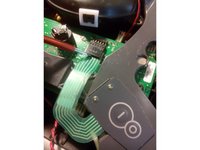
    • Disconnect the brush motor connector.

    • ..and the others on the site too.
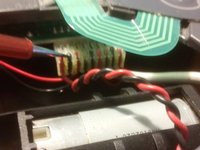
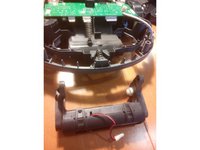
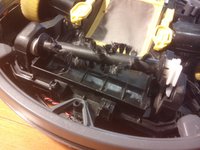
  8. Replace Kärcher RC3000 brush motor. replacement: crwdns2935265:08crwdnd2935265:01crwdnd2935265:02crwdne2935265:0 Replace Kärcher RC3000 brush motor. replacement: crwdns2935265:08crwdnd2935265:02crwdnd2935265:02crwdne2935265:0
    • Remove brush motor.

    • Congratulations, mountain party

  9. Replace Kärcher RC3000 brush motor. replacement: crwdns2935265:09crwdnd2935265:01crwdnd2935265:01crwdne2935265:0
    • Install new brush motor.

  10. Replace Kärcher RC3000 brush motor. replacement: crwdns2935265:010crwdnd2935265:01crwdnd2935265:03crwdne2935265:0 Replace Kärcher RC3000 brush motor. replacement: crwdns2935265:010crwdnd2935265:02crwdnd2935265:03crwdne2935265:0 Replace Kärcher RC3000 brush motor. replacement: crwdns2935265:010crwdnd2935265:03crwdnd2935265:03crwdne2935265:0
    • plug in.

  11. Replace Kärcher RC3000 brush motor. replacement: crwdns2935265:011crwdnd2935265:01crwdnd2935265:03crwdne2935265:0 Replace Kärcher RC3000 brush motor. replacement: crwdns2935265:011crwdnd2935265:02crwdnd2935265:03crwdne2935265:0 Replace Kärcher RC3000 brush motor. replacement: crwdns2935265:011crwdnd2935265:03crwdnd2935265:03crwdne2935265:0
    • ...put on more plugs.

  12. Replace Kärcher RC3000 brush motor. replacement: crwdns2935265:012crwdnd2935265:01crwdnd2935265:03crwdne2935265:0 Replace Kärcher RC3000 brush motor. replacement: crwdns2935265:012crwdnd2935265:02crwdnd2935265:03crwdne2935265:0 Replace Kärcher RC3000 brush motor. replacement: crwdns2935265:012crwdnd2935265:03crwdnd2935265:03crwdne2935265:0
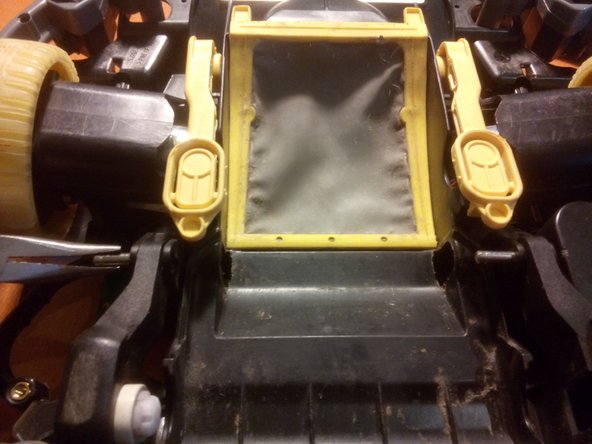
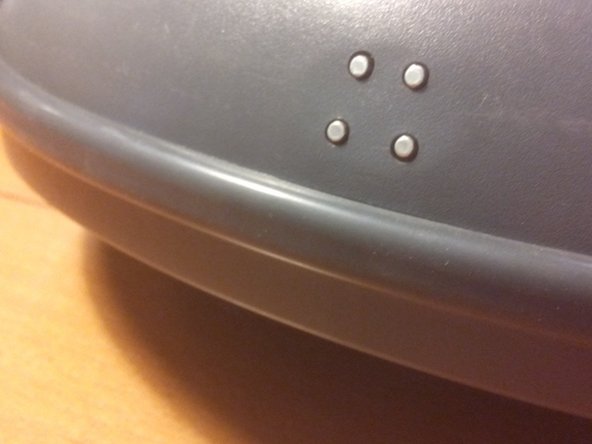
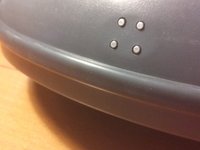
    • Check the sensors for correct seating

    • Put the top lid on. Make sure that the cover is assembled without using force!

    • rotate device. Hold the two frame parts together well.

    • Do the sensors sit well in the frame?

  13. Replace Kärcher RC3000 brush motor. replacement: crwdns2935265:013crwdnd2935265:01crwdnd2935265:02crwdne2935265:0 Replace Kärcher RC3000 brush motor. replacement: crwdns2935265:013crwdnd2935265:02crwdnd2935265:02crwdne2935265:0
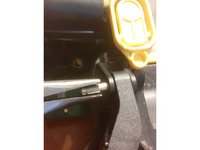
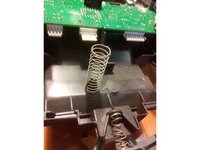
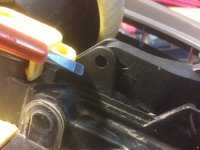
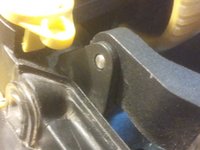
    • The pins that must hold the spring must dip into the opposite frame part.

    • Only then can the frame be screwed on on this side.

    • The same on the other side.

    • Also install the remaining two screws. When tightening, ensure that the frames are evenly spaced apart.

  14. Replace Kärcher RC3000 brush motor. replacement: crwdns2935265:014crwdnd2935265:01crwdnd2935265:02crwdne2935265:0 Replace Kärcher RC3000 brush motor. replacement: crwdns2935265:014crwdnd2935265:02crwdnd2935265:02crwdne2935265:0
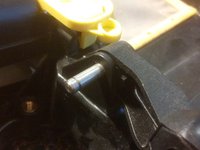
    • Reinsert the pins for the brush from the correct side.

  15. Replace Kärcher RC3000 brush motor. replacement: crwdns2935265:015crwdnd2935265:01crwdnd2935265:02crwdne2935265:0 Replace Kärcher RC3000 brush motor. replacement: crwdns2935265:015crwdnd2935265:02crwdnd2935265:02crwdne2935265:0
    • Insert pins to the end.

  16. Replace Kärcher RC3000 brush motor. replacement: crwdns2935265:016crwdnd2935265:01crwdnd2935265:02crwdne2935265:0 Replace Kärcher RC3000 brush motor. replacement: crwdns2935265:016crwdnd2935265:02crwdnd2935265:02crwdne2935265:0
    • Install brush

    • attach the cover

    • rotate device

  17. Replace Kärcher RC3000 brush motor. replacement: crwdns2935265:017crwdnd2935265:01crwdnd2935265:02crwdne2935265:0 Replace Kärcher RC3000 brush motor. replacement: crwdns2935265:017crwdnd2935265:02crwdnd2935265:02crwdne2935265:0
    • Plug in the connector for the charging contacts

    • Plug for the on/off switch..

  18. Replace Kärcher RC3000 brush motor. replacement: crwdns2935265:018crwdnd2935265:01crwdnd2935265:02crwdne2935265:0 Replace Kärcher RC3000 brush motor. replacement: crwdns2935265:018crwdnd2935265:02crwdnd2935265:02crwdne2935265:0
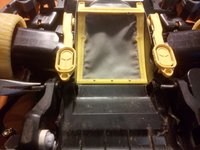
    • Mount the yellow cover

    • Mount the bumper

    • Install batteries

    • Testing

    Hallo. Mein Roboter fährt nur noch im Stern da er denkt de Boden sei überall sehr dreckig. Zuerst dachte ich die Sensoren sind dreckig und sah Kondensation unter dem Glas. Ich hab den rc3000 auseinander geschraubt und die Kondensation beseitigt. Leider besteht das Problem weiterhin. Weiss jemand an was das Problem noch liegen könnte?

    Dominik Bieler - crwdns2934203:0crwdne2934203:0

crwdns2915888:0crwdne2915888:0

To reassemble your device, follow these instructions in reverse order.

crwdns2934873:0crwdne2934873:0

de en

100%

crwdns2934883:0HelloMacOScrwdne2934883:0 crwdns2934875:0crwdne2934875:0
crwdns2934877:0crwdne2934877:0 ›

Michael Kappich

crwdns2935283:012/11/16crwdne2935283:0

101 crwdns2915208:0crwdne2915208:0

crwdns2935295:0crwdne2935295:0

crwdns2947410:01crwdne2947410:0

Danke - hat super geklappt! Vorsicht bei den weißen, dünnen Plastikstiften die den Bürstenmotor vorne noch begrenzen - brechen gerne ab.

thenotoriousflow - crwdns2934203:0crwdne2934203:0

crwdns2917038:0crwdne2917038:0

crwdns2936625:0crwdne2936625:0:

crwdns2936751:024crwdne2936751:0 0

crwdns2936753:07crwdne2936753:0 3

crwdns2936753:030crwdne2936753:0 14

crwdns2942667:0crwdne2942667:0 1,006