crwdns2915892:0crwdne2915892:0
This guide will show you how to replace the Wi-Fi card in your Asus M570D. This repair will help if your Wi-Fi or Bluetooth is no longer working or if you want to replace a defective card.
crwdns2942213:0crwdne2942213:0
-
-
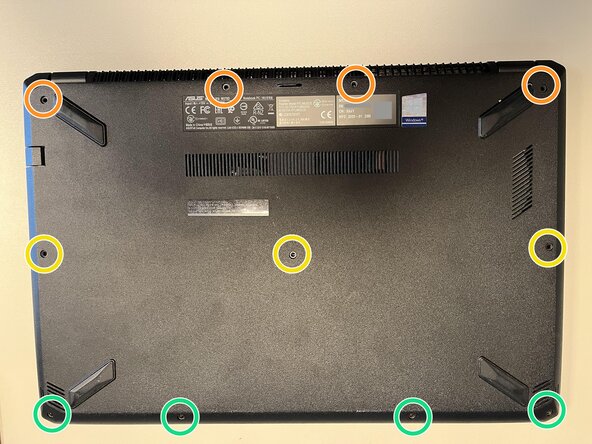
Close the laptop, place it on its lid, and align it as shown in the image
-
There are three different screw lengths:
-
4 x PH1 12 mm (orange)
-
3 x PH1 10 mm (yellow)
-
4 x PH1 7 mm (green)
-
The screws must be reinstalled in the correct position later, otherwise something can be damaged.
-
Take out the screws and sort them by length.
-
-
-
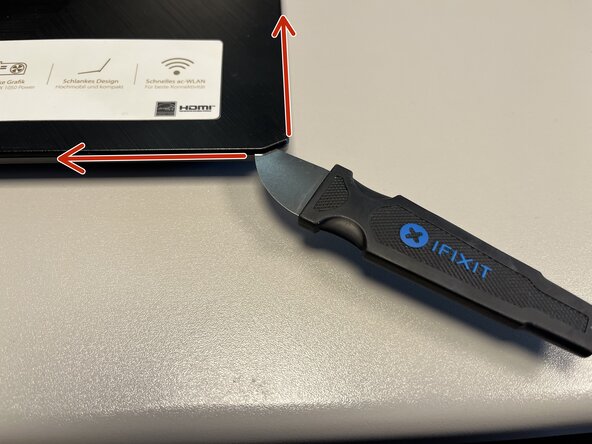
Turn the device over and open it.
-
Carefully insert the Jimmy into the gap between the case and the keyboard at the lower right corner of the keyboard.
-
From this position, work your way forward by levering alternately to the left and up until the keyboard is loose on the case.
-
-
-
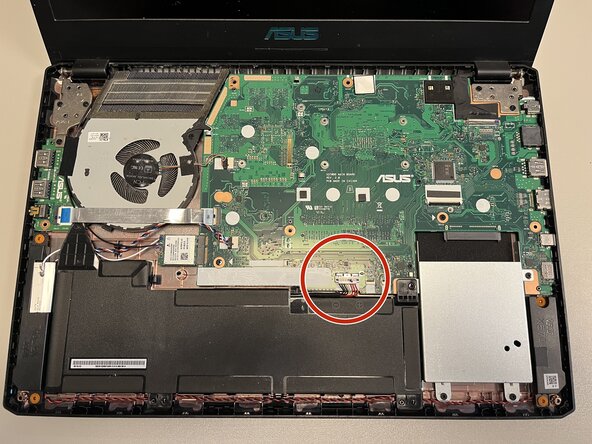
There are 4 cables that must be removed!
-
Carefully open the keyboard under the touchpad, move it in the direction of the screen.
-
Use the spudger to lift the black lock on the ribbon cable and carefully pull out the cable. Repeat this for each one of the four ribbon cables.
-
-
-
-
Locate the battery connector.
-
Carefully slide the metal clip (marked blue in the picture) upwards to unlock the connector.
-
Use the spudger to lift the white connector upwards.
-
-
-
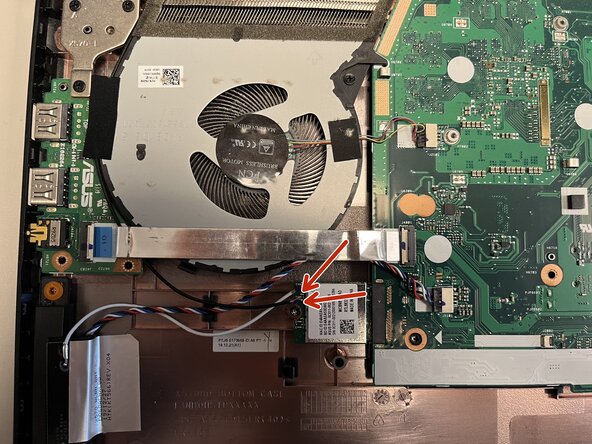
Carefully disconnect the two antenna cables using tweezers.
-
-
-
Carefully pull the Wi-Fi card out to the left.
-


Follow the steps in reverse order to reassemble your device. When installing the new card, make sure that the antenna cables are reconnected correctly. They are often color-coded.
Follow the steps in reverse order to reassemble your device. When installing the new card, make sure that the antenna cables are reconnected correctly. They are often color-coded.
crwdns2934873:0crwdne2934873:0
100%

crwdns2934883:0oldturkey03crwdne2934883:0 crwdns2934875:0crwdne2934875:0
crwdns2934877:0crwdne2934877:0 ›