crwdns2915892:0crwdne2915892:0
If your in-line amplifier has stuck or sticky volume wheels then it may need to be cleaned.
crwdns2942213:0crwdne2942213:0
-
-
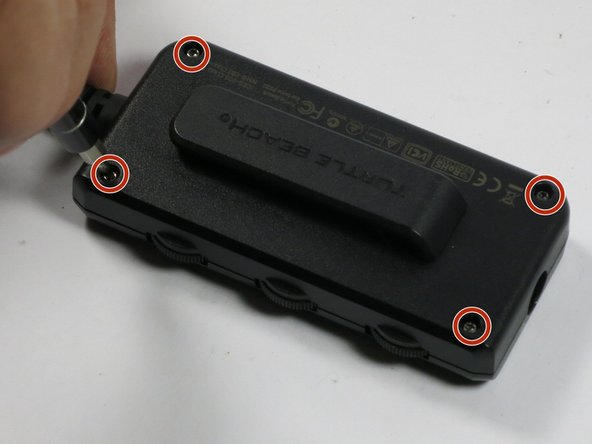
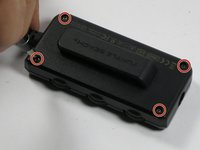
Remove the 4 screws from the inline amplifier using a #6 torque screwdriver head. The screws measure 1/4" long and 3/32" in diameter.
-
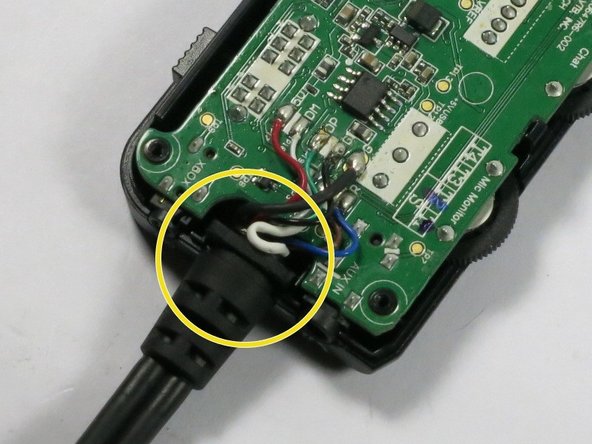
Open the amplifier by using the smaller plastic opening tool. Place it in the headphone jack and use leverage to pry open the plastic halves.
-
-
-
-
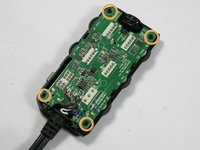
Remove the circuit board from the plastic housing and flip it so that you can see the scroll wheels.
-
Using a cloth dipped in isopropyl rubbing alcohol, clean the affected scroll wheels.
-
-
-
When done cleaning, place the circuit board back in the plastic housing.
-
The scroll wheels should be facing the housing with the logo and labels, and should slide onto the 4 screw holes.
-
Make sure the plastic headphone jack brace is in position.
-
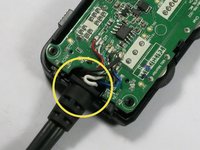
Position the wire in the slot on the other side of the amplifier, it should slide down onto the housing and become fixed.
-
Close the housing with the other plastic half. It will click into place.
-
Replace the 4 screws using the #6 torque screwdriver.
-


To reassemble your device, follow these instructions in reverse order.
crwdns2935287:0crwdne2935287:0

UMass Dartmouth, Team 3-1, Duarte Spring 2015 crwdns2935289:0UMass Dartmouth, Team 3-1, Duarte Spring 2015crwdne2935289:0
UMASSD-DUARTE-S15S3G1
crwdns2931471:04crwdne2931471:0
crwdns2935297:08crwdne2935297:0