crwdns2933423:0crwdne2933423:0

Removing the HP Compaq dx2000MT Optical (CD) Drive

crwdns2942213:0crwdne2942213:0

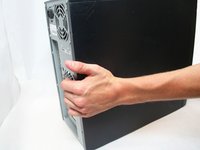
  1. Removing the HP Compaq dx2000MT Optical (CD) Drive, Removing the HP Compaq dx2000MT Case Doors: crwdns2935265:01crwdnd2935265:01crwdnd2935265:01crwdne2935265:0
    • Turn off your computer and remove the power cable by pulling it straight out of its socket.

  2. Removing the HP Compaq dx2000MT Optical (CD) Drive: crwdns2935265:02crwdnd2935265:01crwdnd2935265:02crwdne2935265:0 Removing the HP Compaq dx2000MT Optical (CD) Drive: crwdns2935265:02crwdnd2935265:02crwdnd2935265:02crwdne2935265:0
    • Remove the two Phillips #2 screws that secure the case door to the device.

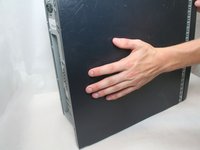
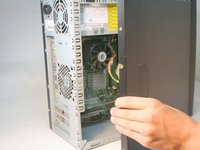
  3. Removing the HP Compaq dx2000MT Optical (CD) Drive: crwdns2935265:03crwdnd2935265:01crwdnd2935265:03crwdne2935265:0 Removing the HP Compaq dx2000MT Optical (CD) Drive: crwdns2935265:03crwdnd2935265:02crwdnd2935265:03crwdne2935265:0 Removing the HP Compaq dx2000MT Optical (CD) Drive: crwdns2935265:03crwdnd2935265:03crwdnd2935265:03crwdne2935265:0
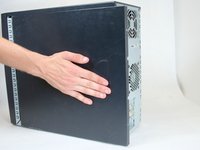
    • Remove the side case door by pushing towards the rear of the device with your hand.

    • This may take considerable force so keep pushing!

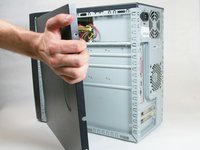
    • Once you slide the door back, remove it by pulling it outwards from the device.

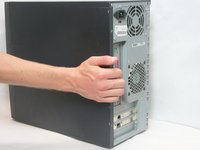
  4. Removing the HP Compaq dx2000MT Optical (CD) Drive: crwdns2935265:04crwdnd2935265:01crwdnd2935265:03crwdne2935265:0 Removing the HP Compaq dx2000MT Optical (CD) Drive: crwdns2935265:04crwdnd2935265:02crwdnd2935265:03crwdne2935265:0 Removing the HP Compaq dx2000MT Optical (CD) Drive: crwdns2935265:04crwdnd2935265:03crwdnd2935265:03crwdne2935265:0
    • Remove the side case door by pushing towards the rear of the device with your hand.

    • Once again, this may take considerable force.

    • Once you slide the door back, remove it by pulling it outwards from the device.

  5. Removing the HP Compaq dx2000MT Optical (CD) Drive, Optical (CD) Drive: crwdns2935265:05crwdnd2935265:01crwdnd2935265:03crwdne2935265:0 Removing the HP Compaq dx2000MT Optical (CD) Drive, Optical (CD) Drive: crwdns2935265:05crwdnd2935265:02crwdnd2935265:03crwdne2935265:0 Removing the HP Compaq dx2000MT Optical (CD) Drive, Optical (CD) Drive: crwdns2935265:05crwdnd2935265:03crwdnd2935265:03crwdne2935265:0
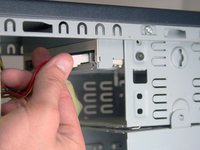
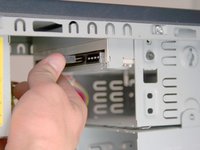
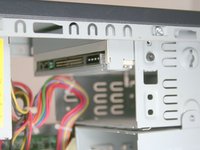
    • Remove the IDE data cable and the power cable from the optical drive by pulling away from the drive.

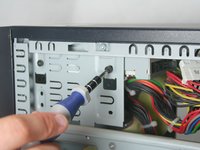
  6. Removing the HP Compaq dx2000MT Optical (CD) Drive: crwdns2935265:06crwdnd2935265:01crwdnd2935265:02crwdne2935265:0 Removing the HP Compaq dx2000MT Optical (CD) Drive: crwdns2935265:06crwdnd2935265:02crwdnd2935265:02crwdne2935265:0
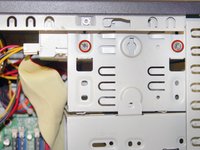
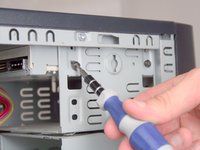
    • Remove the 2 Torx T15 screws holding the optical drive in place.

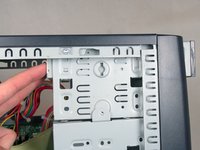
  7. Removing the HP Compaq dx2000MT Optical (CD) Drive: crwdns2935265:07crwdnd2935265:01crwdnd2935265:02crwdne2935265:0 Removing the HP Compaq dx2000MT Optical (CD) Drive: crwdns2935265:07crwdnd2935265:02crwdnd2935265:02crwdne2935265:0
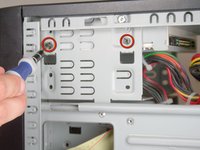
    • Remove the other 2 Torx T15 screws holding the other side of the drive in place.

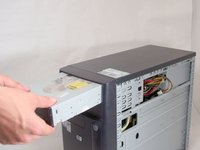
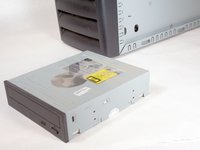
  8. Removing the HP Compaq dx2000MT Optical (CD) Drive: crwdns2935265:08crwdnd2935265:01crwdnd2935265:03crwdne2935265:0 Removing the HP Compaq dx2000MT Optical (CD) Drive: crwdns2935265:08crwdnd2935265:02crwdnd2935265:03crwdne2935265:0 Removing the HP Compaq dx2000MT Optical (CD) Drive: crwdns2935265:08crwdnd2935265:03crwdnd2935265:03crwdne2935265:0
    • Remove the optical drive by sliding it out the front of the device.

crwdns2915888:0crwdne2915888:0

To reassemble your device, follow these instructions in reverse order.

Logan Pace

crwdns2935283:010/12/11crwdne2935283:0

2,224 crwdns2915208:0crwdne2915208:0

crwdns2935297:09crwdne2935297:0

crwdns2915084:0crwdne2915084:0

Cal Poly, Team 17-16, Regan Fall 2011 crwdns2935289:0Cal Poly, Team 17-16, Regan Fall 2011crwdne2935289:0

CPSU-REGAN-F11S17G16

crwdns2931471:04crwdne2931471:0

crwdns2935297:017crwdne2935297:0

crwdns2944067:00crwdne2944067:0

crwdns2917038:0crwdne2917038:0

crwdns2936625:0crwdne2936625:0:

crwdns2936751:024crwdne2936751:0 1

crwdns2936753:07crwdne2936753:0 10

crwdns2936753:030crwdne2936753:0 15

crwdns2942667:0crwdne2942667:0 1,482