crwdns2915892:0crwdne2915892:0
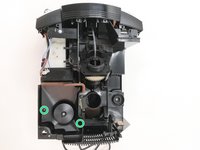
This guide will help you to repair and install a new grinder in your Jura Impressa F50 coffee machine.
crwdns2942213:0crwdne2942213:0
-
-
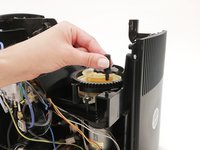
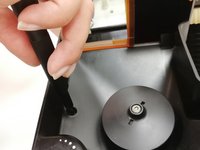
Remove the lock washer on the axle for grinding degree adjustment using pliers.
-
-
-
Remove the grinding degree adjustment axle by using pliers to pull it upwards.
-
-
-
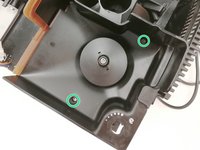
Remove the 2 screws on the bean container of the coffee machine with the Torx T10 screwdriver.
-
-
-
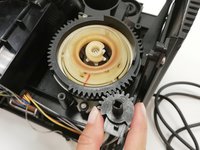
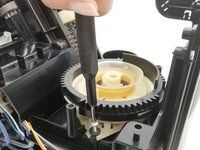
Remove the pinion for the grinding degree adjustment.
-
-
-
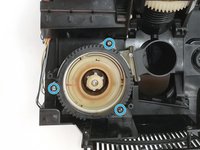
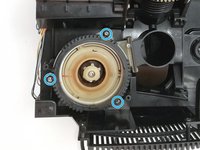
Remove the 3 screws attaching the grinding mill attachment to the grinder with the Torx T10 screwdriver.
-
-
-
-
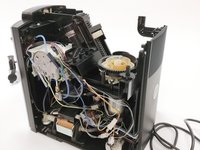
Disconnect the first connector (black cable) from the plug-in connector attached to the bottom of the grinder.
-
-
-
Separate the second (white) cable attached to the grinder from the housing of the plug-in connector.
-
-
-
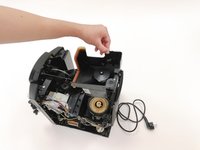
Remove the grinder to clean or replace it.
-
-
-
Reinstall the new or repaired grinder into the coffee machine.
-
Reconnect the grinder to the connectors. Make sure to place the connectors in the correct place.
-
-
-
Now set the grinder back into its correct position
-
-
-
Reattach the 3 screws for grinding mill by fastening them to the inserted grinder with the Torx T10 screwdriver.
-
-
-
Reinsert the bean container into the coffee machine.
-
-
-
Fasten the two screws we remove from the bean container earlier with the Torx T10 screwdriver.
-
-
-
Reinsert the axle for grinding degree adjustment.
-
-
-
Use pliers to reseat the safety washer.
-


Need help closing the case of your Jura Impressa F50 coffee grinder? Check out the instructions "Close machine housing".
crwdns2935221:0crwdne2935221:0
crwdns2935229:04crwdne2935229:0
crwdns2934873:0crwdne2934873:0
100%


crwdns2934885:0crwdne2934885:0 crwdns2934875:0crwdne2934875:0
crwdns2934877:0crwdne2934877:0 ›
crwdns2935287:0crwdne2935287:0

KMM 2019SS crwdns2935289:0KMM 2019SScrwdne2935289:0
Community
crwdns2931471:011crwdne2931471:0
crwdns2935297:016crwdne2935297:0
crwdns2947410:01crwdne2947410:0
I’ve got a similar Impressa machine to this one (the outside is visually identical). While removing the grinder, the ferrite inductor that is on the black wiring going into the grinder broke. Does anyone know what the rating/specs are of this inductor so I can splice in a replacement? The other similar inductor in the machine is unmarked and offers no hint as to what it’s ratings are. It’s been weeks since I broke the piece and I’m having a lot of trouble figuring this out.